Introduction
TokShop is live shopping and auction market place, this app is done fully by flutter framework, it supports both android and ios, its a livestream social shopping app for people to sell, auction, bid on live auctions and also shop from their favourite brands,Engage with your audience during the live stream allow them to speak and ask questions or comment in the live stream.
Features
- Create live stream, attach products and start selling live
- Invite core hosts and friends to join your live stream
- Create live auctions during live session and accet live bids, highest bidder by the time ends wins the auction
- Create sudden death auctions - last bidder wins the auction
- Chat with audience live during live stream
- Send tip to hosts and users you follow
- Import Woocommerce products from wordpress website and sync to TokShop, accept orders from both platforms and sync between them
- Support Multi vendors
- Vendors sell in the marketplace, accept and manage sales and orders
- Platform Owner Earns Commission on sales from vendors
- Vendors can withdraw earnings from TokShop to their bank accounts they have connected.
- Users have and can manage wallet balances
- Dark and Light Theme support
- Multi language support
Requirements
- Flutter 3.29.1 and Dart 3.7.0Link
- Firebase Account read more about it here Link, we use firebase to store chats and product images and also to send notifications .
- Agora - we use agora to create live stream, you can read more about it here Link
- Stripe - we use stripe to handle payments, you can read more about it here Link
Android Studio Setup
Windows Setup
- Download Android Studio from the official website:https://developer.android.com/studio/
- Access the Flutter SDK through:https://flutter.dev/docs/get-started/install
- For further information on Android Studio, visit:https://developer.android.com/studio/intro/
- Please download the provided installation bundle to access the latest stable release of the Flutter SDK.
- Upon downloading, extract the zip file and place the 'flutter' directory in your chosen installation directory for the Flutter SDK (e.g., C:\src\flutter).
- To enable running Flutter commands in the regular Windows console, follow these steps to add Flutter to the PATH environment variable:
Step 1 : Get the Flutter SDK
Step 2 : Update your path
- Open the Start menu and search for 'env', then select 'Edit environment variables for your account'.
- In the User variables section, check if there is an entry named Path.
- If the Path entry already exists, append the full path to the flutter\bin directory using ; as a separator from existing values.
- If the Path entry doesn’t exist, create a new user variable named Path and set its value to the full path to the flutter\bin directory.
- Remember to close and reopen any existing console windows for these changes to take effect.
- You are now prepared to run Flutter commands in the Flutter Console!
Step 3 : Run flutter doctor
- From a console window with the Flutter directory added to the PATH (as described above), execute the following command to check for any platform dependencies that may be required to complete the setup:
- If any complications arise during the environment setup, kindly refer to our online resources for guidance. Please click the following link to access:Click Here
macOS setup
- Download Android Studio from the official website:https://developer.android.com/studio/
- Download Xcode from the App Store:https://apps.apple.com/us/app/xcode/id497799835?mt=12 .
- Access the Flutter SDK through:https://flutter.dev/docs/get-started/install
- For further information on Android Studio, visit:https://developer.android.com/studio/intro/
- Please download the provided installation bundle to acquire the latest stable release of the Flutter SDK.
- After downloading, extract the SDK by double-clicking on the downloaded file. Subsequently, copy the extracted folder and paste it into your desired location, such as Documents\flutter.
- To update the PATH variable and access the "flutter" command from the terminal, follow these steps:
Step 1 : Get the Flutter SDK
Step 2 : Update your path
- Open the terminal.
- For updating the PATH variable for the current terminal window only, enter the command:
- To update the PATH variable permanently, open or create the .bash_profile file by entering:
- Append the following line to the .bash_profile file, placing it at the bottom:
- Replace [PATH_TO_FLUTTER_SDK_DIRECTORY] with the actual path to the Flutter SDK folder.
- Refresh the PATH variables by running the command:
- Verify that the SDK is successfully installed by running:
- If the check list of Flutter SDK requirements is displayed, the SDK is successfully installed, and you can proceed with building Flutter apps.
- For troubleshooting during environment setup on macOS, refer to our online resourcesClick Here
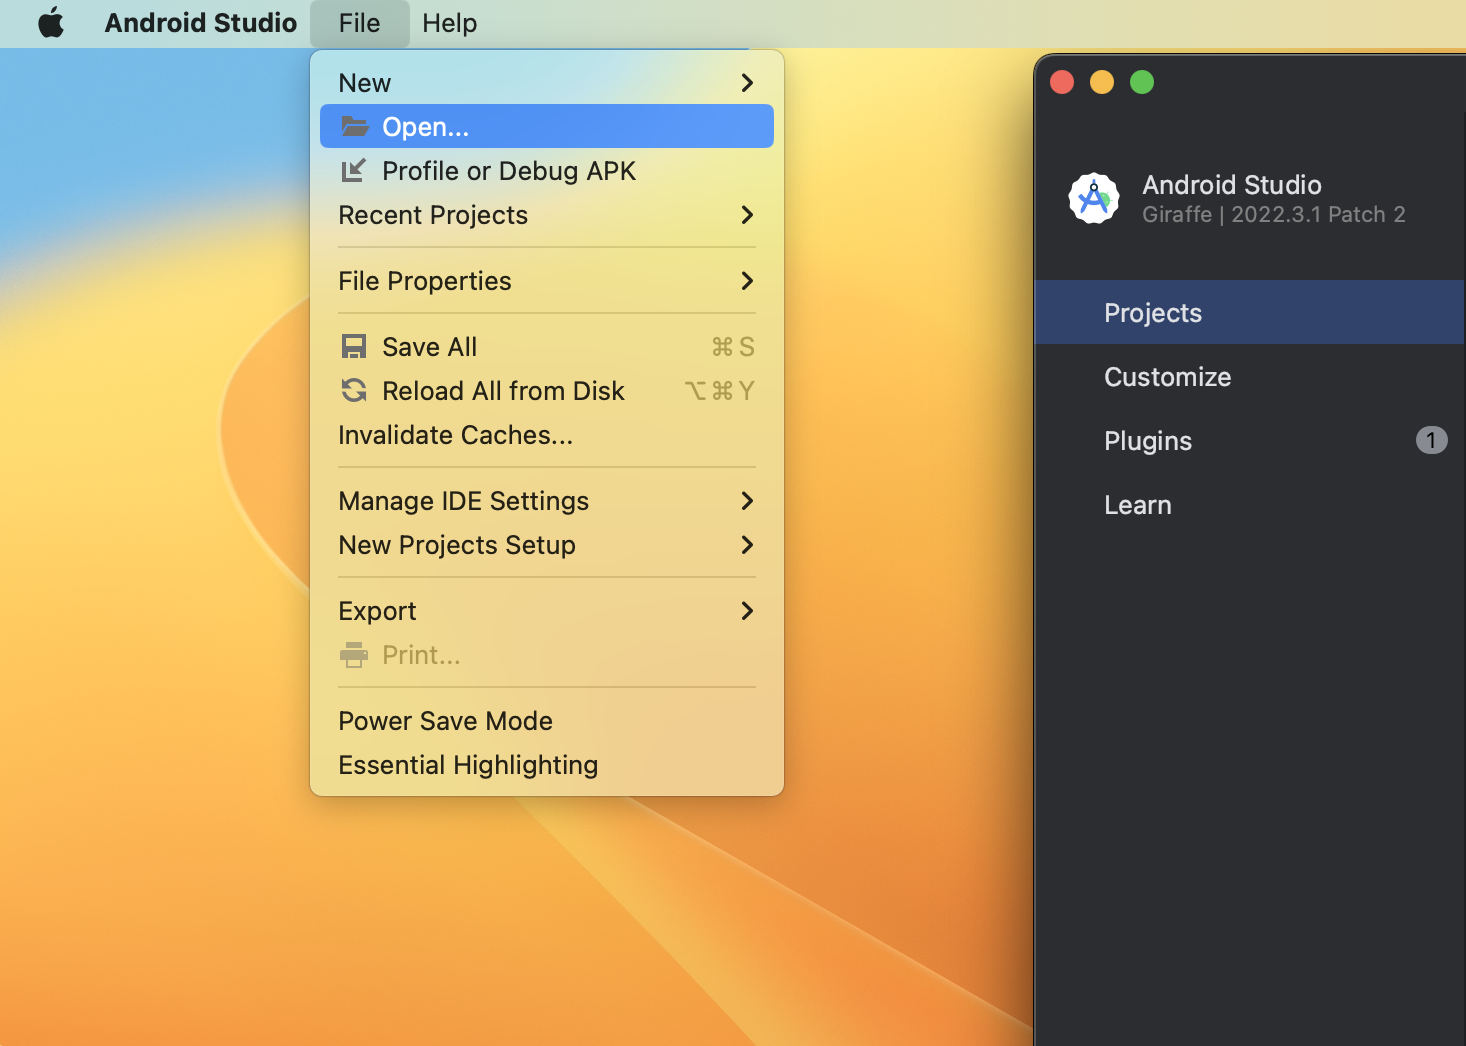
- Open Android Studio, at the top right corner, click on the "File" button.
- Click on "Open", navigate to your project directory, select tokshopapp app directory you got when you dowloaded from codecanyon and open your project.
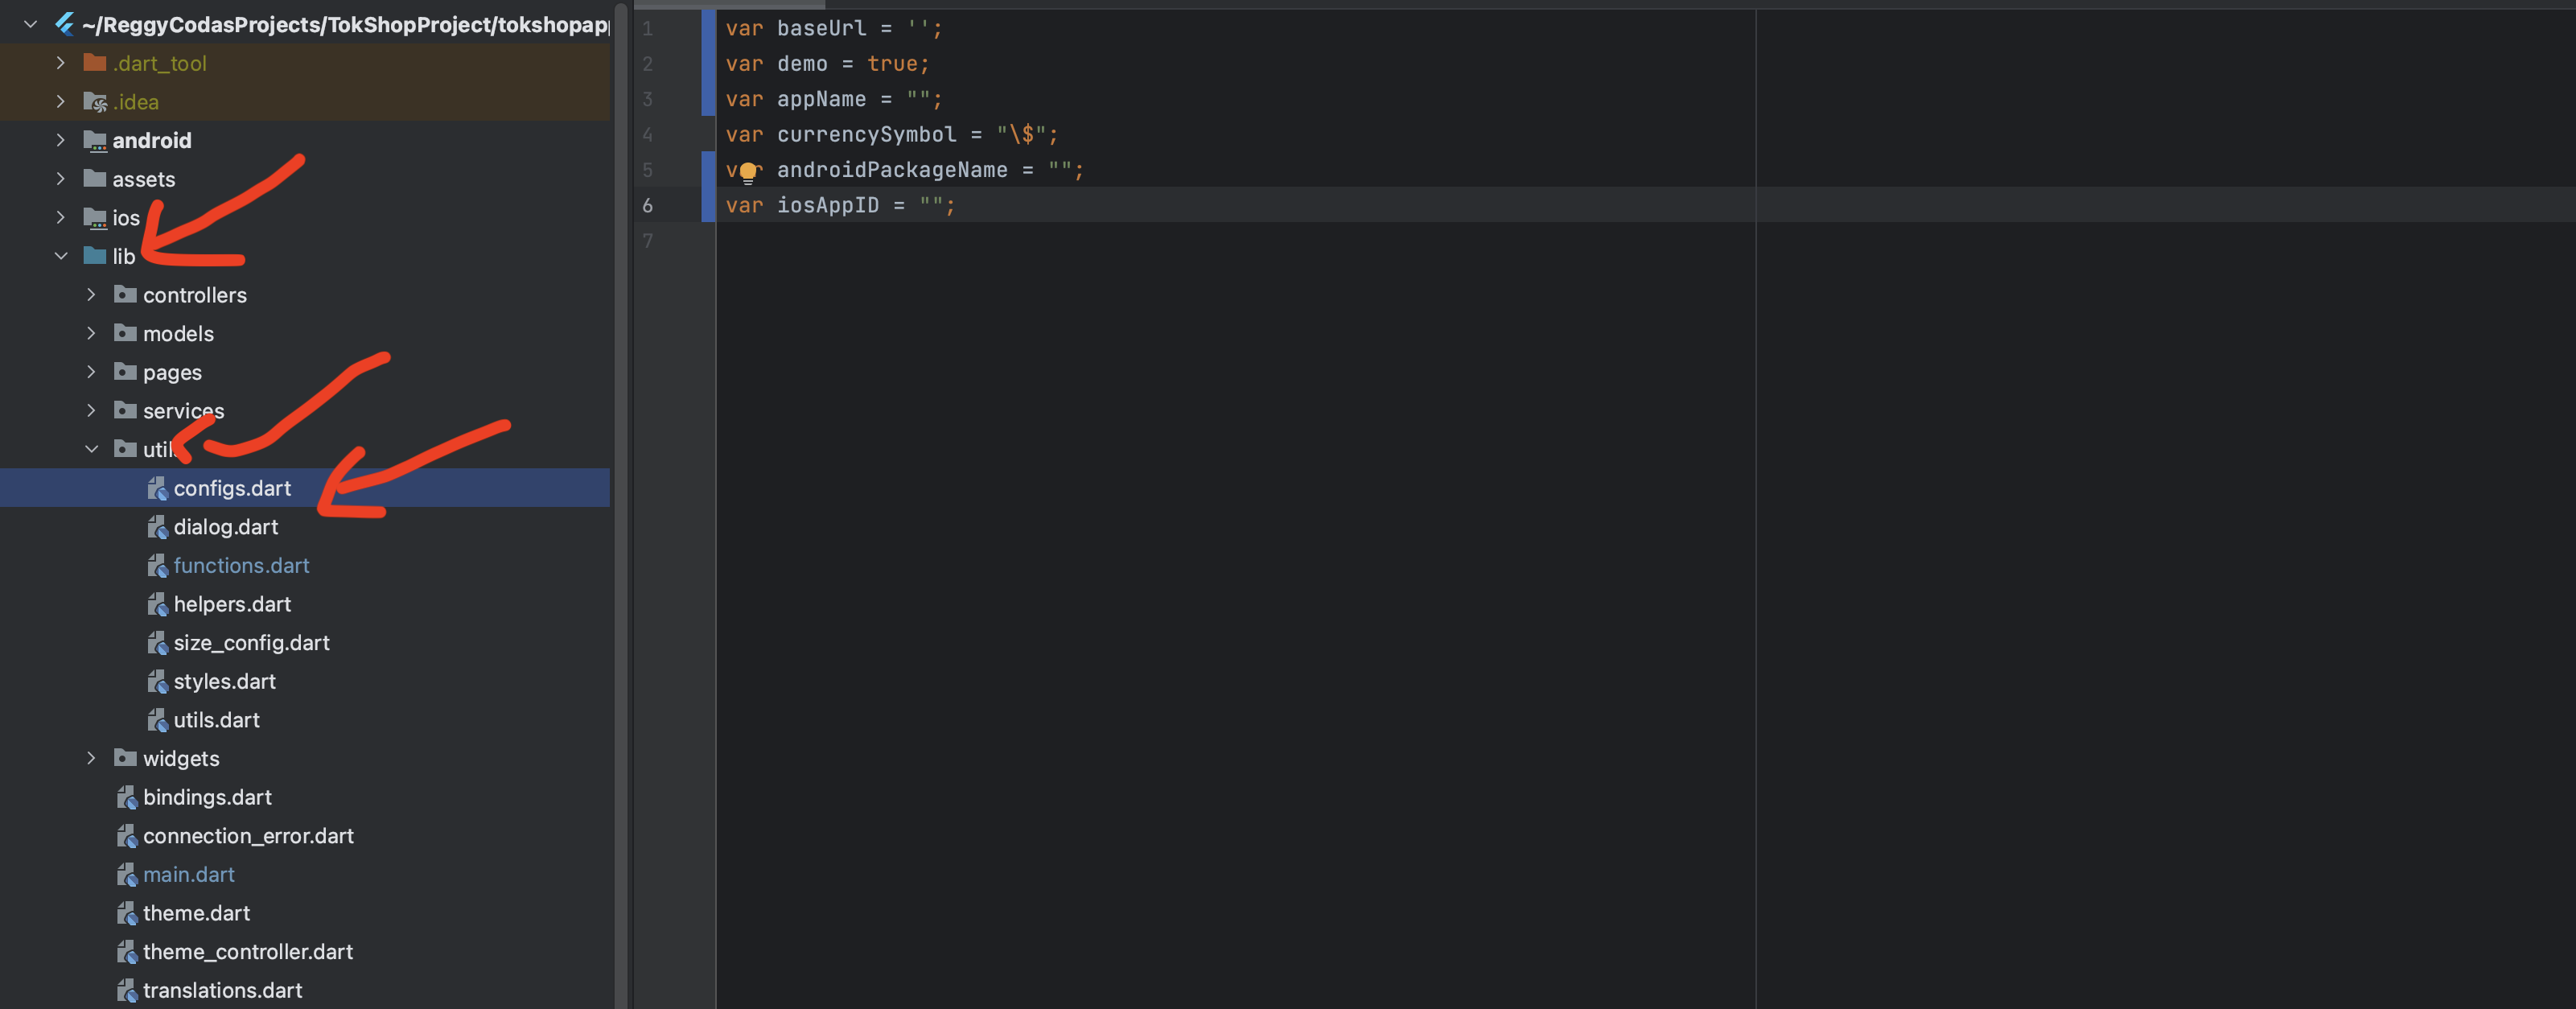
- Project Structure
- Open config.dart file
- baseUrl: "" -> this is the url you got when you installed admin panel
- demo: "" -> set it to true if you are not yet ready for production
- appName: "" -> set it to your app name e.g Tokshop
- currencySymbol: "" -> set it to your default currency symbol e.g $
- androidPackageName: "" -> set it to your android package name, you can get it from your project directory -> app -> manifest.xml e.g com.tokshop.com
- iosAppID: "" -> set it to your ios package name, you can get it from your project directory -> app -> info.plist
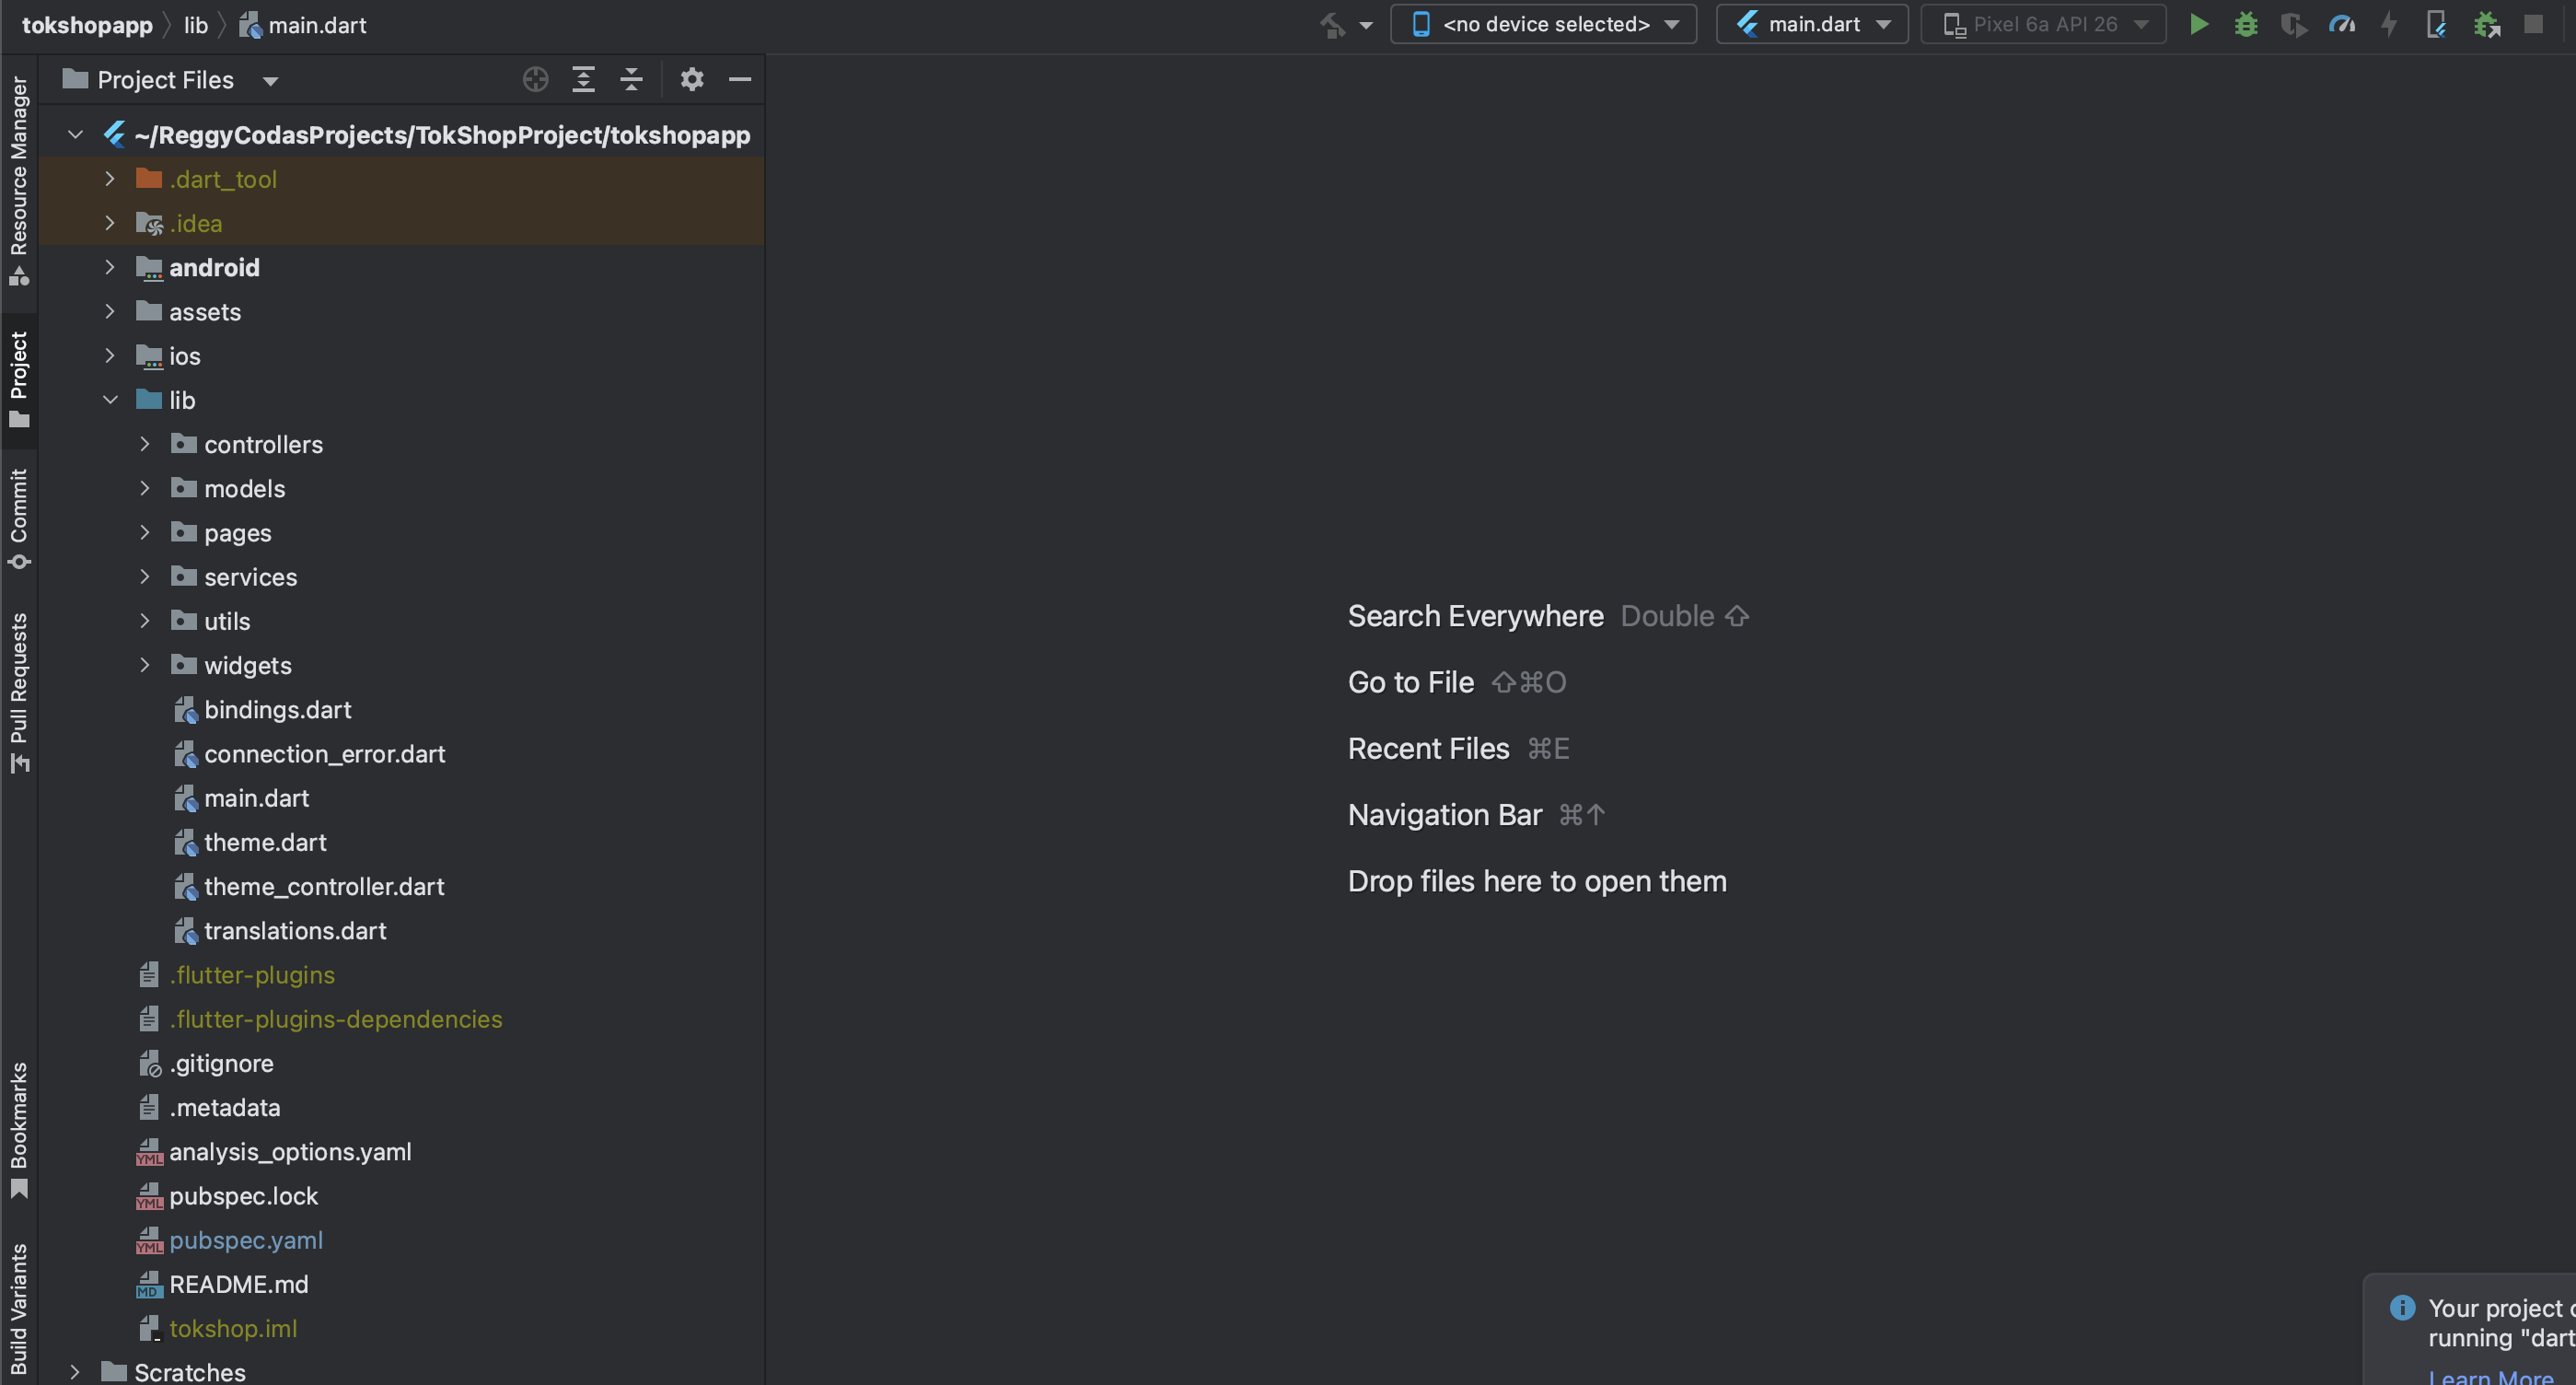
Open App in Android Studio
Configure Firebase
- Open Firebase website here -> https://firebase.google.com/
- Sign up if you don't have an account or log in if you already have one
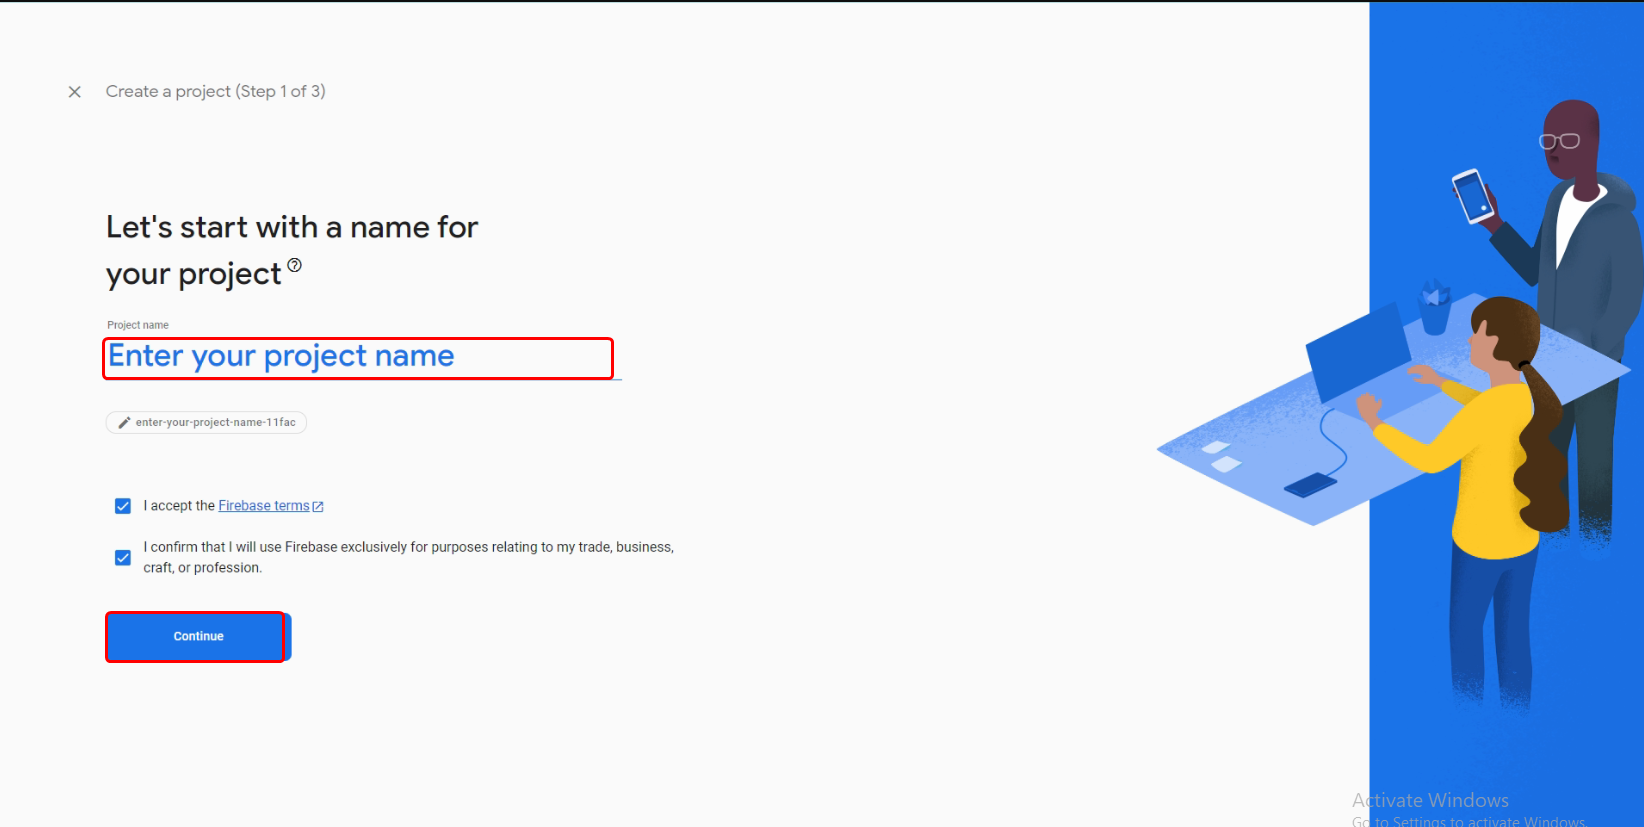
- After creating a Firebase project and signing in, Click on the "Add project" button to initiate the creation of a new project.
- Enter project name and proceed by clicking next to the next steps.
Add Firebase to Flutter Project under Android Folder
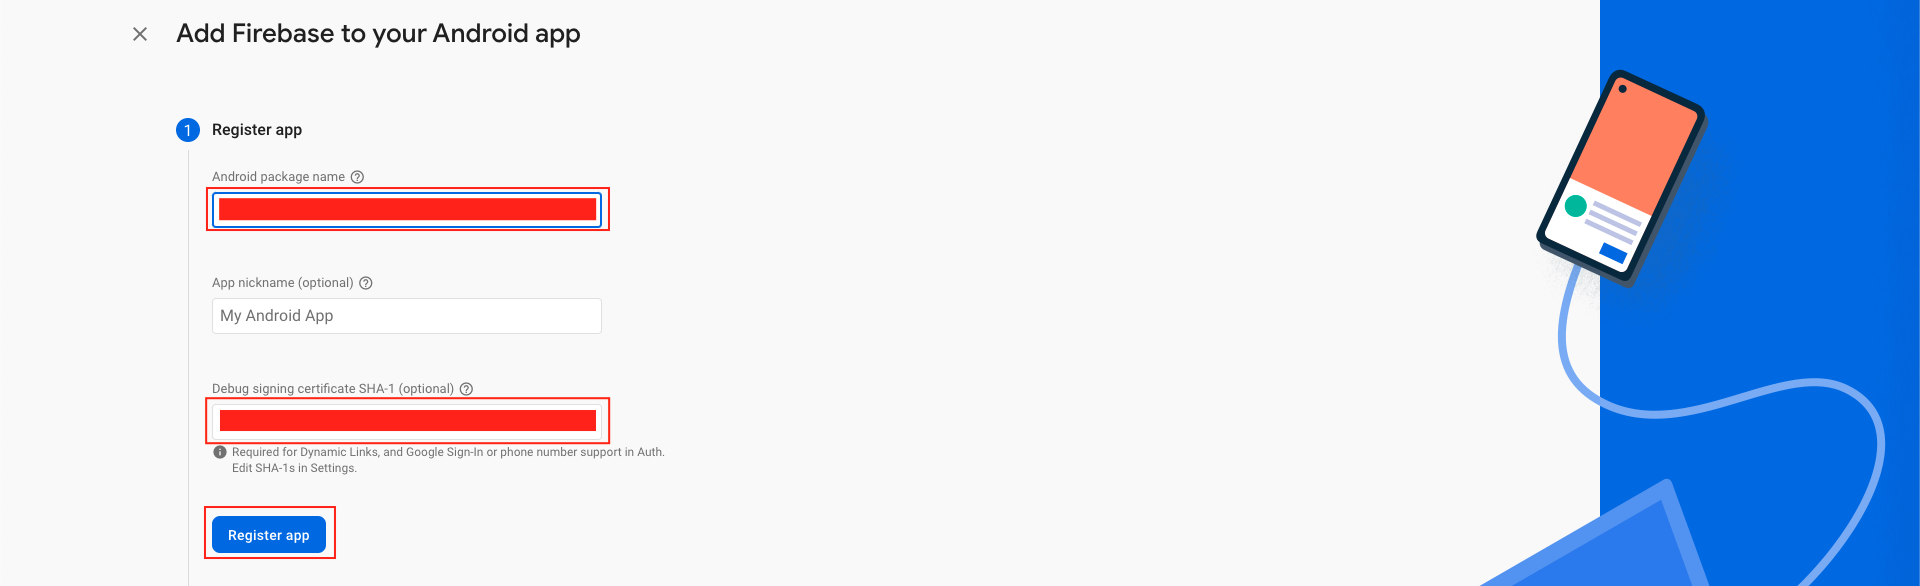
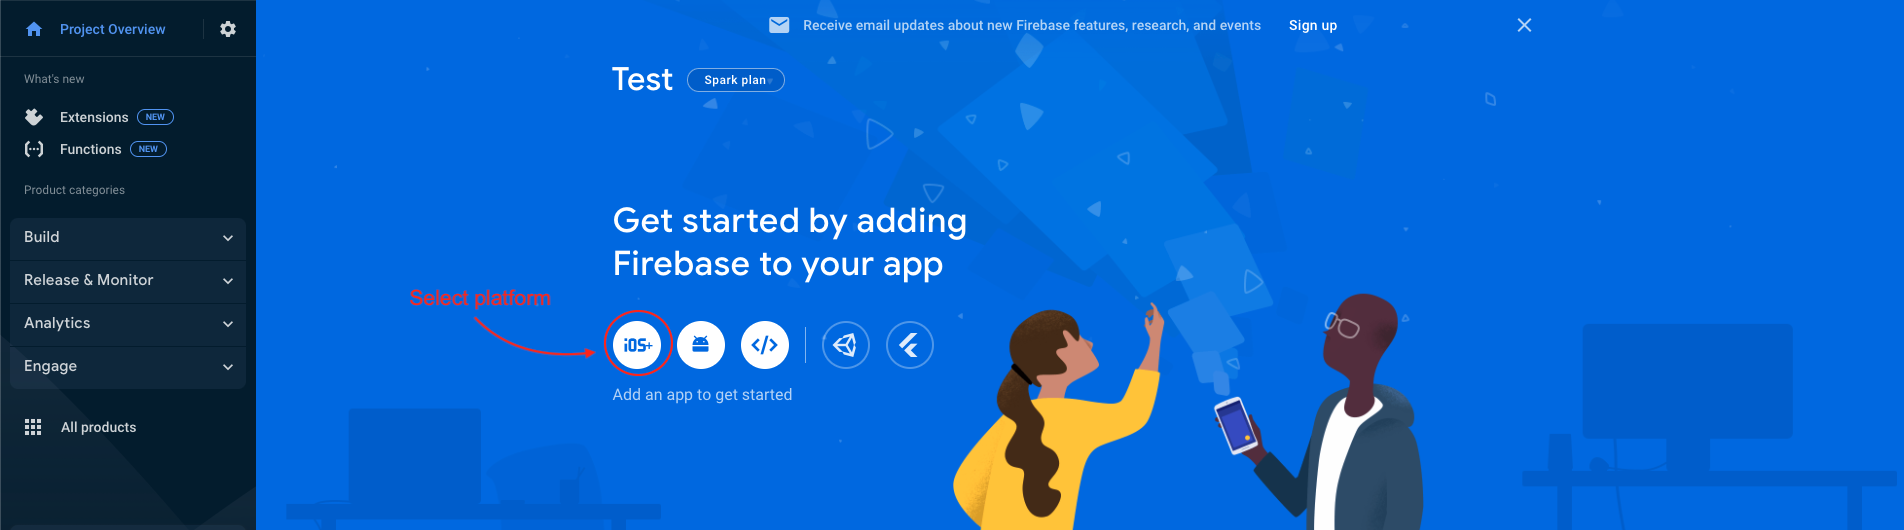
- In the next step, we have to choose the platform to add Firebase to our application. Click on Android.
- The platform can be Android, iOS, Web etc..
- Your package name is generally the applicationId in your build.gradle (app-level) file
- Refer to thePagefor guidance on utilizing keytool to obtain the SHA-1 hash of your signing certificate.
- Add your applicationid in the first field and SHA-1 to the third field as shown in the image below.
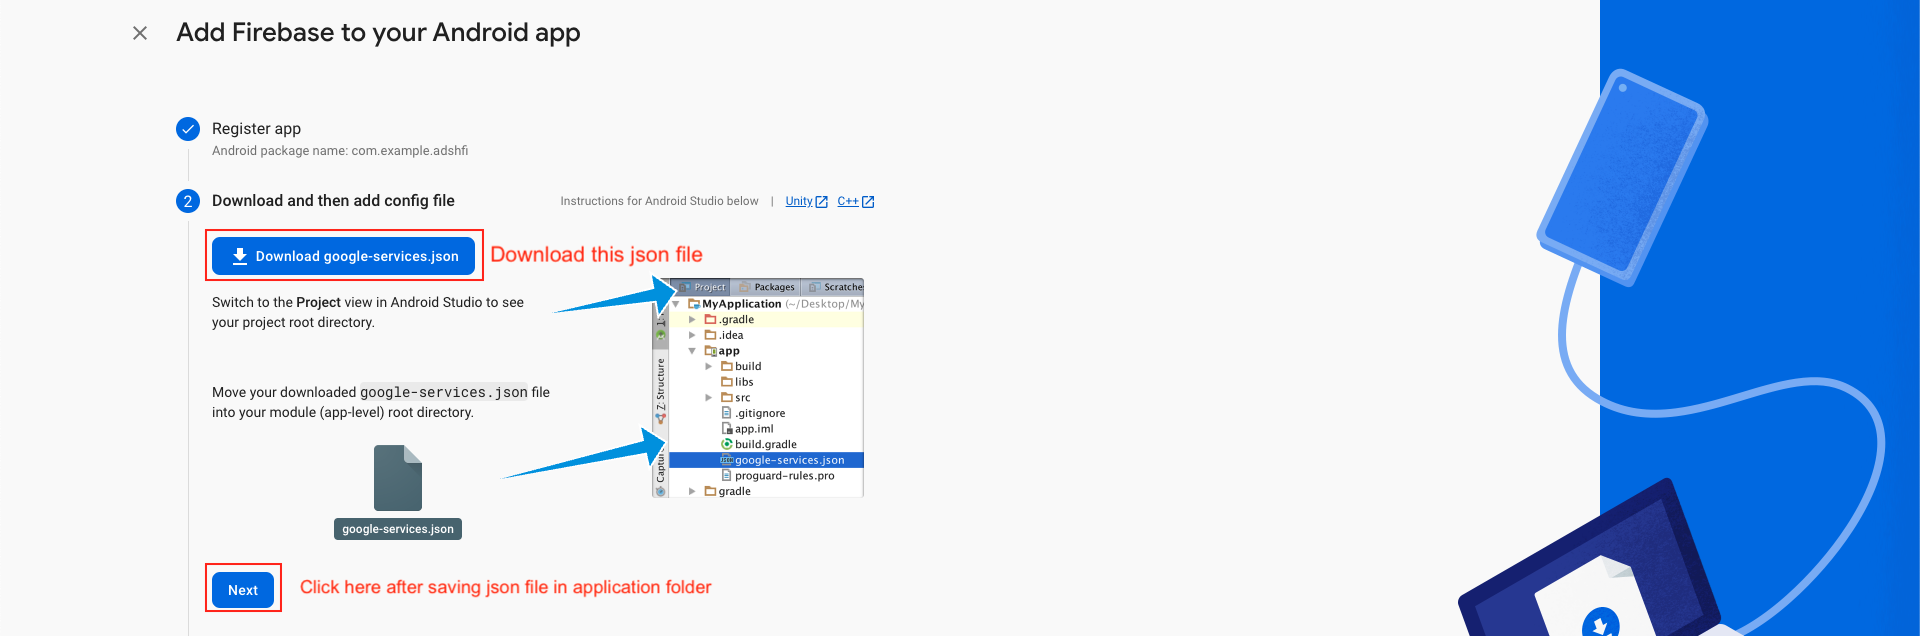
- Download the google-services.json file & place it in your project's app root directory.
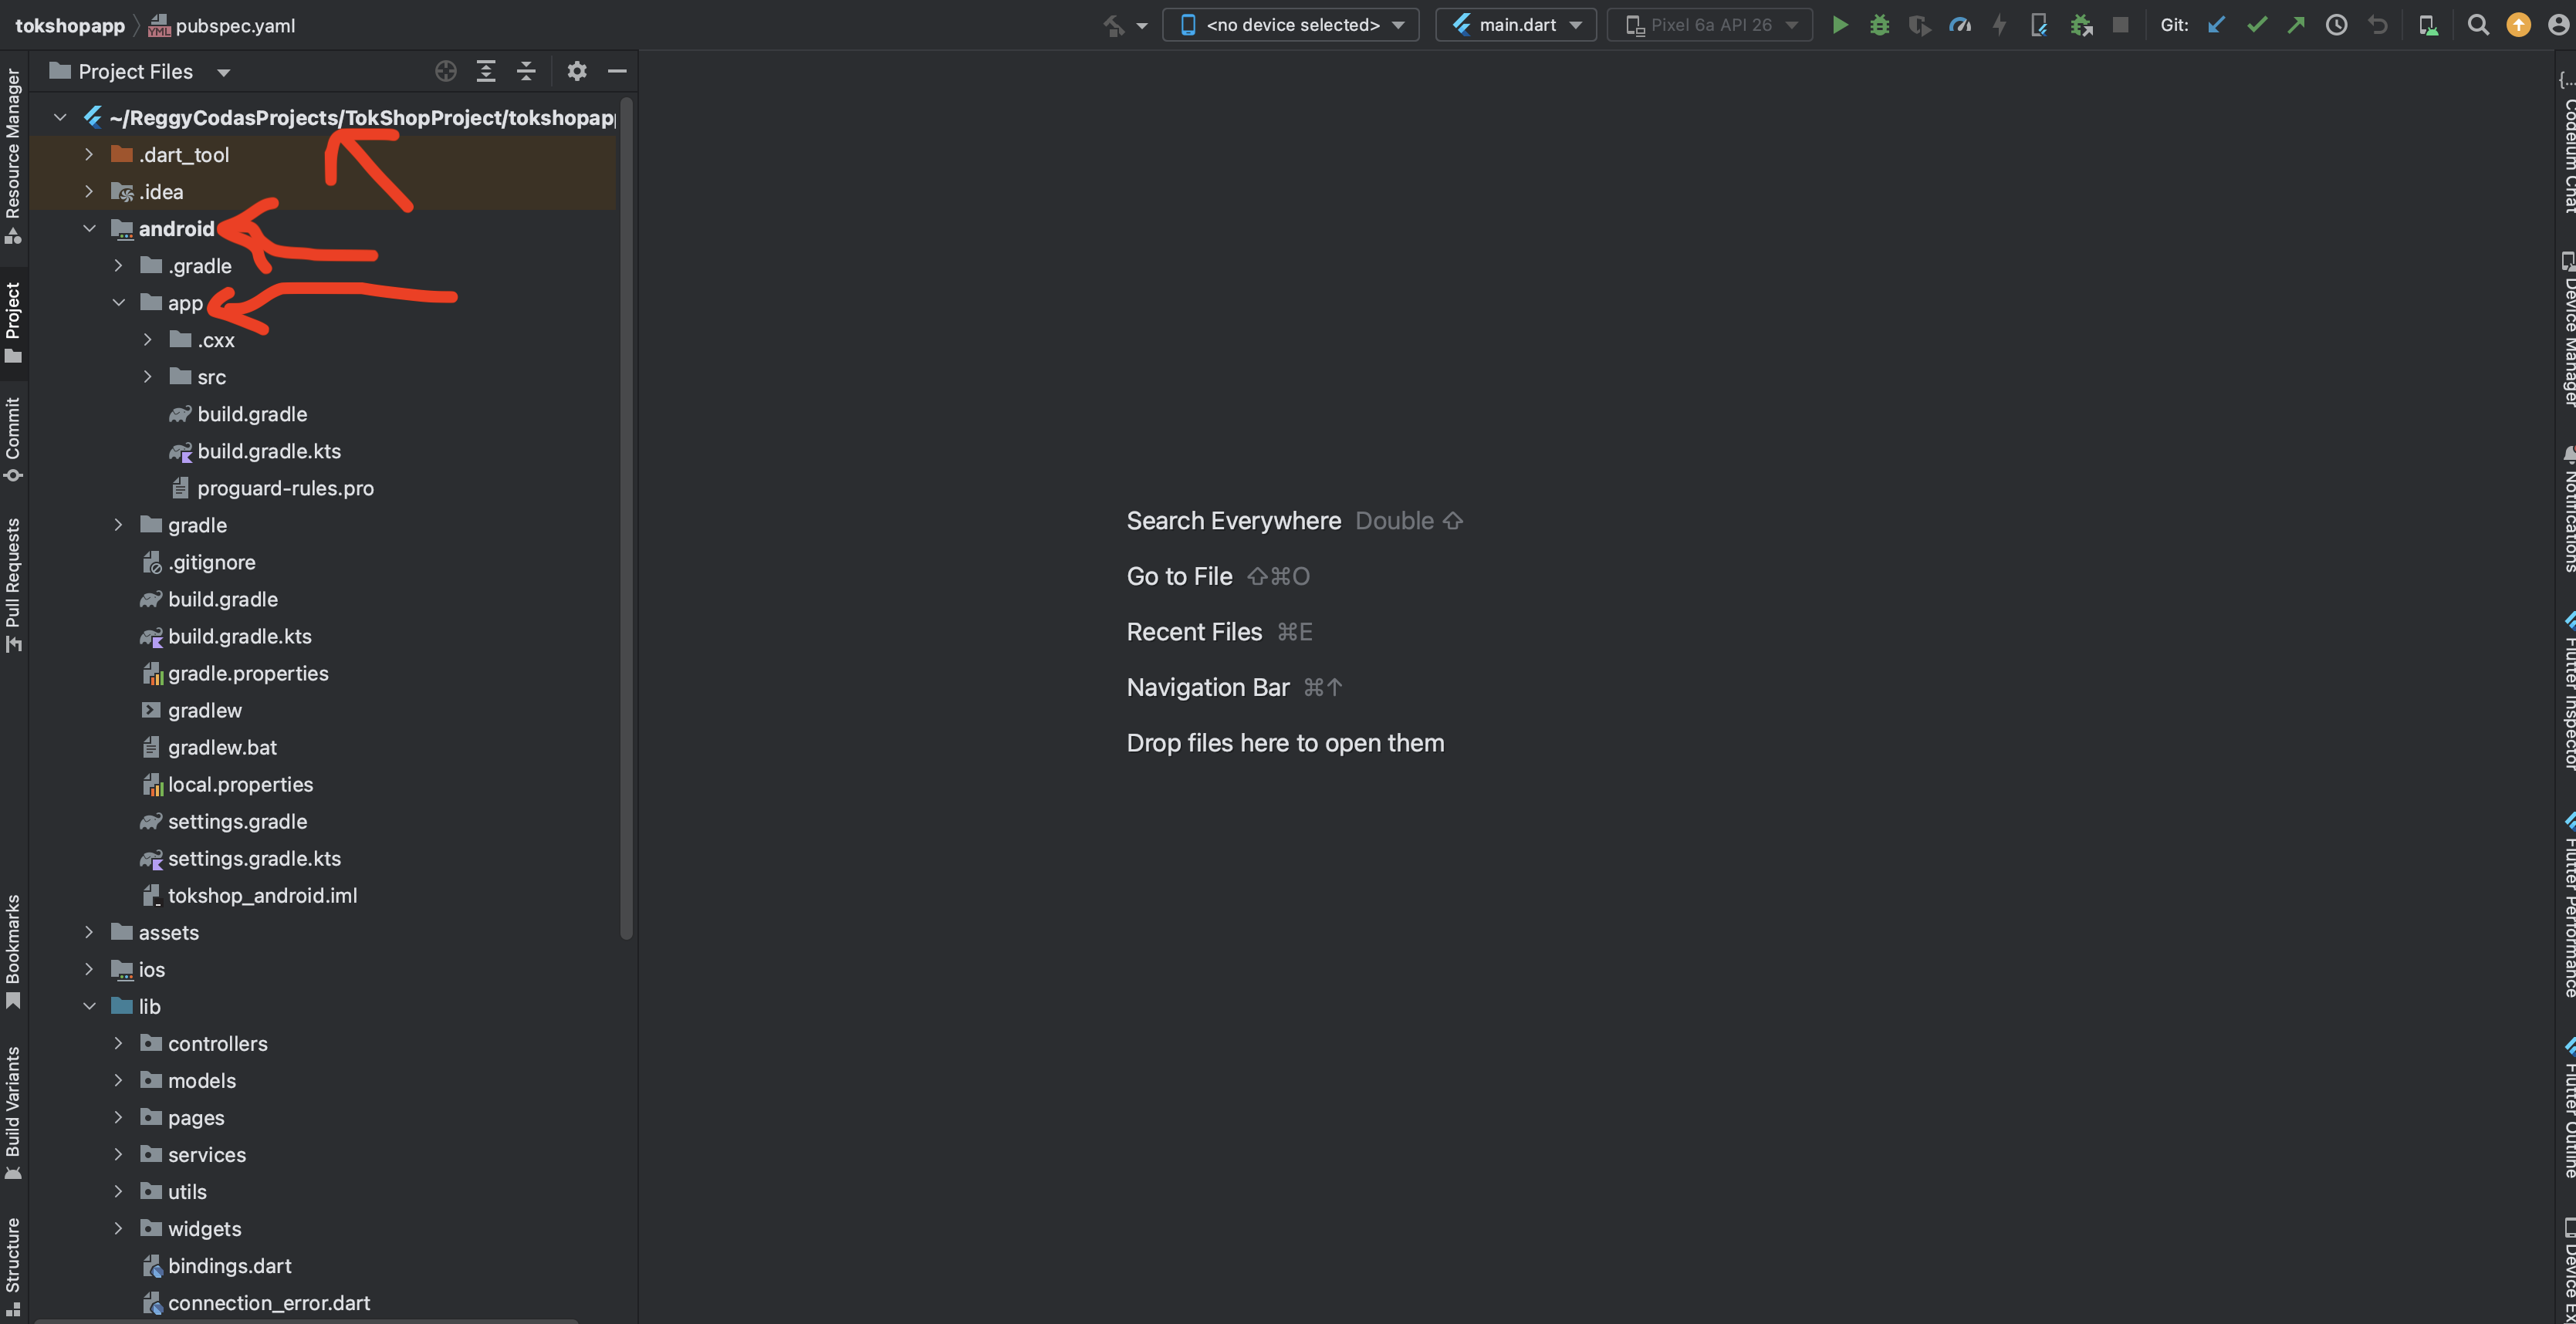
- Navigate to your project's app root directory, under android folder there is a folder called app, paste the googlejson file there
- Back in the Firebase console-setup workflow, click Next to skip the remaining steps and then finish and complete

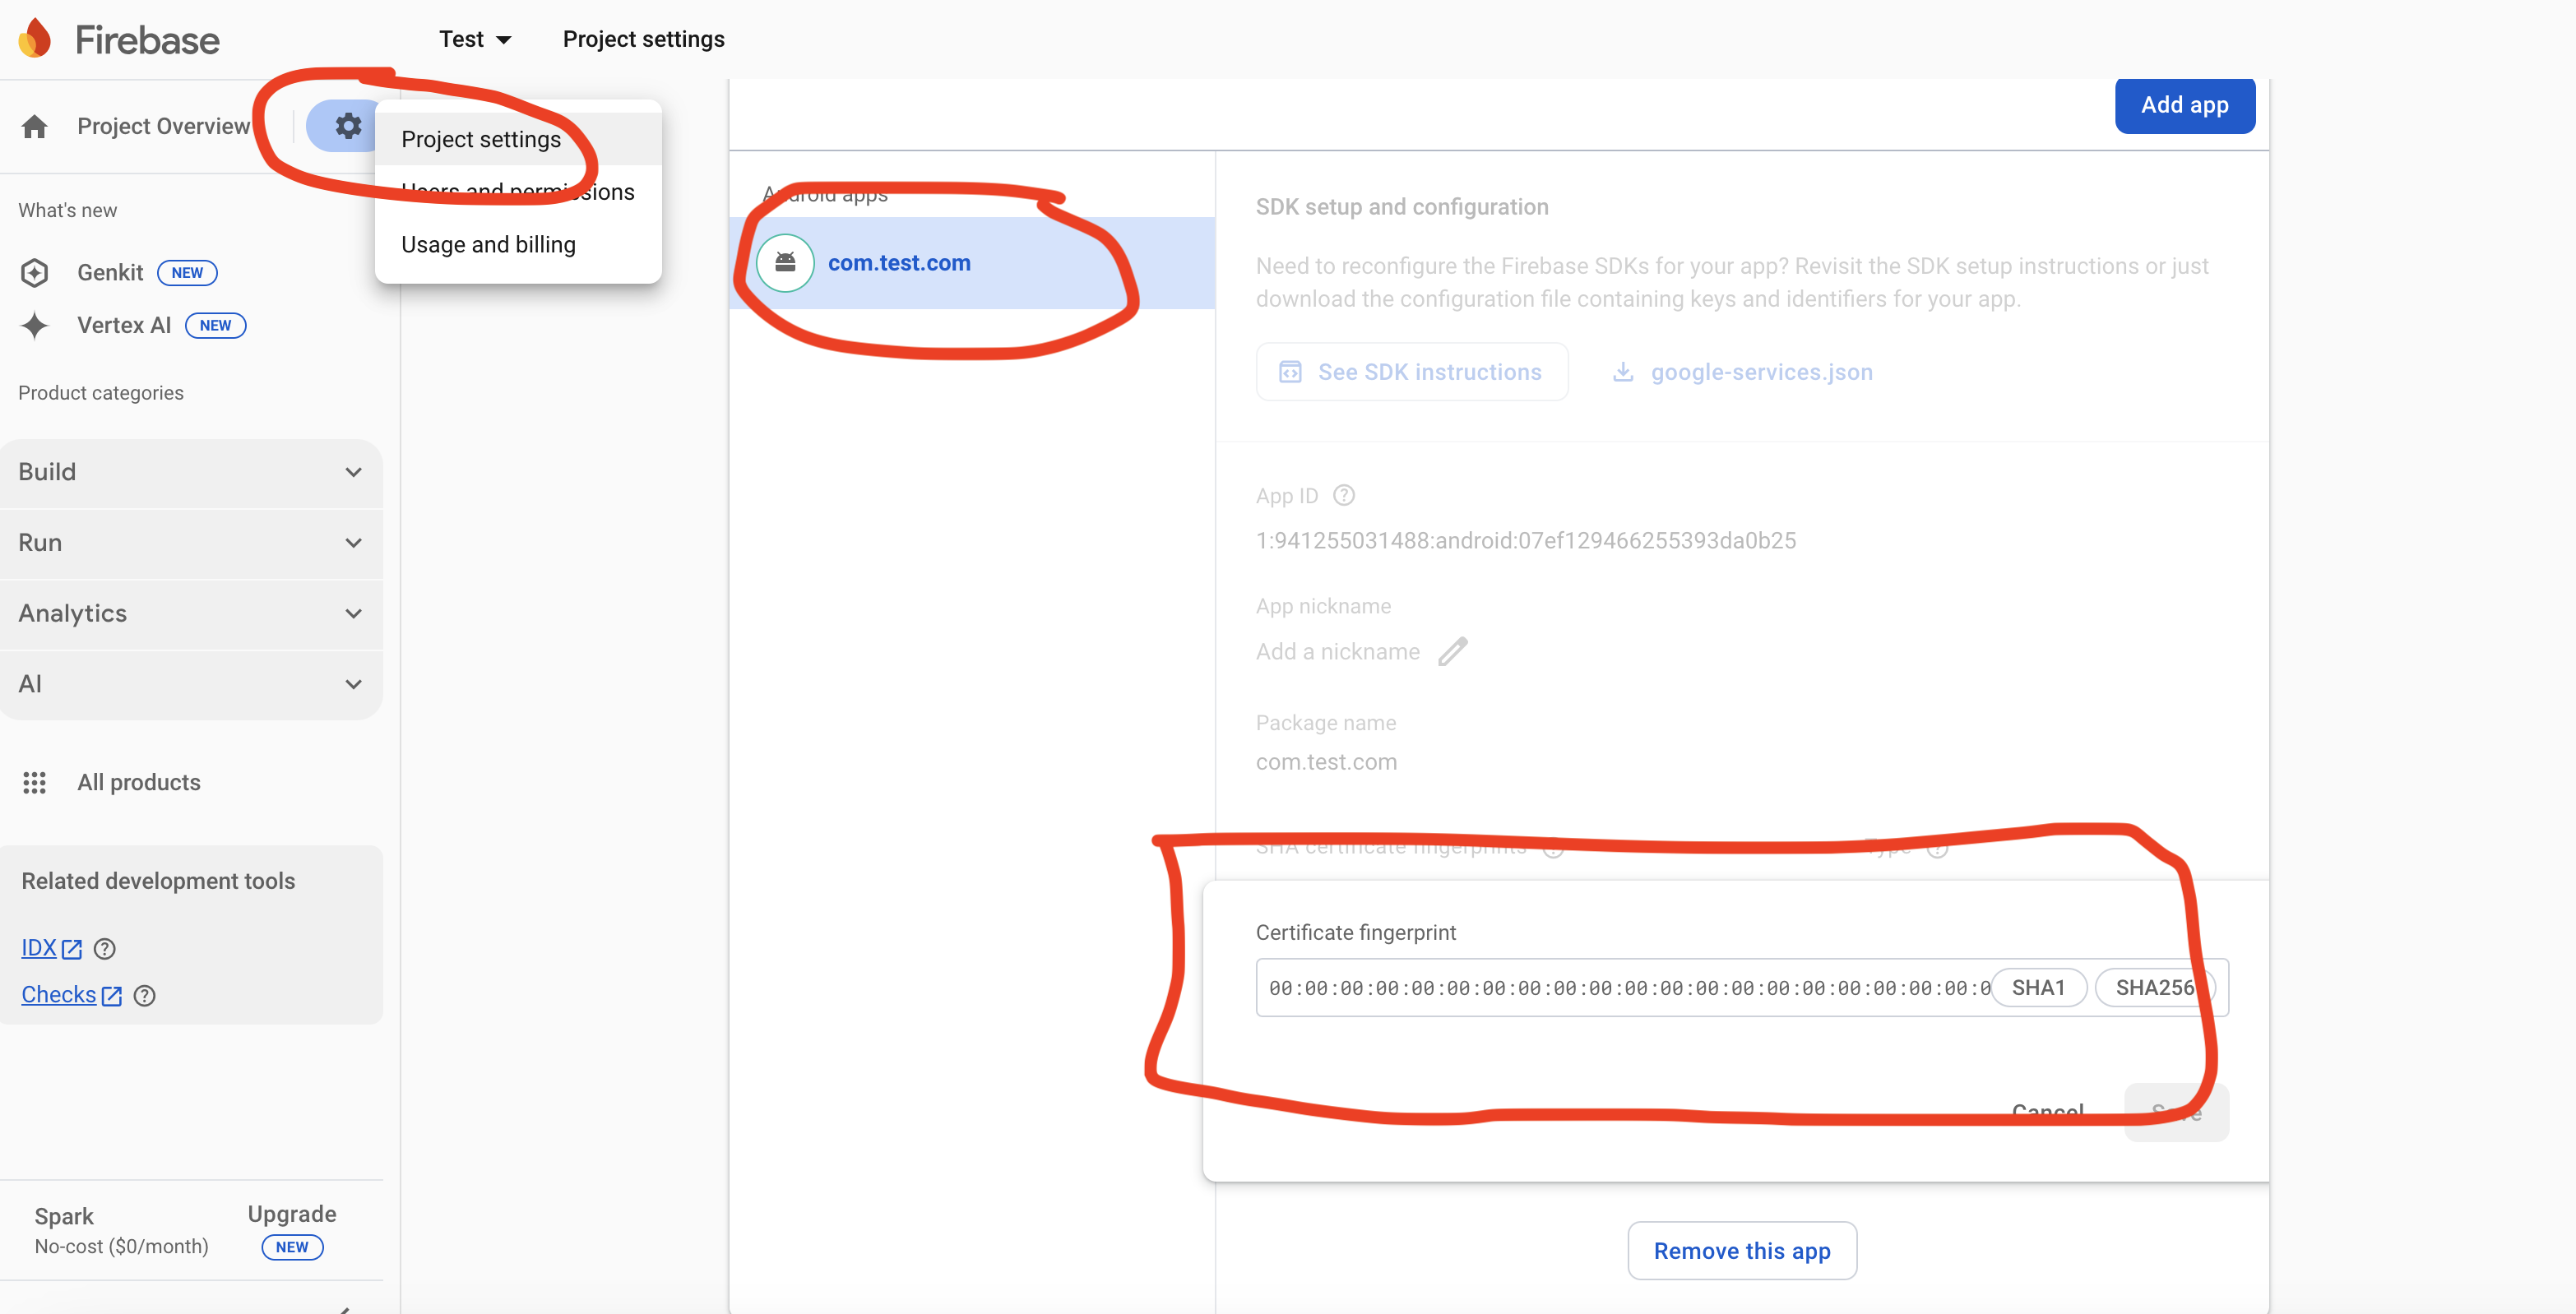
Step 1 : Enter SHA Key in firebase console
- Add SHA-1 key in the Firebase project for Google Login to work, refer here Link.
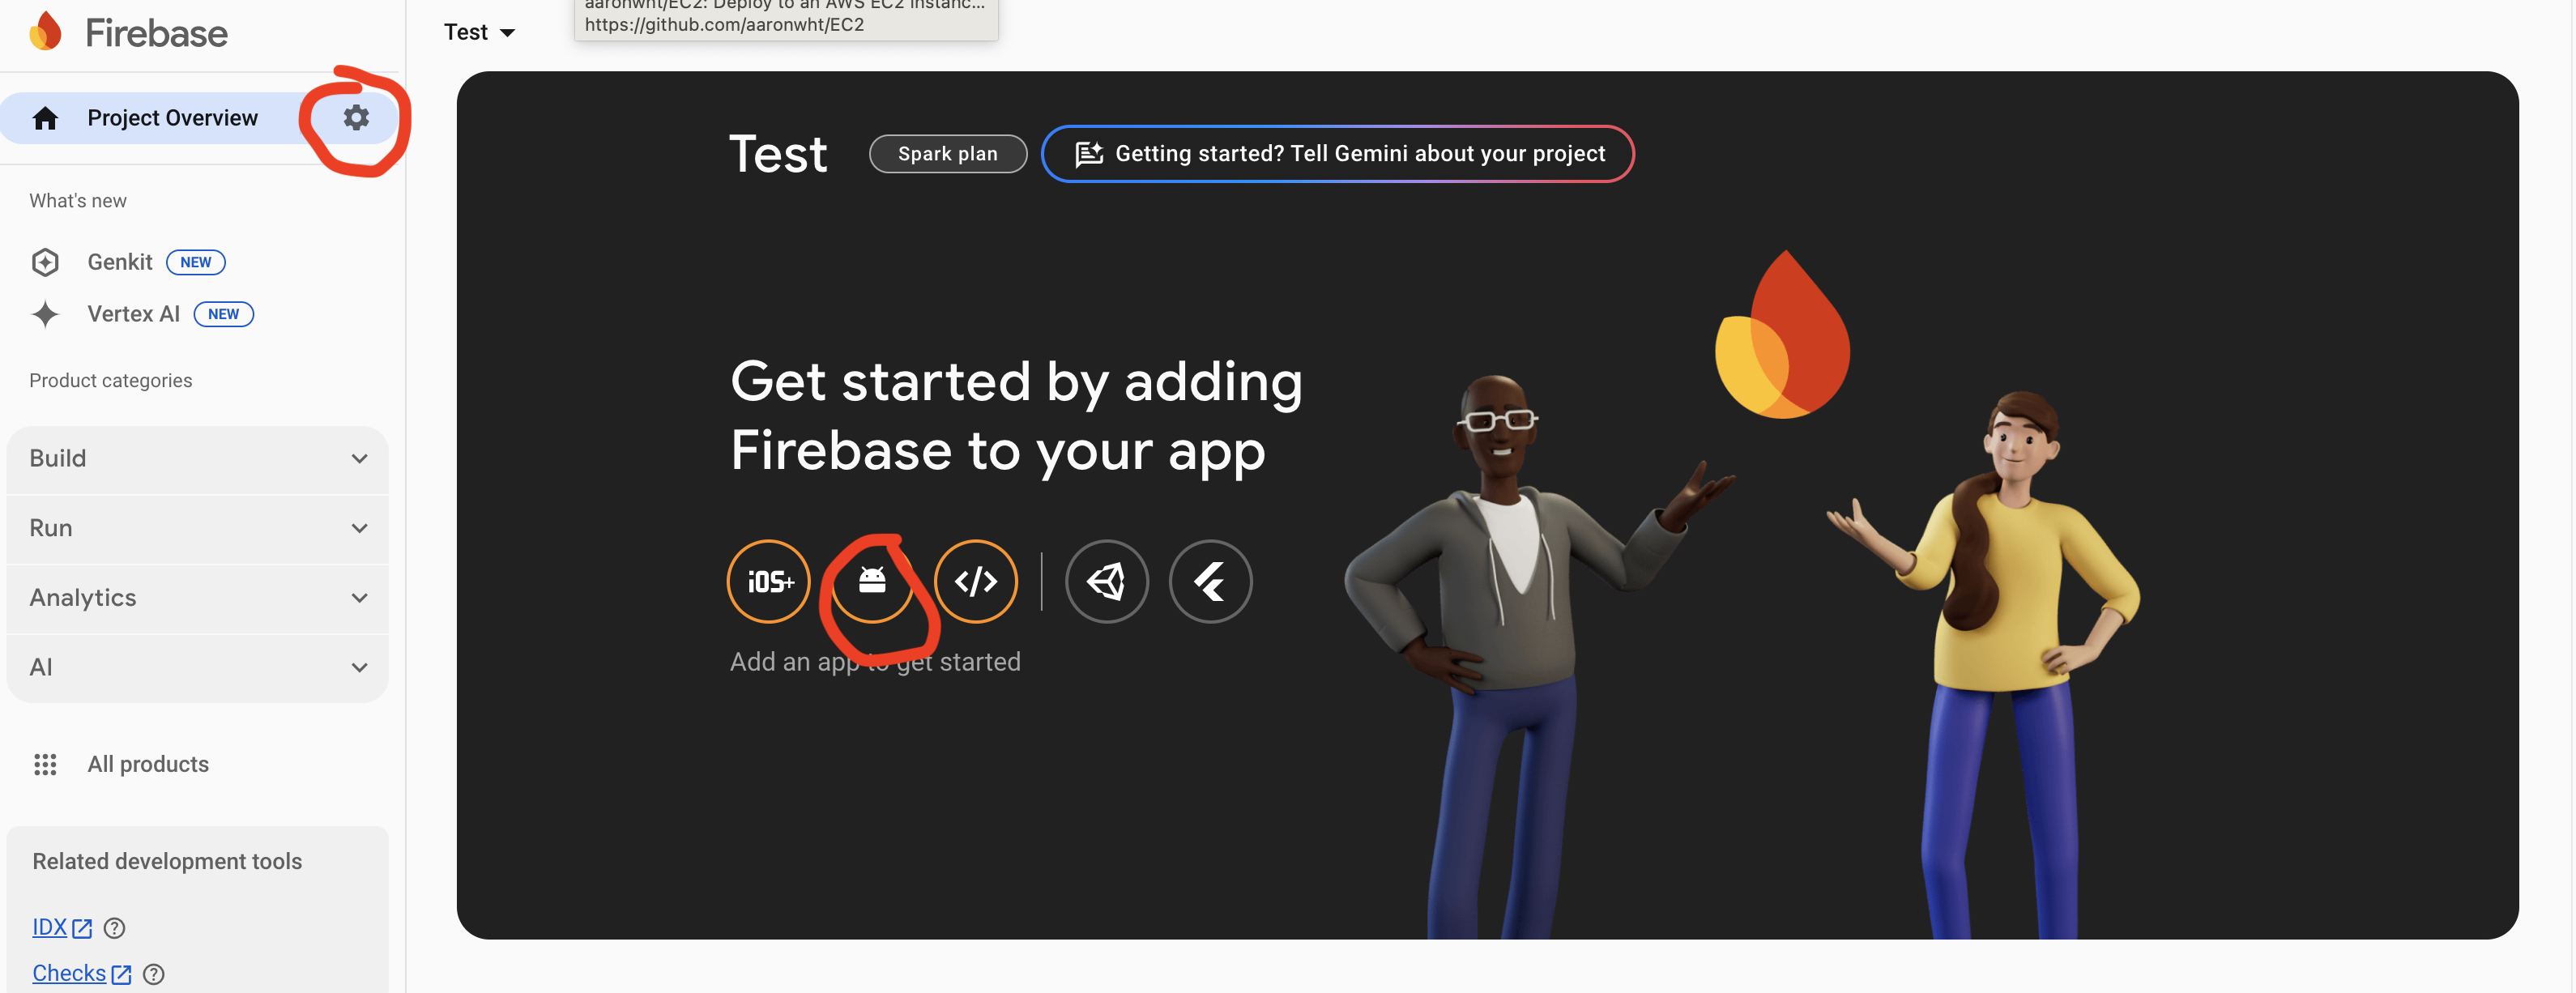
- Click on Project Overview
- Click on Project Settings
- Select Android app , then pase SHA-1 key in the circled area in the image at the bottom
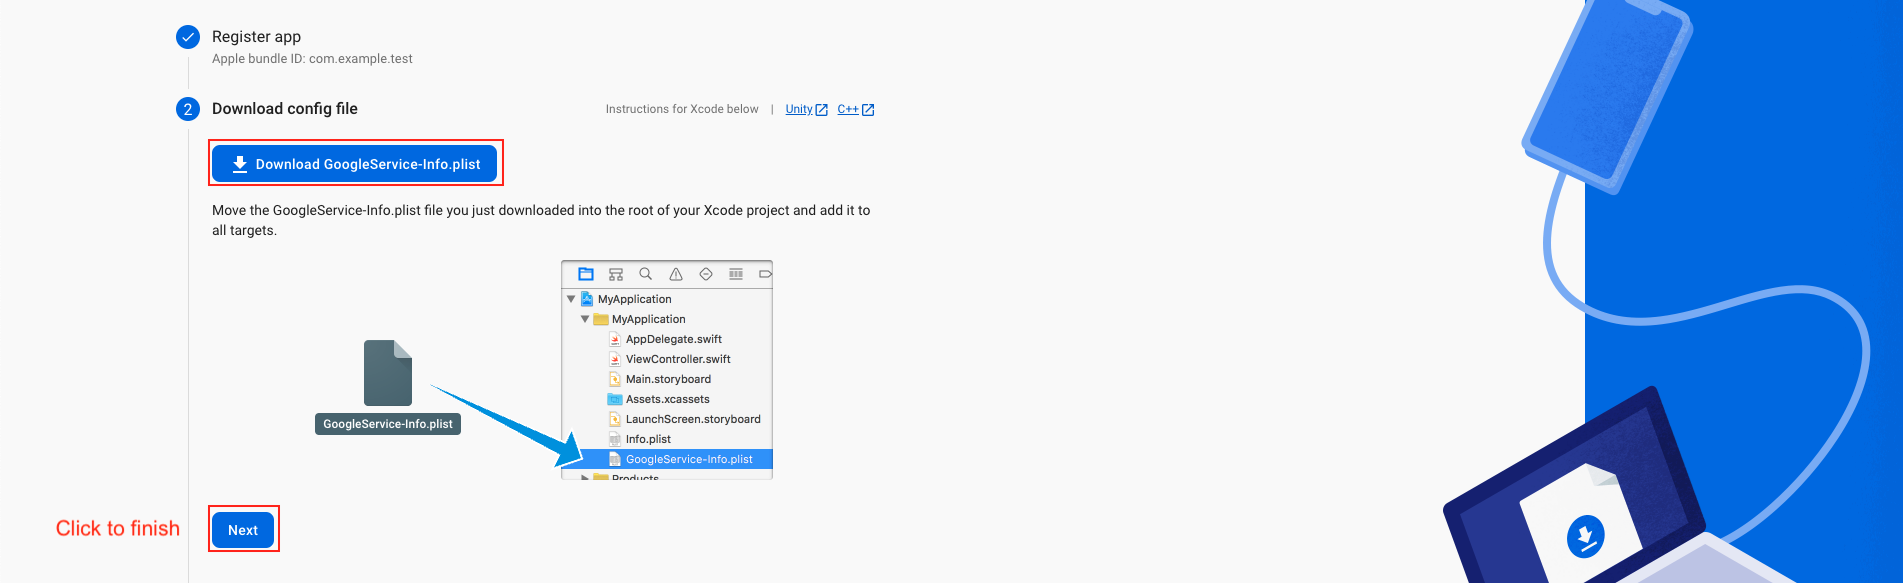
Add IOS App In Firebase
- we have to choose the platform to add Firebase to our application. Click on iOS.
- On the next screen, enter your iOS bundle ID & App nickname and click on Register App. You can find your bundle ID in the General tab for your app's primary target in Xcode. If specified, the app nickname will be used throughout the Firebase console to represent this app. Nicknames aren't visible to users.
- Download the GoogleService-Info.plist file & move the GoogleService-Info.plist file you just downloaded into the root of your Xcode project and add it to all targets.
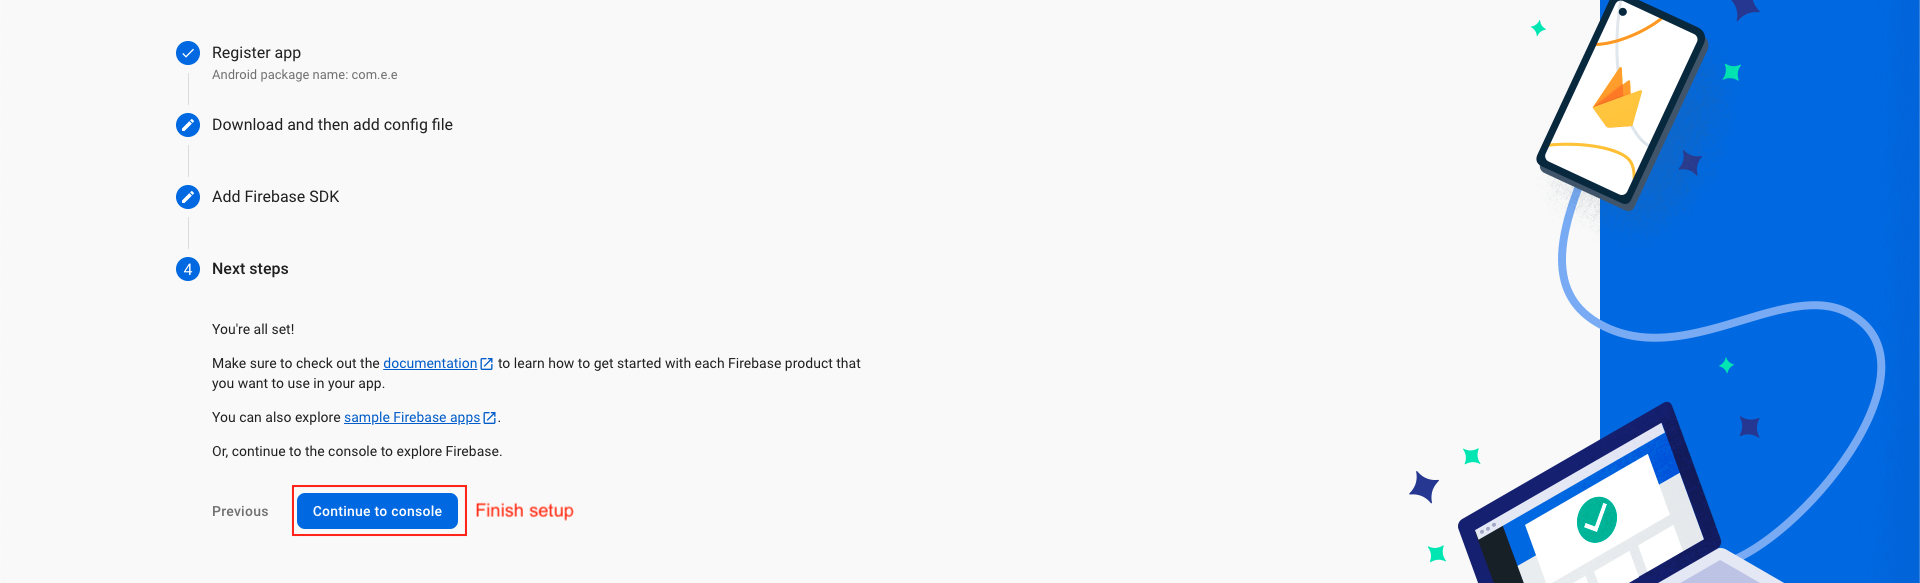
- Back in the Firebase console-setup workflow, click Next to skip the remaining steps and then finish and complete

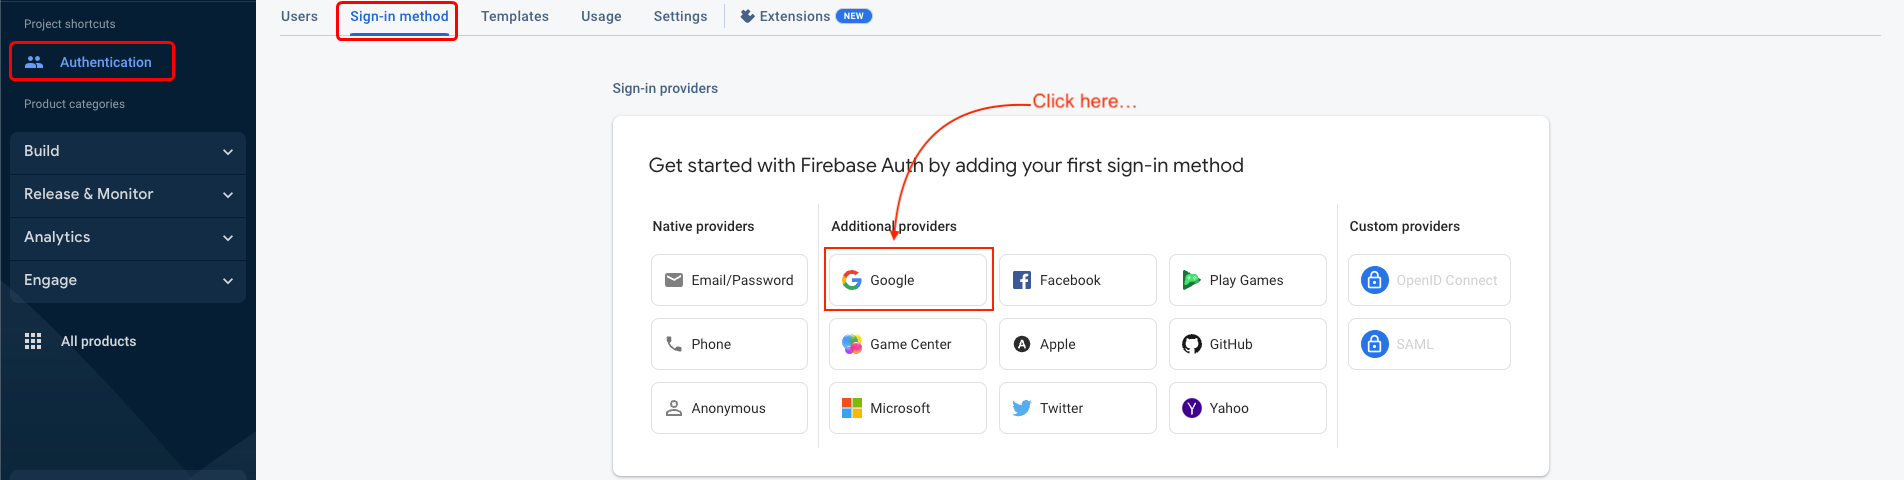
Google Sign In Configuration
- Navigate to the "Authentication" section and select the "Sign-in method" tab.
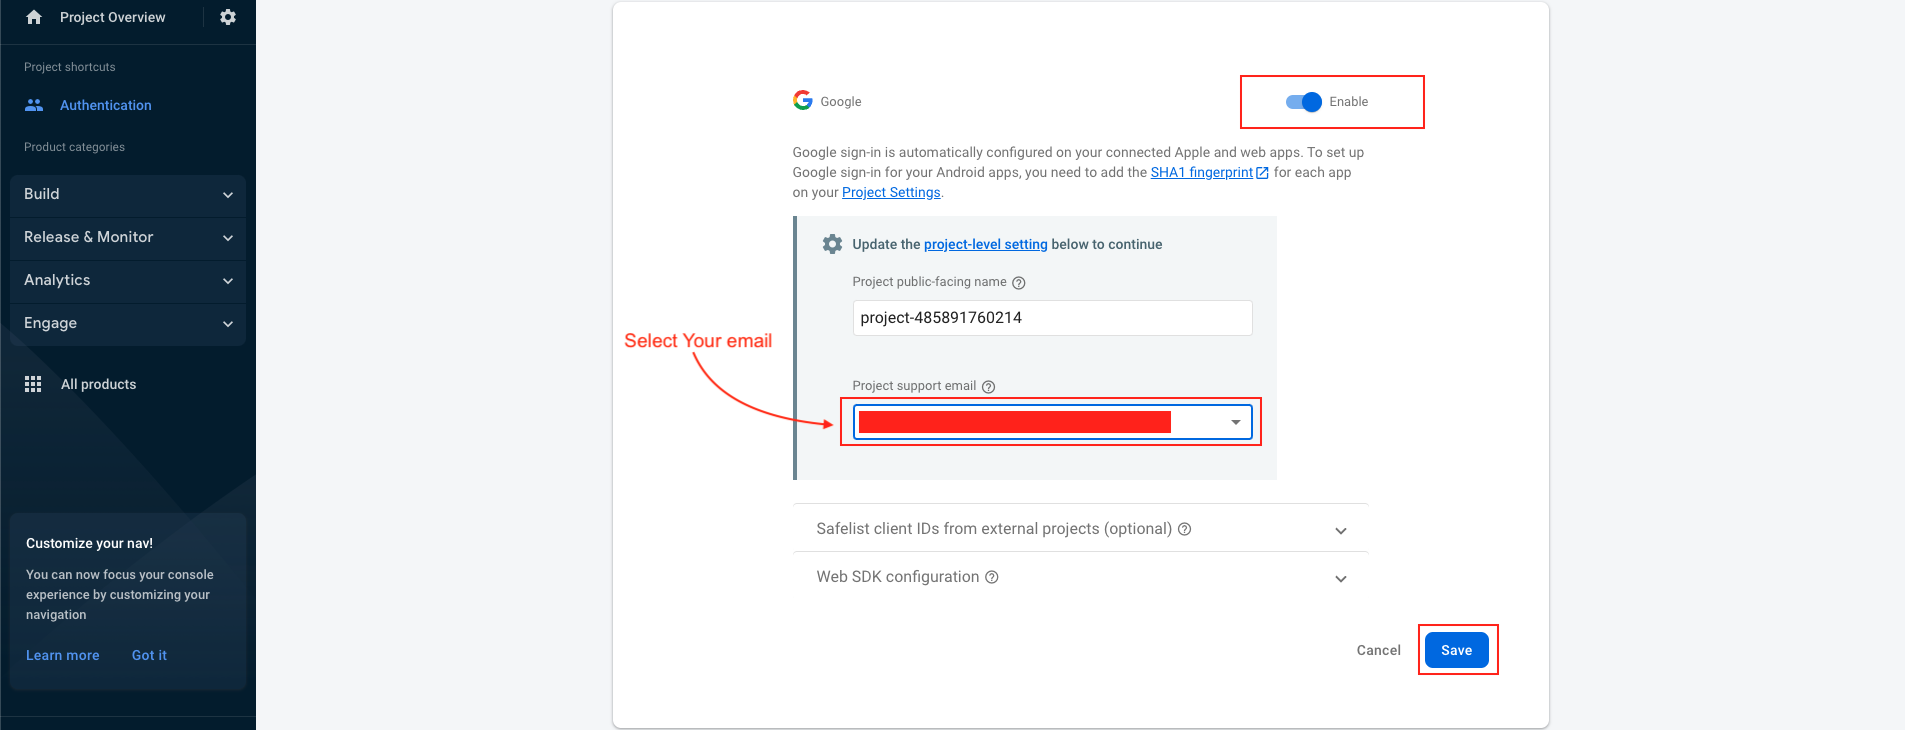
- Click to Enable
- Select your support email and save
- Google sign-in method has been successfully enabled.

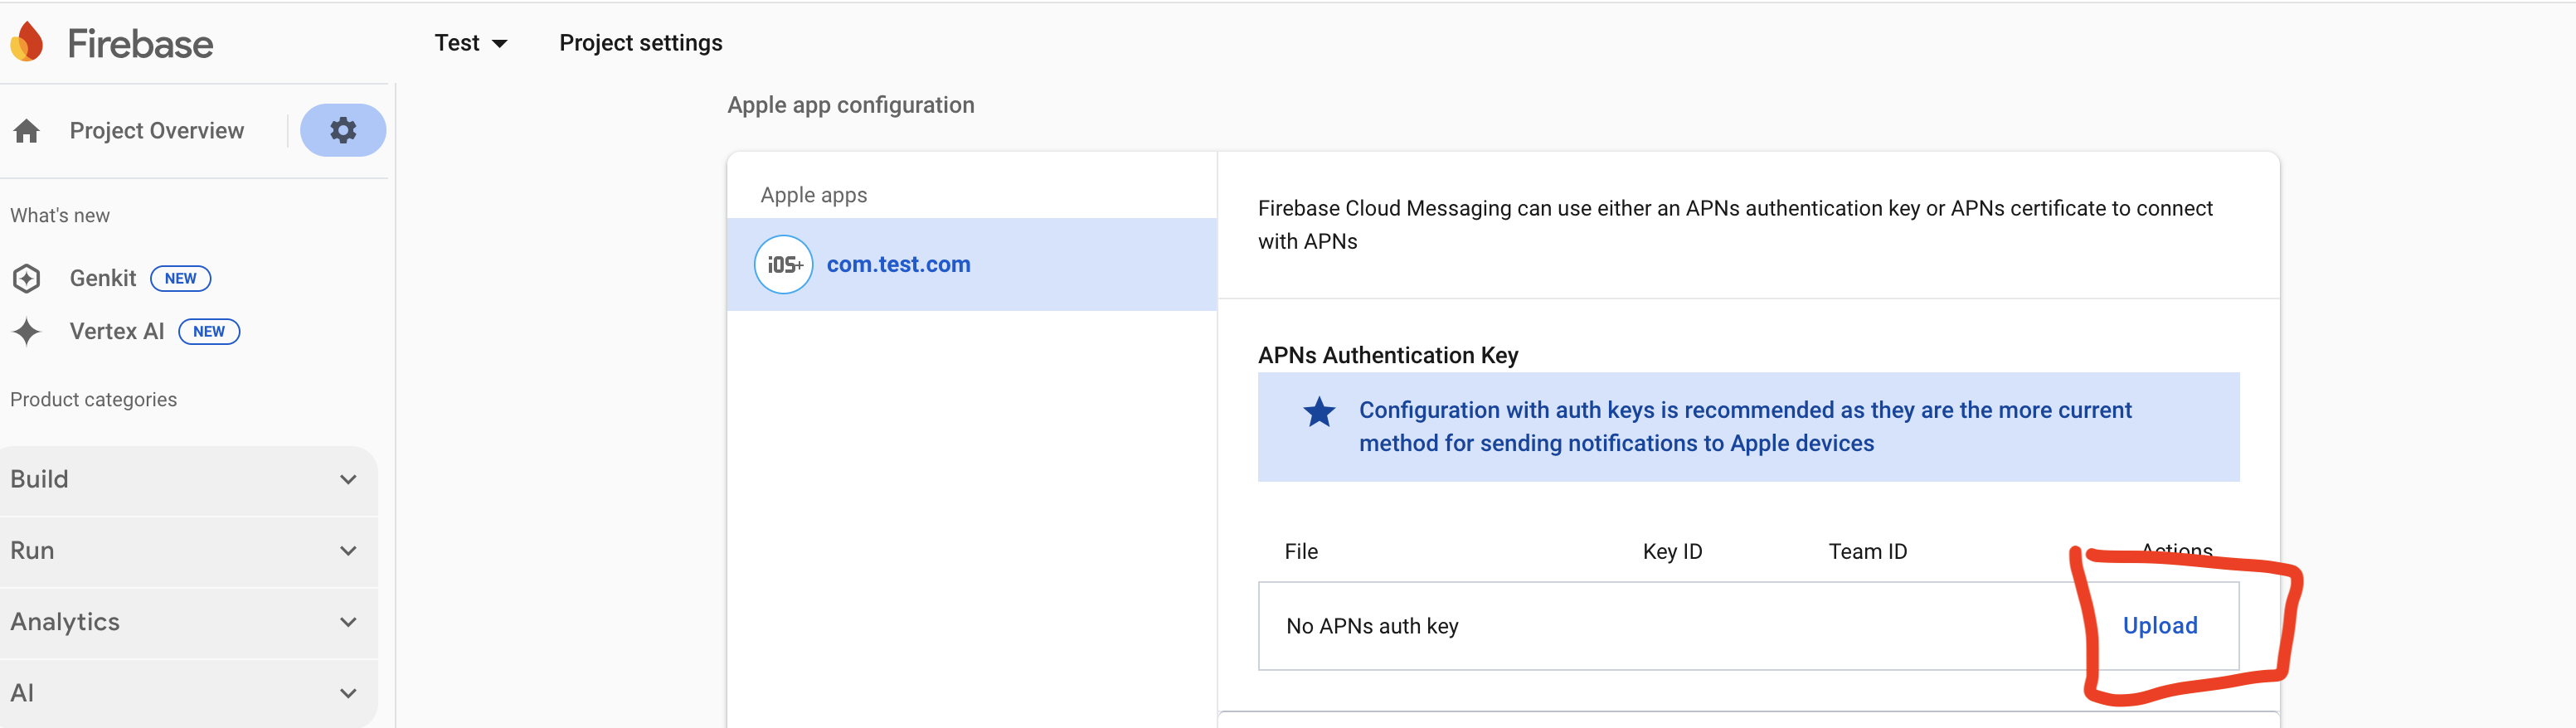
Create APNs Auth Key For Push Notification
- Navigate to https://developer.apple.com/account.
- Log in using your Apple developer credentials.
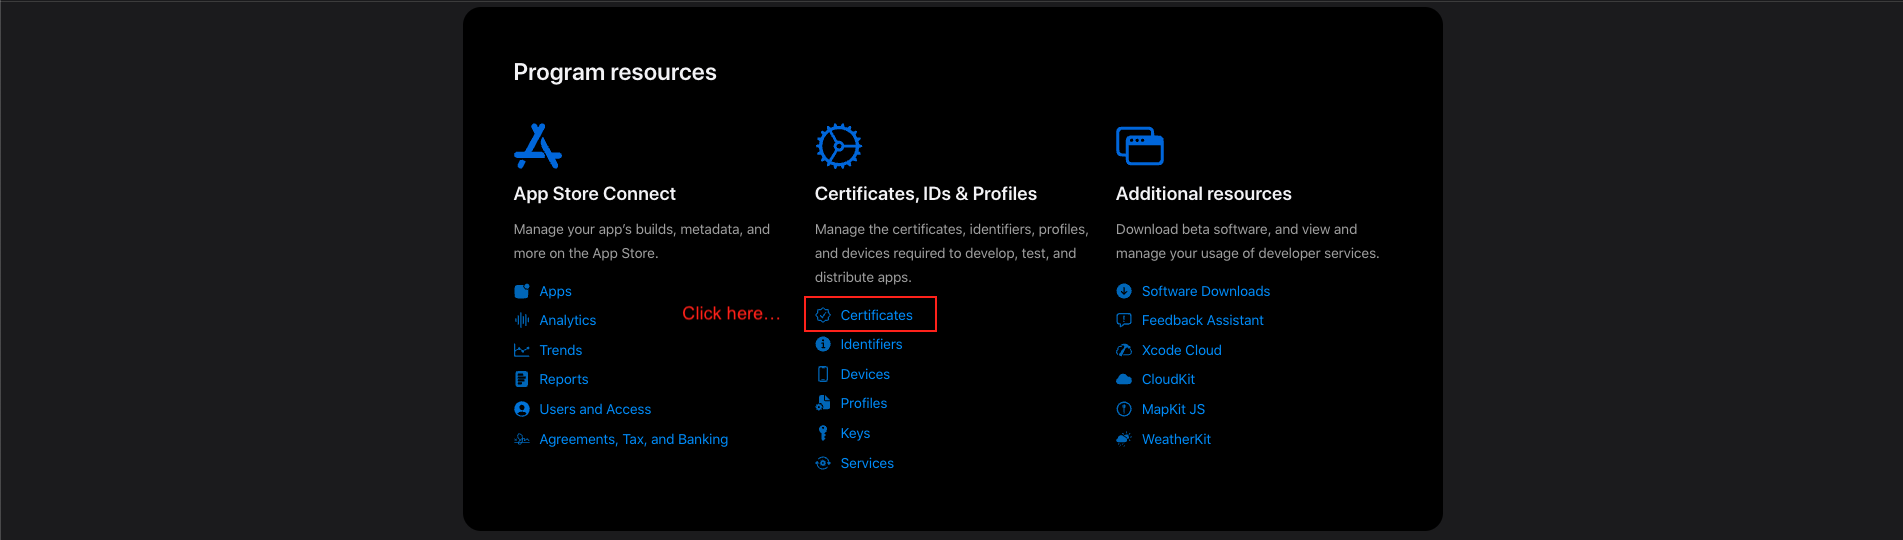
- Obtain a provider certificate from your developer account. This can be found in the "Certificates" section, as depicted in the image below.
- Select the "Certificate, IDs & Profiles" tab.
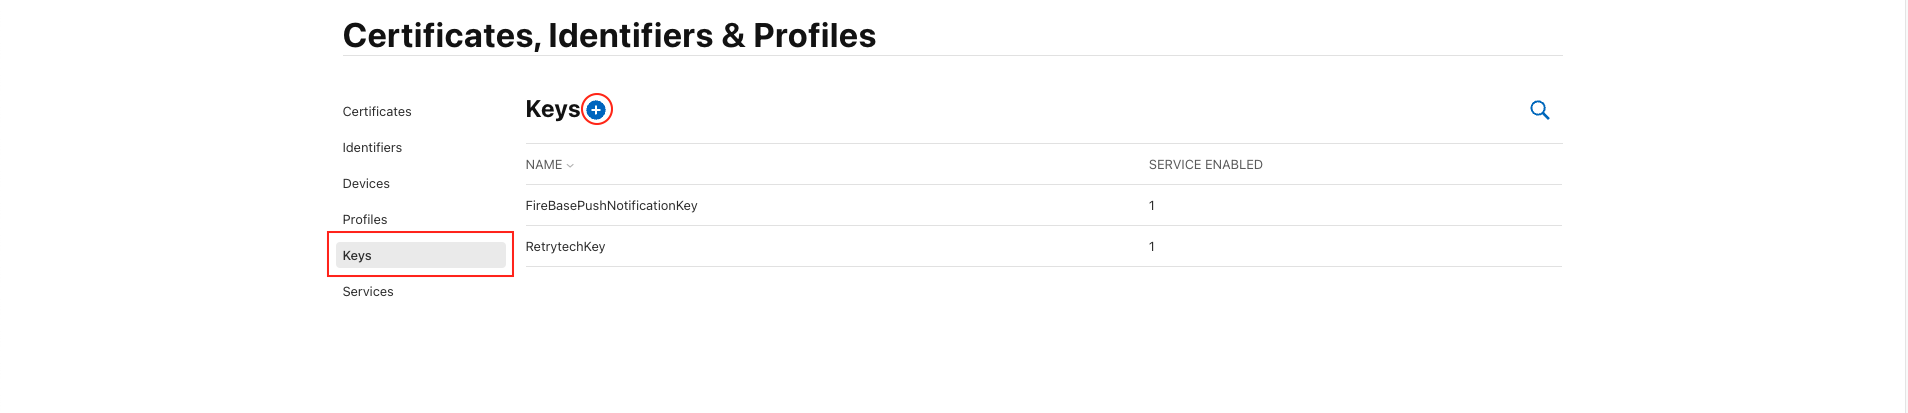
- Select the "Keys" tab.
- Click on the "+" button.
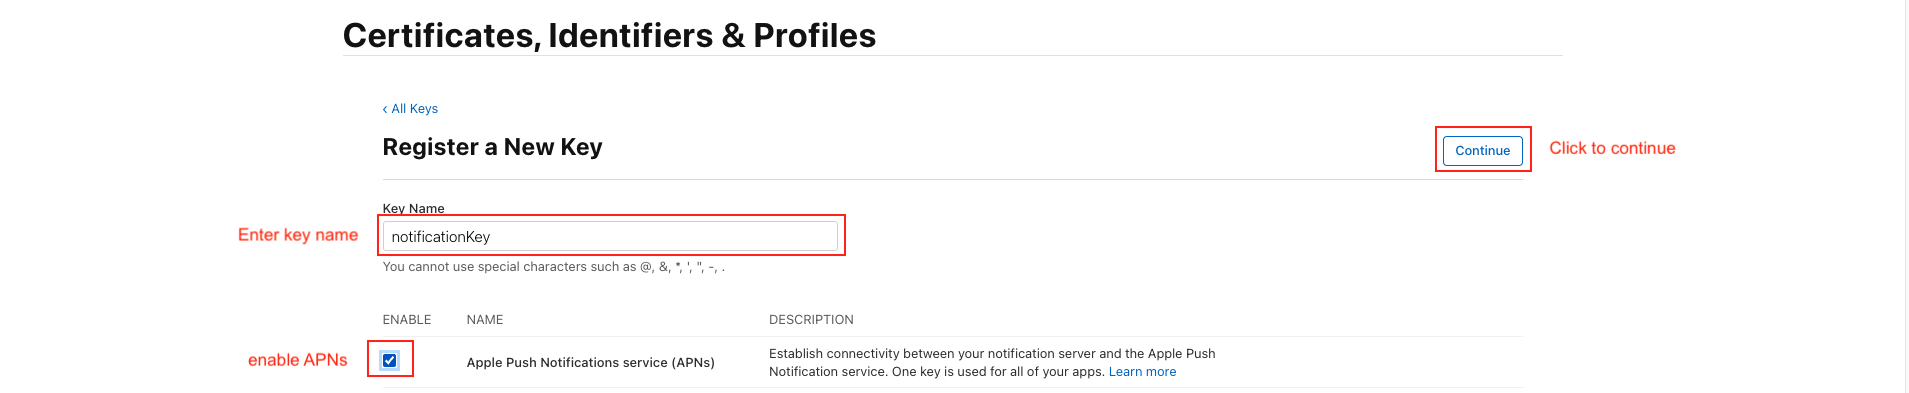
- A key can be generated which gives the FCM full access over the Apple Push Notification service (APNs). On the "Keys" menu item, register a new key. The name of the key can be anything, however you must ensure the APNs service is enabled.
- Click "Continue" & then "Save". Once saved, you will be presented with a screen displaying the private "Key ID" & the ability to download the key. Copy the ID, and download the file to your local machine.
- Copy the Key ID and download the file.
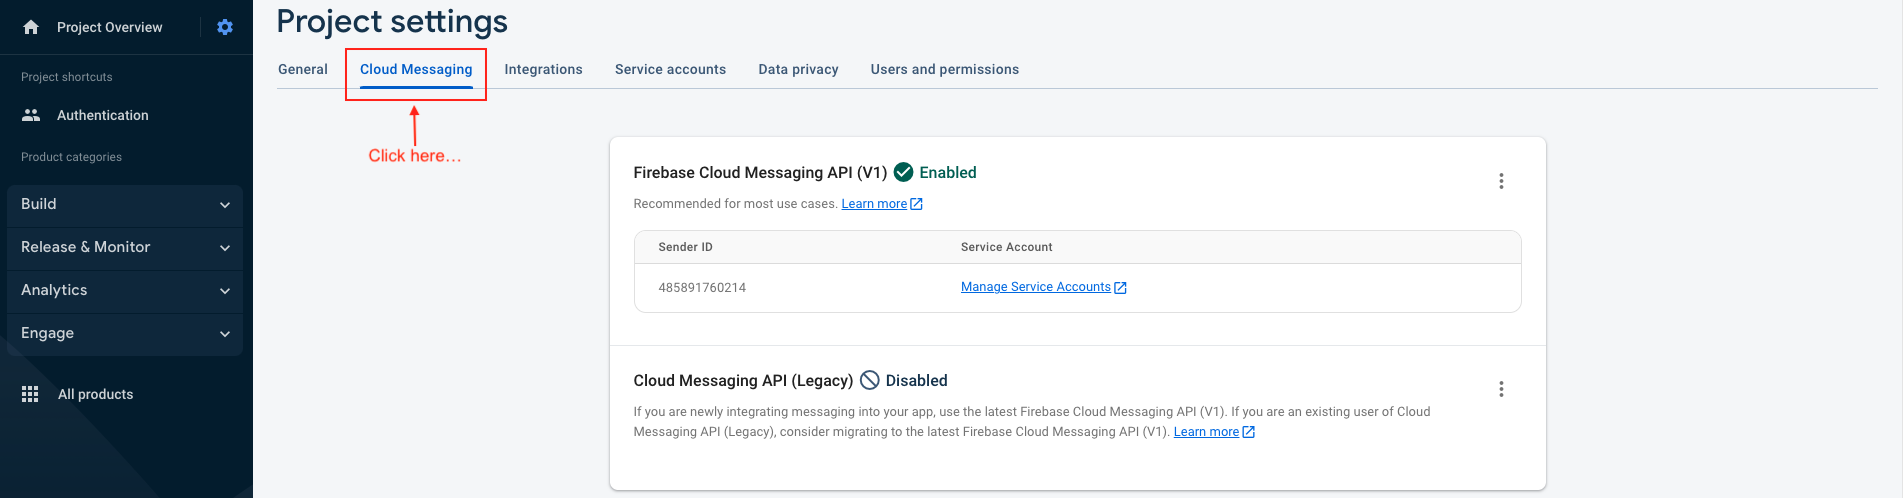
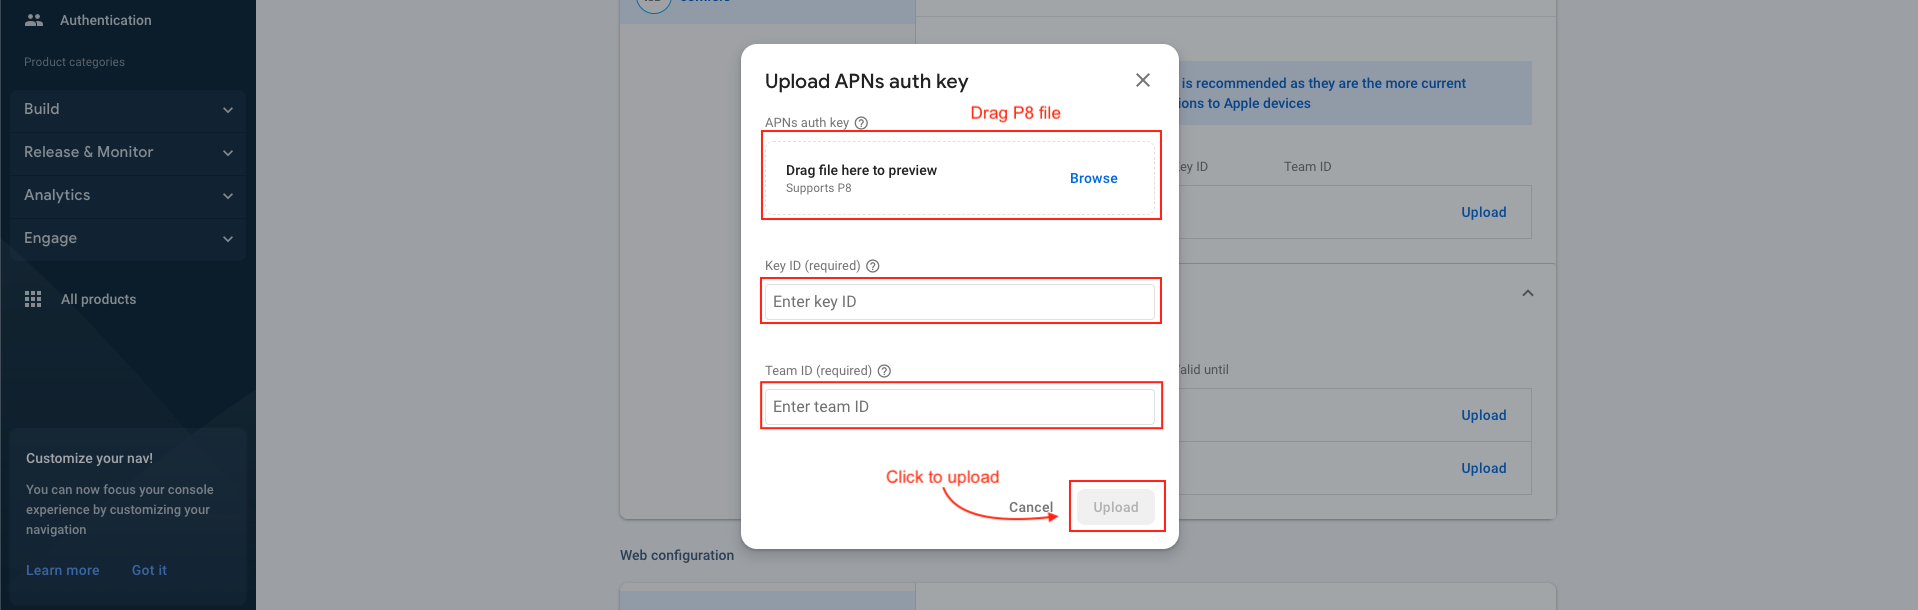
- The file & Key ID can now be added to your Firebase Project. On the Firebase Console, navigate to the "Project settings" and select the "Cloud Messaging" tab. Select your iOS application under the "iOS app configuration" heading.s
- Upload the downloaded file and enter the Key & Team IDs;


Woocommerce Setup
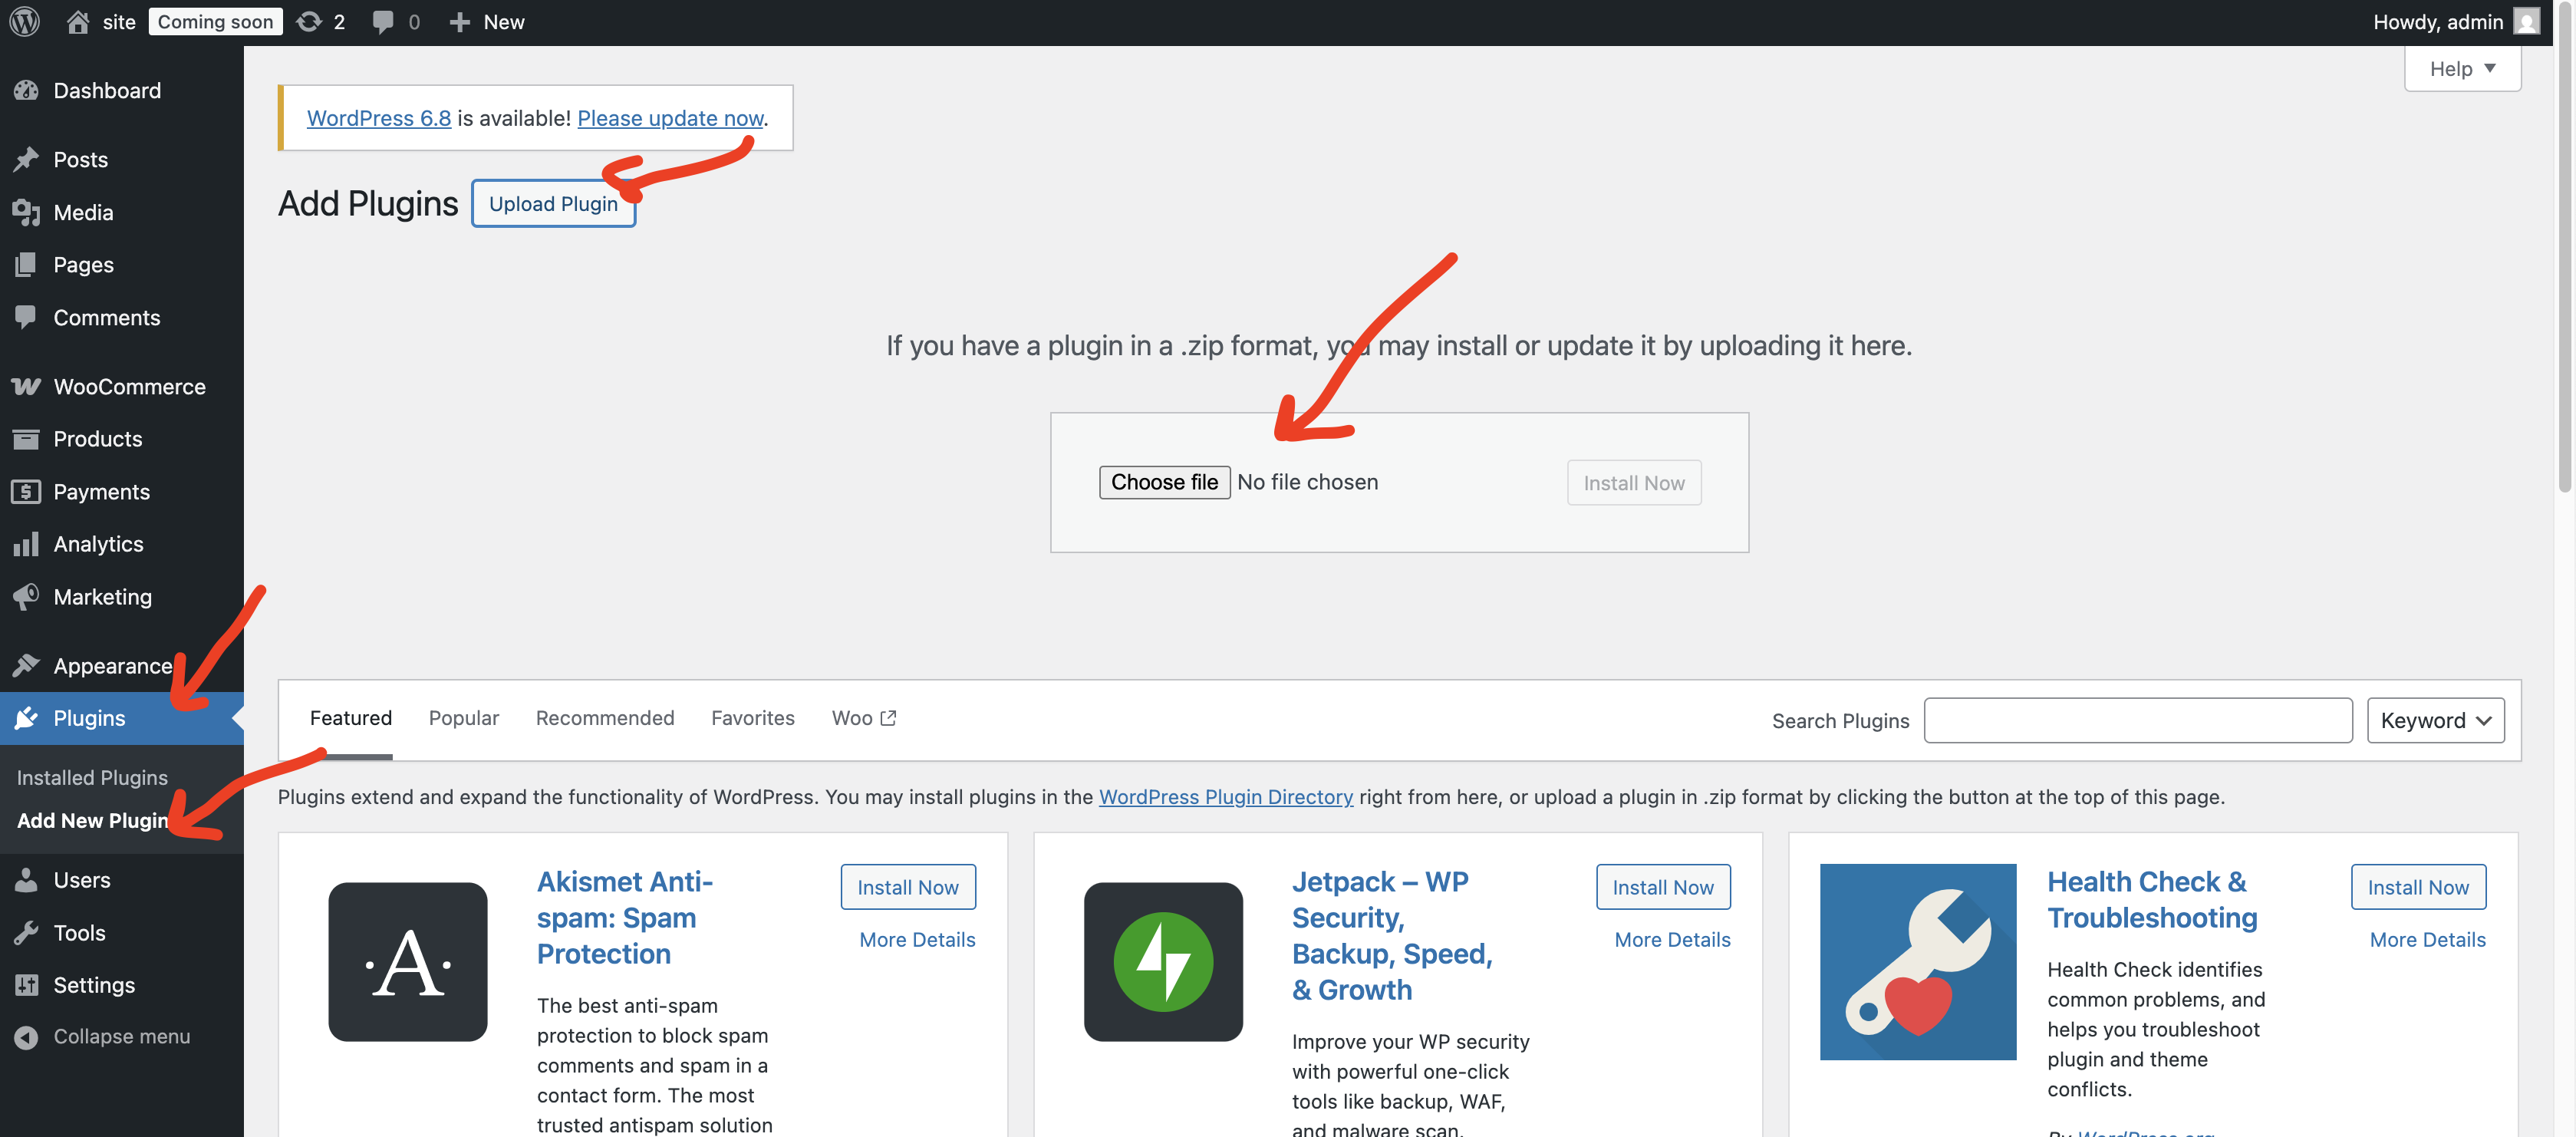
We assume you already have a woocommerce store, we have a wordpres plugin called WC-Plugin which is part of the source code you get when you downnload our source code from codecanyon
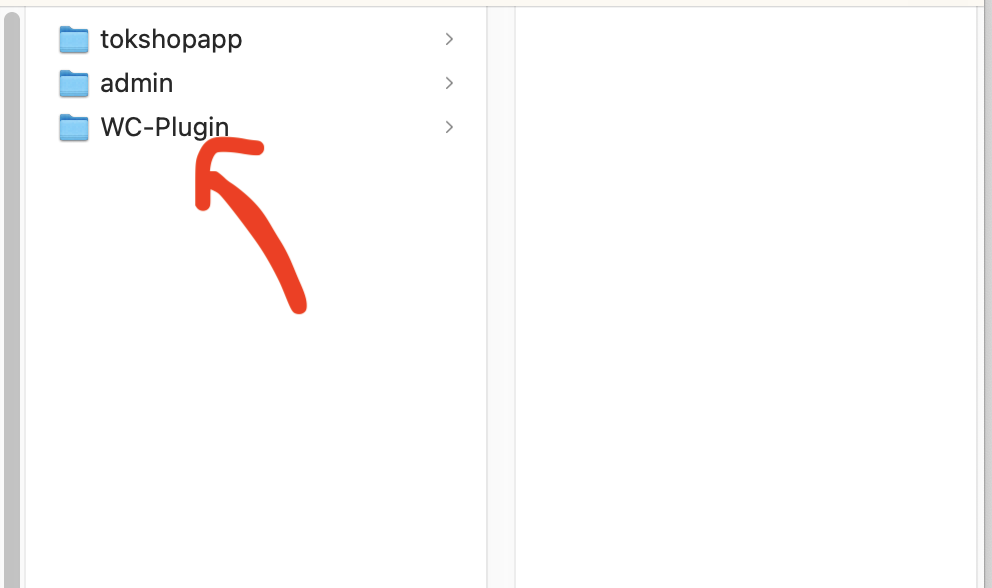
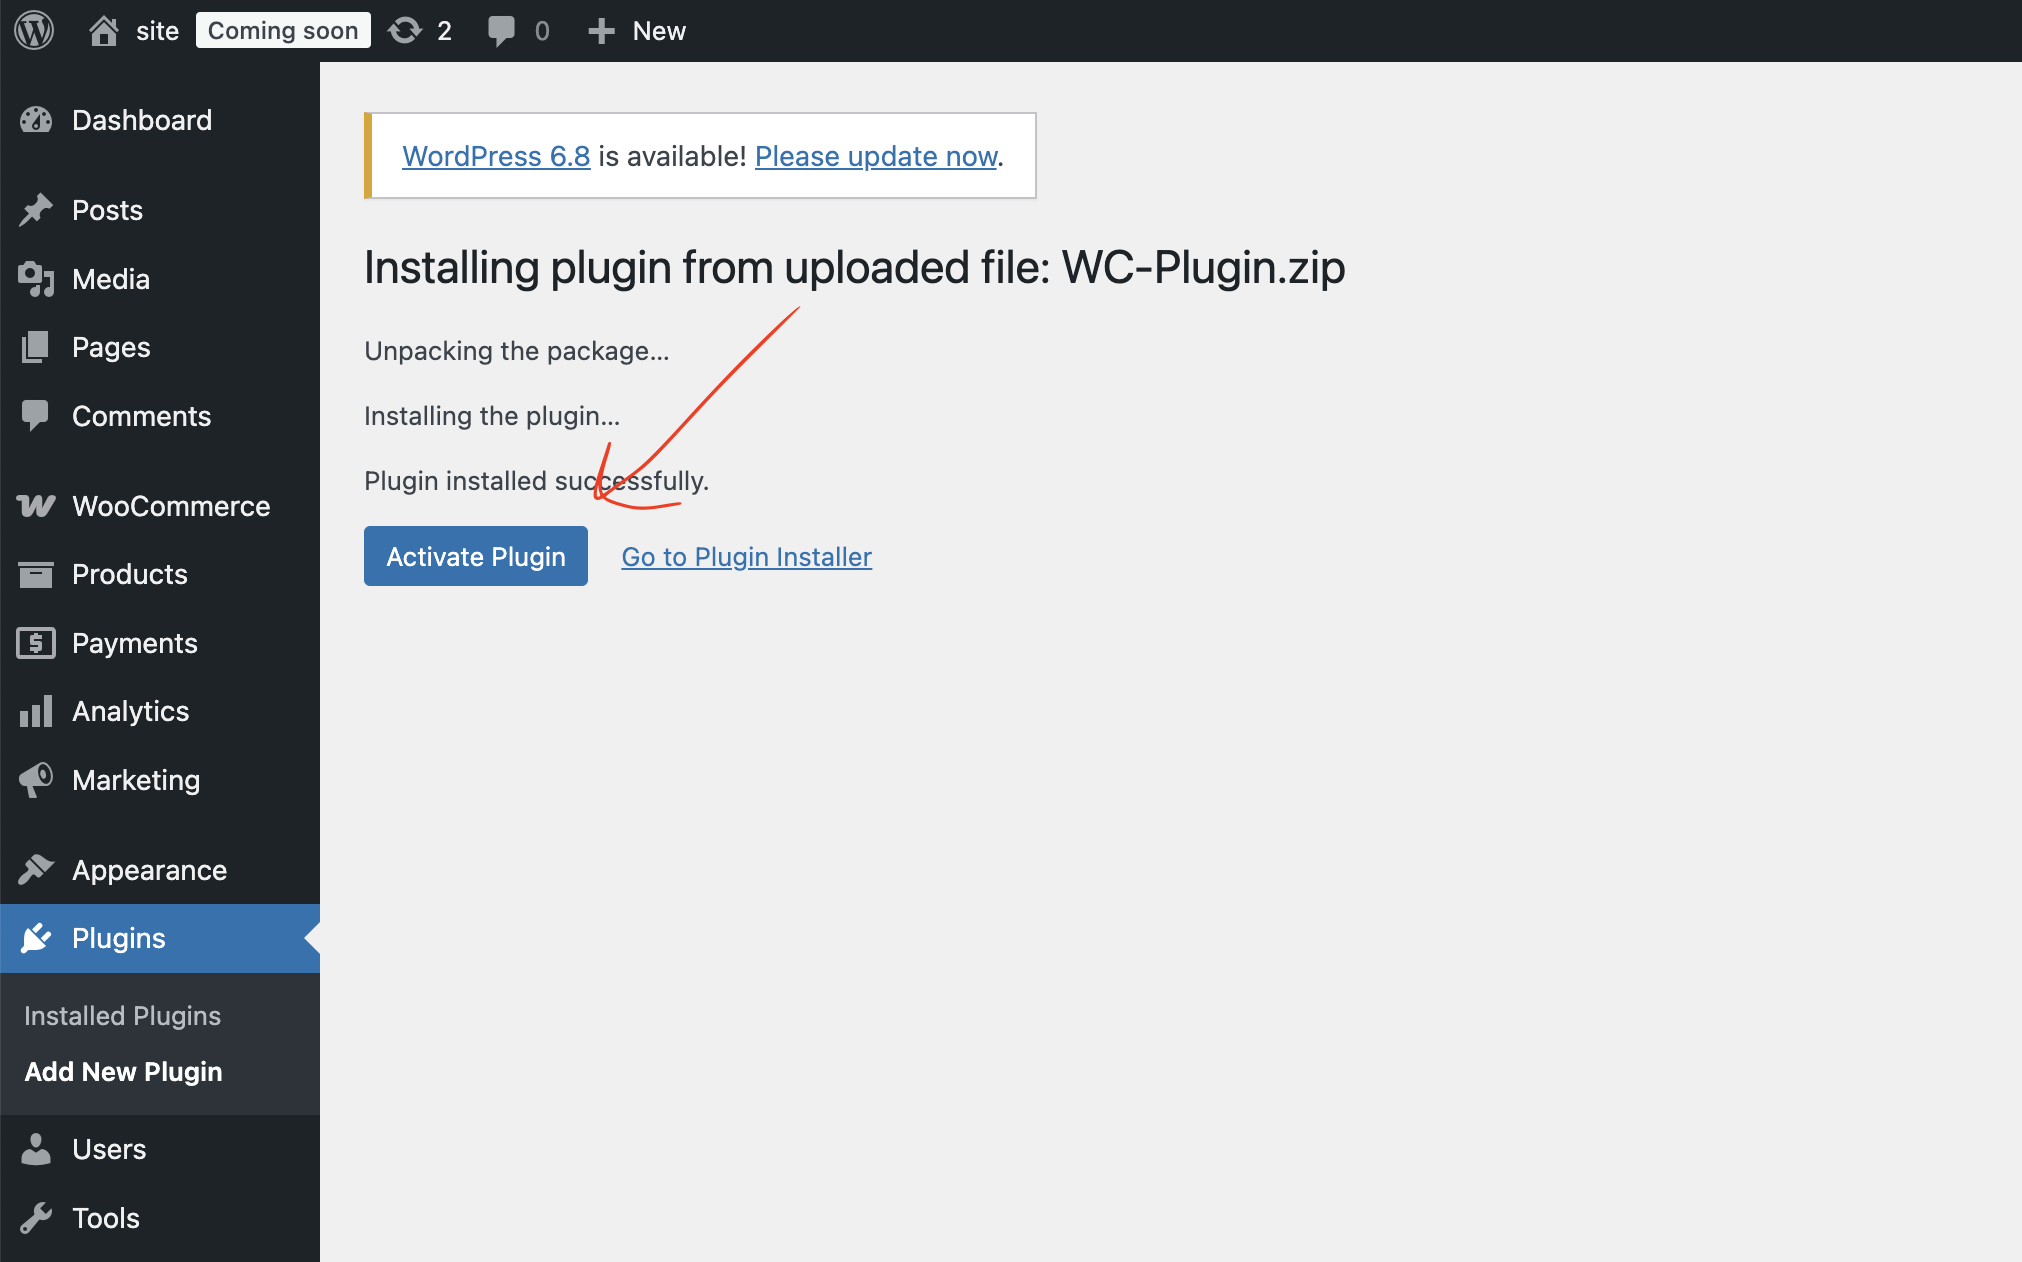
- Install the plugin in your wordpress ecommerce store, first of all compress it then do the following inside your wordpress admin
- After uploading the plugin click on the "Activate" button and that is it, now you can leave your wordpress admin
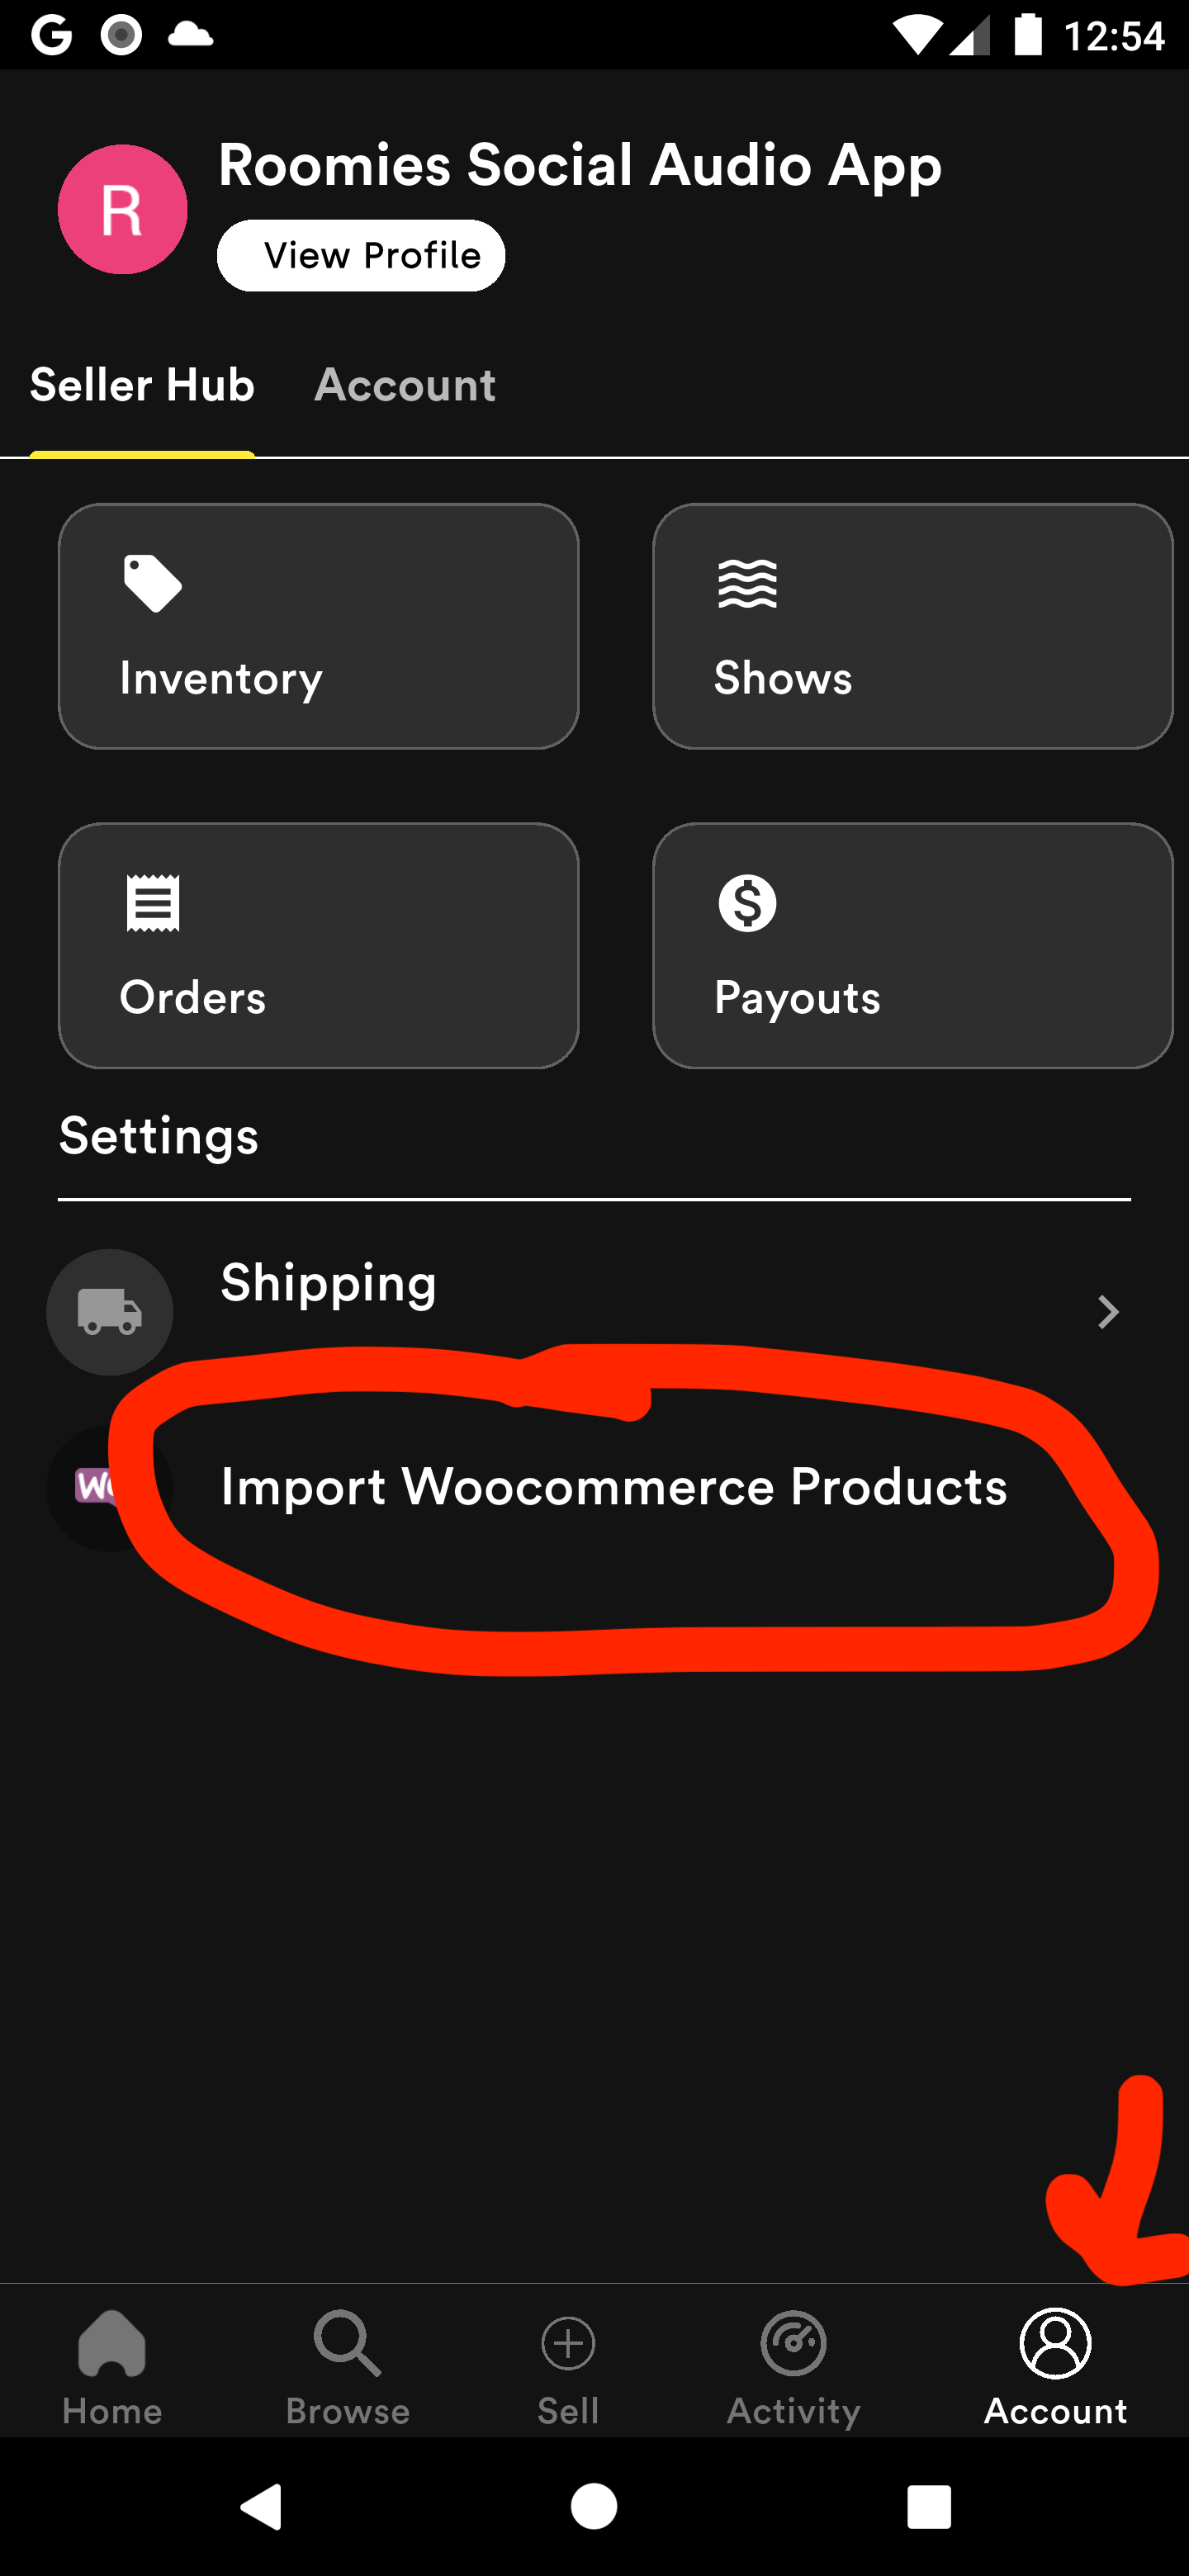
Import Products
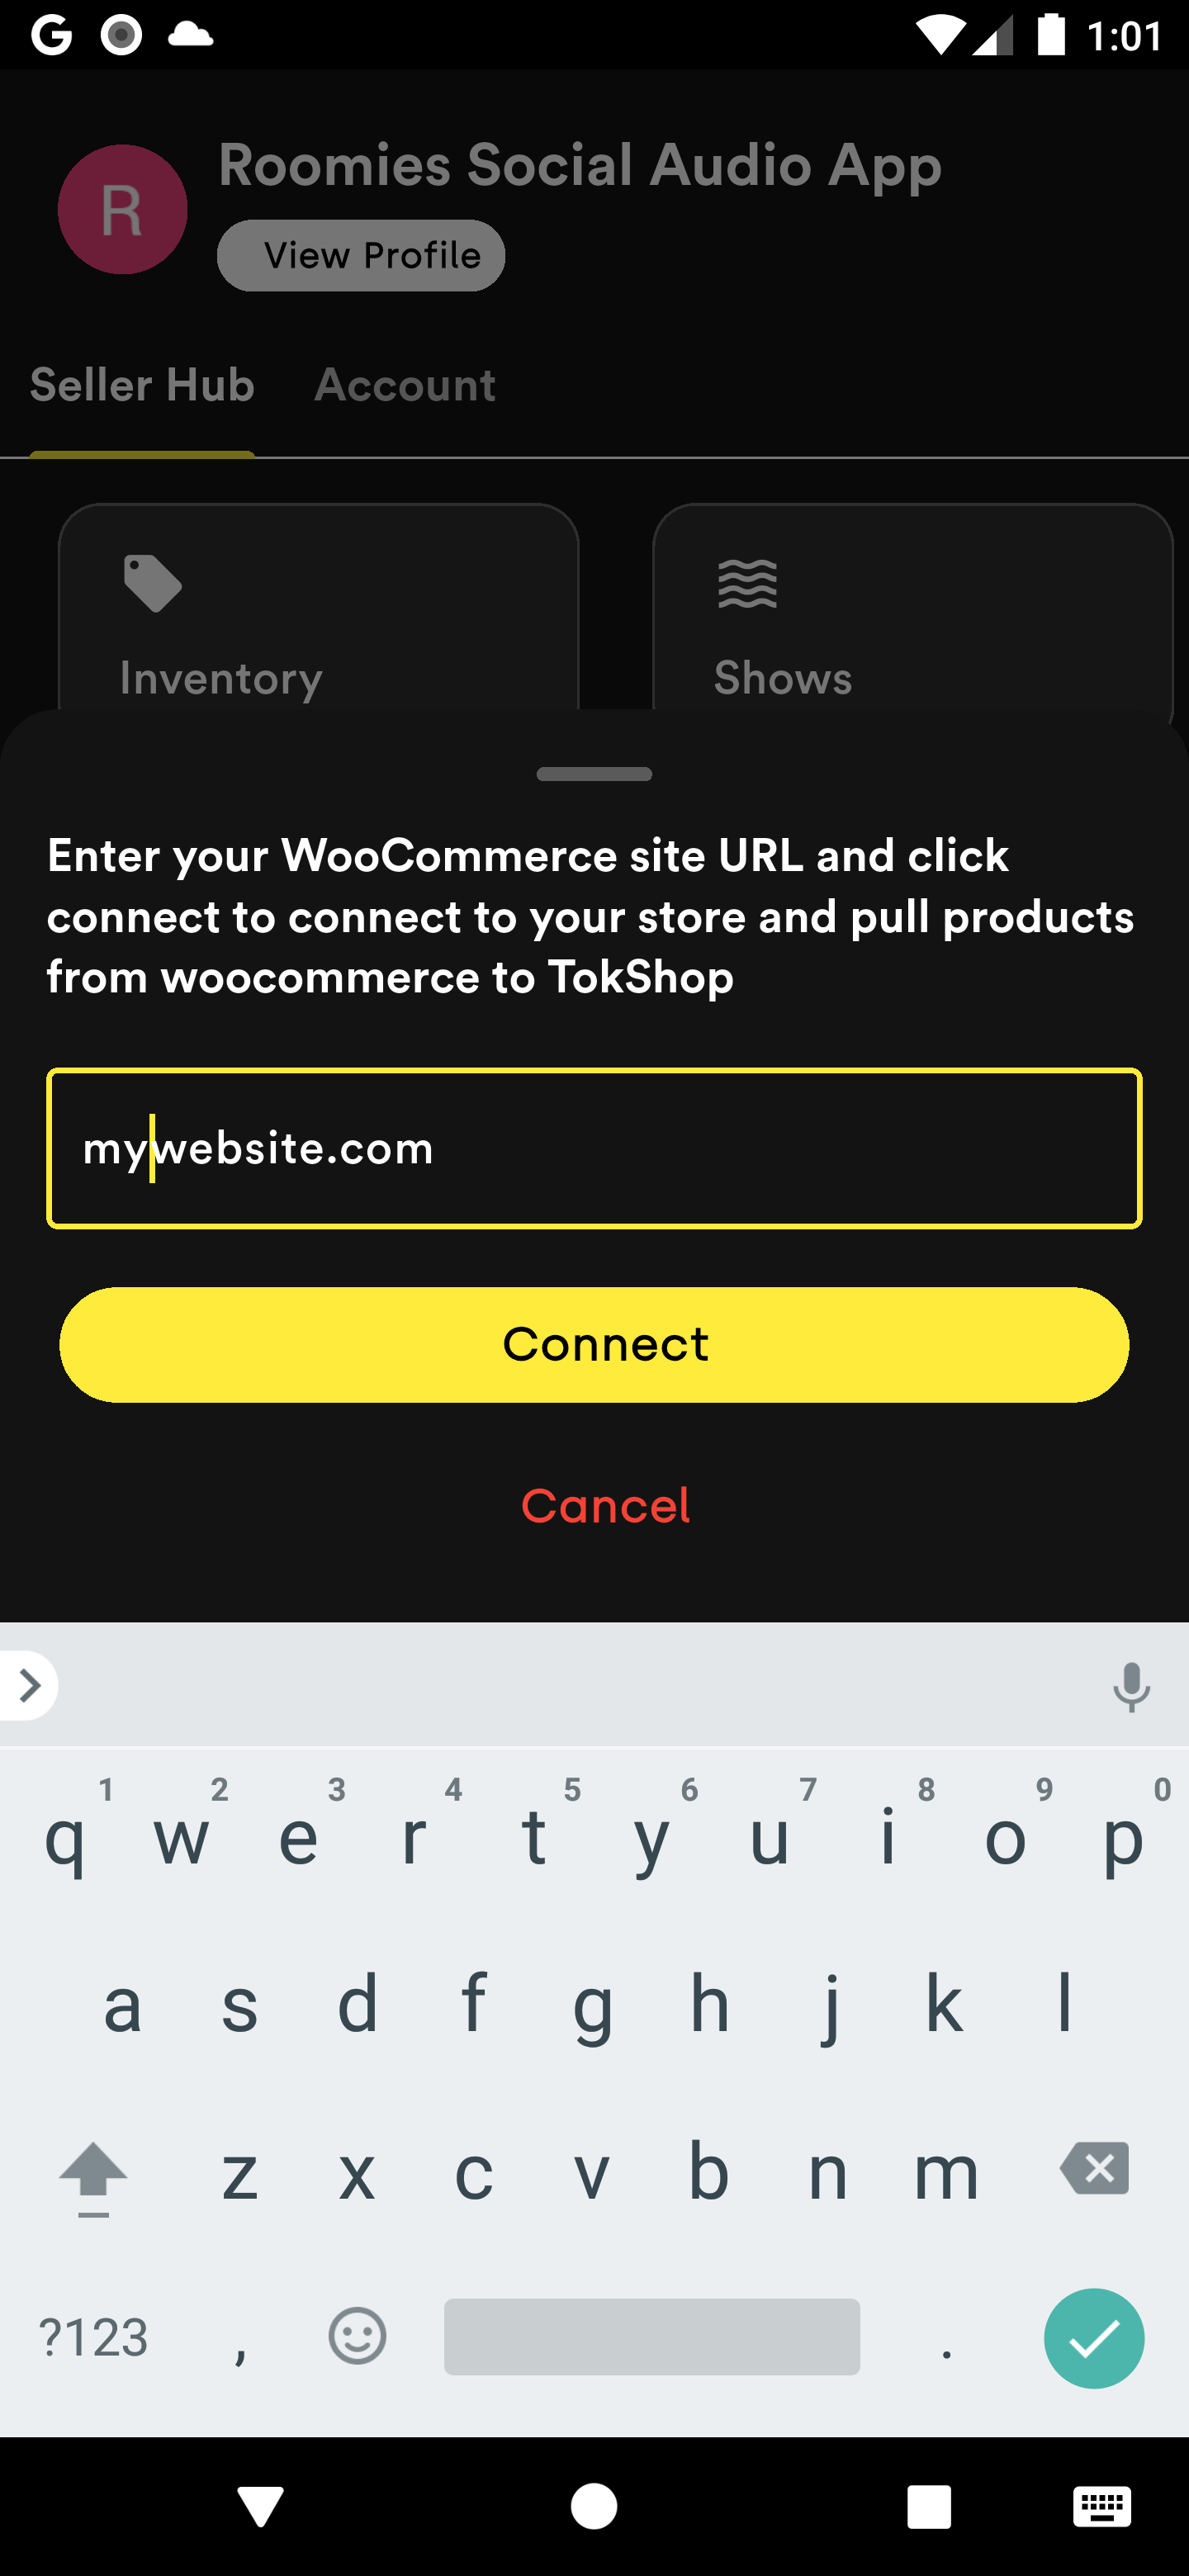
- Go to Account tab and click "Import Woocommerce Products"
- Enter your website url, if your website is https://mywebsite.com, only enter mywebsite.com
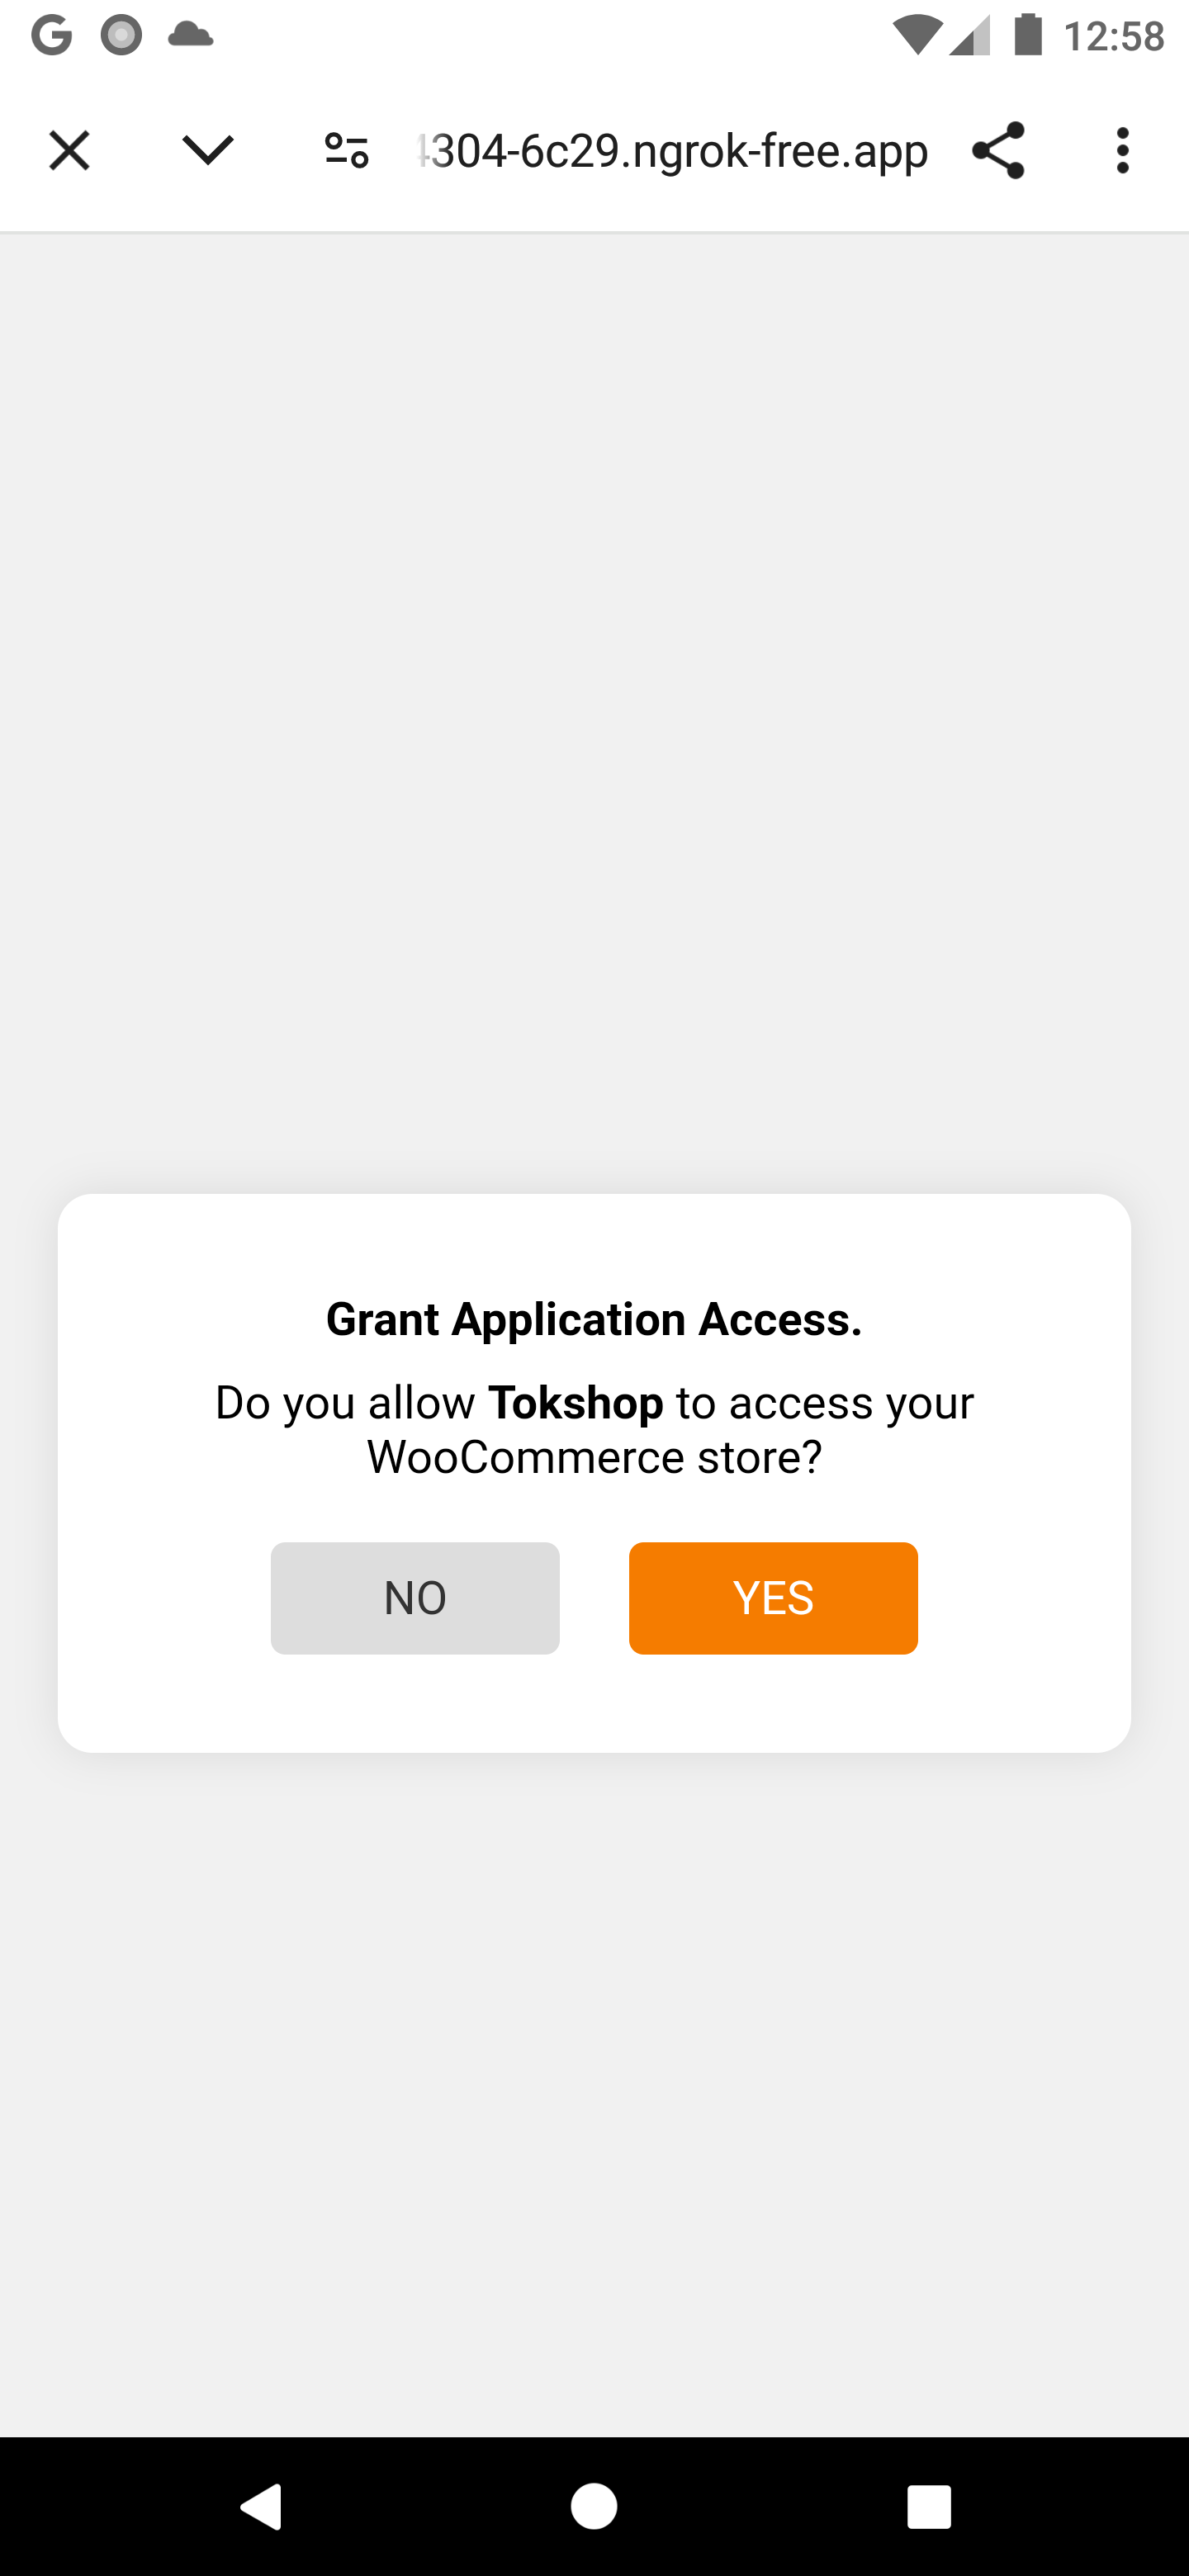
- Click Connect button, you will be asked to grant your tokshop account access to your woocommerce store, click "Yes" and wait for a few seconds, if everything works you will be directed back to your tokshop account
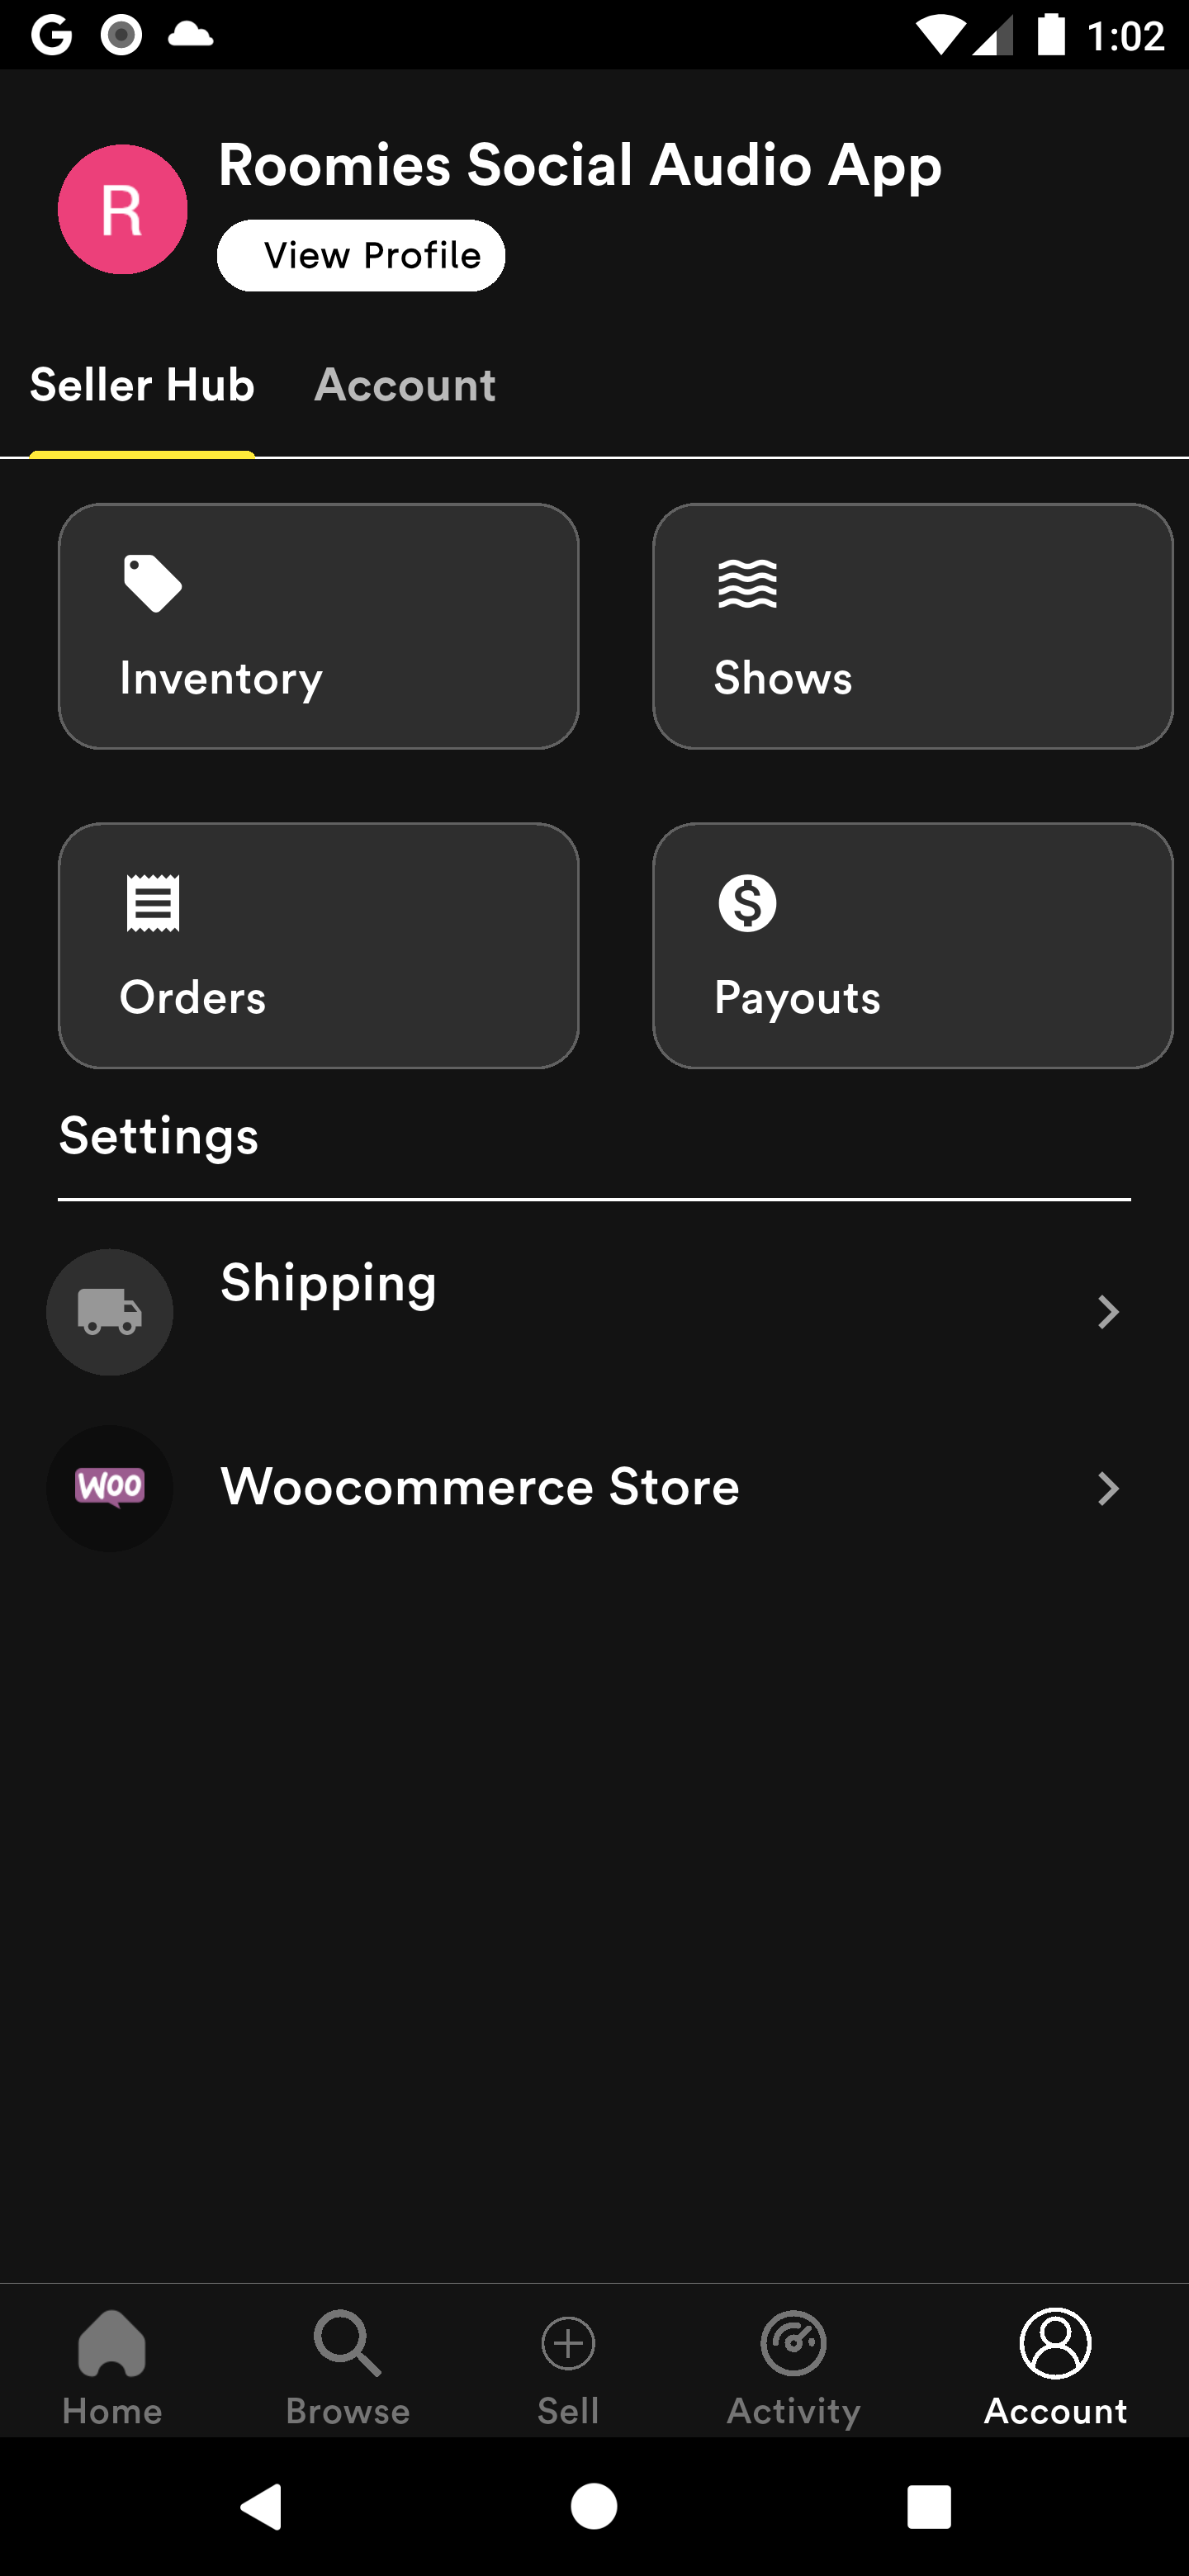
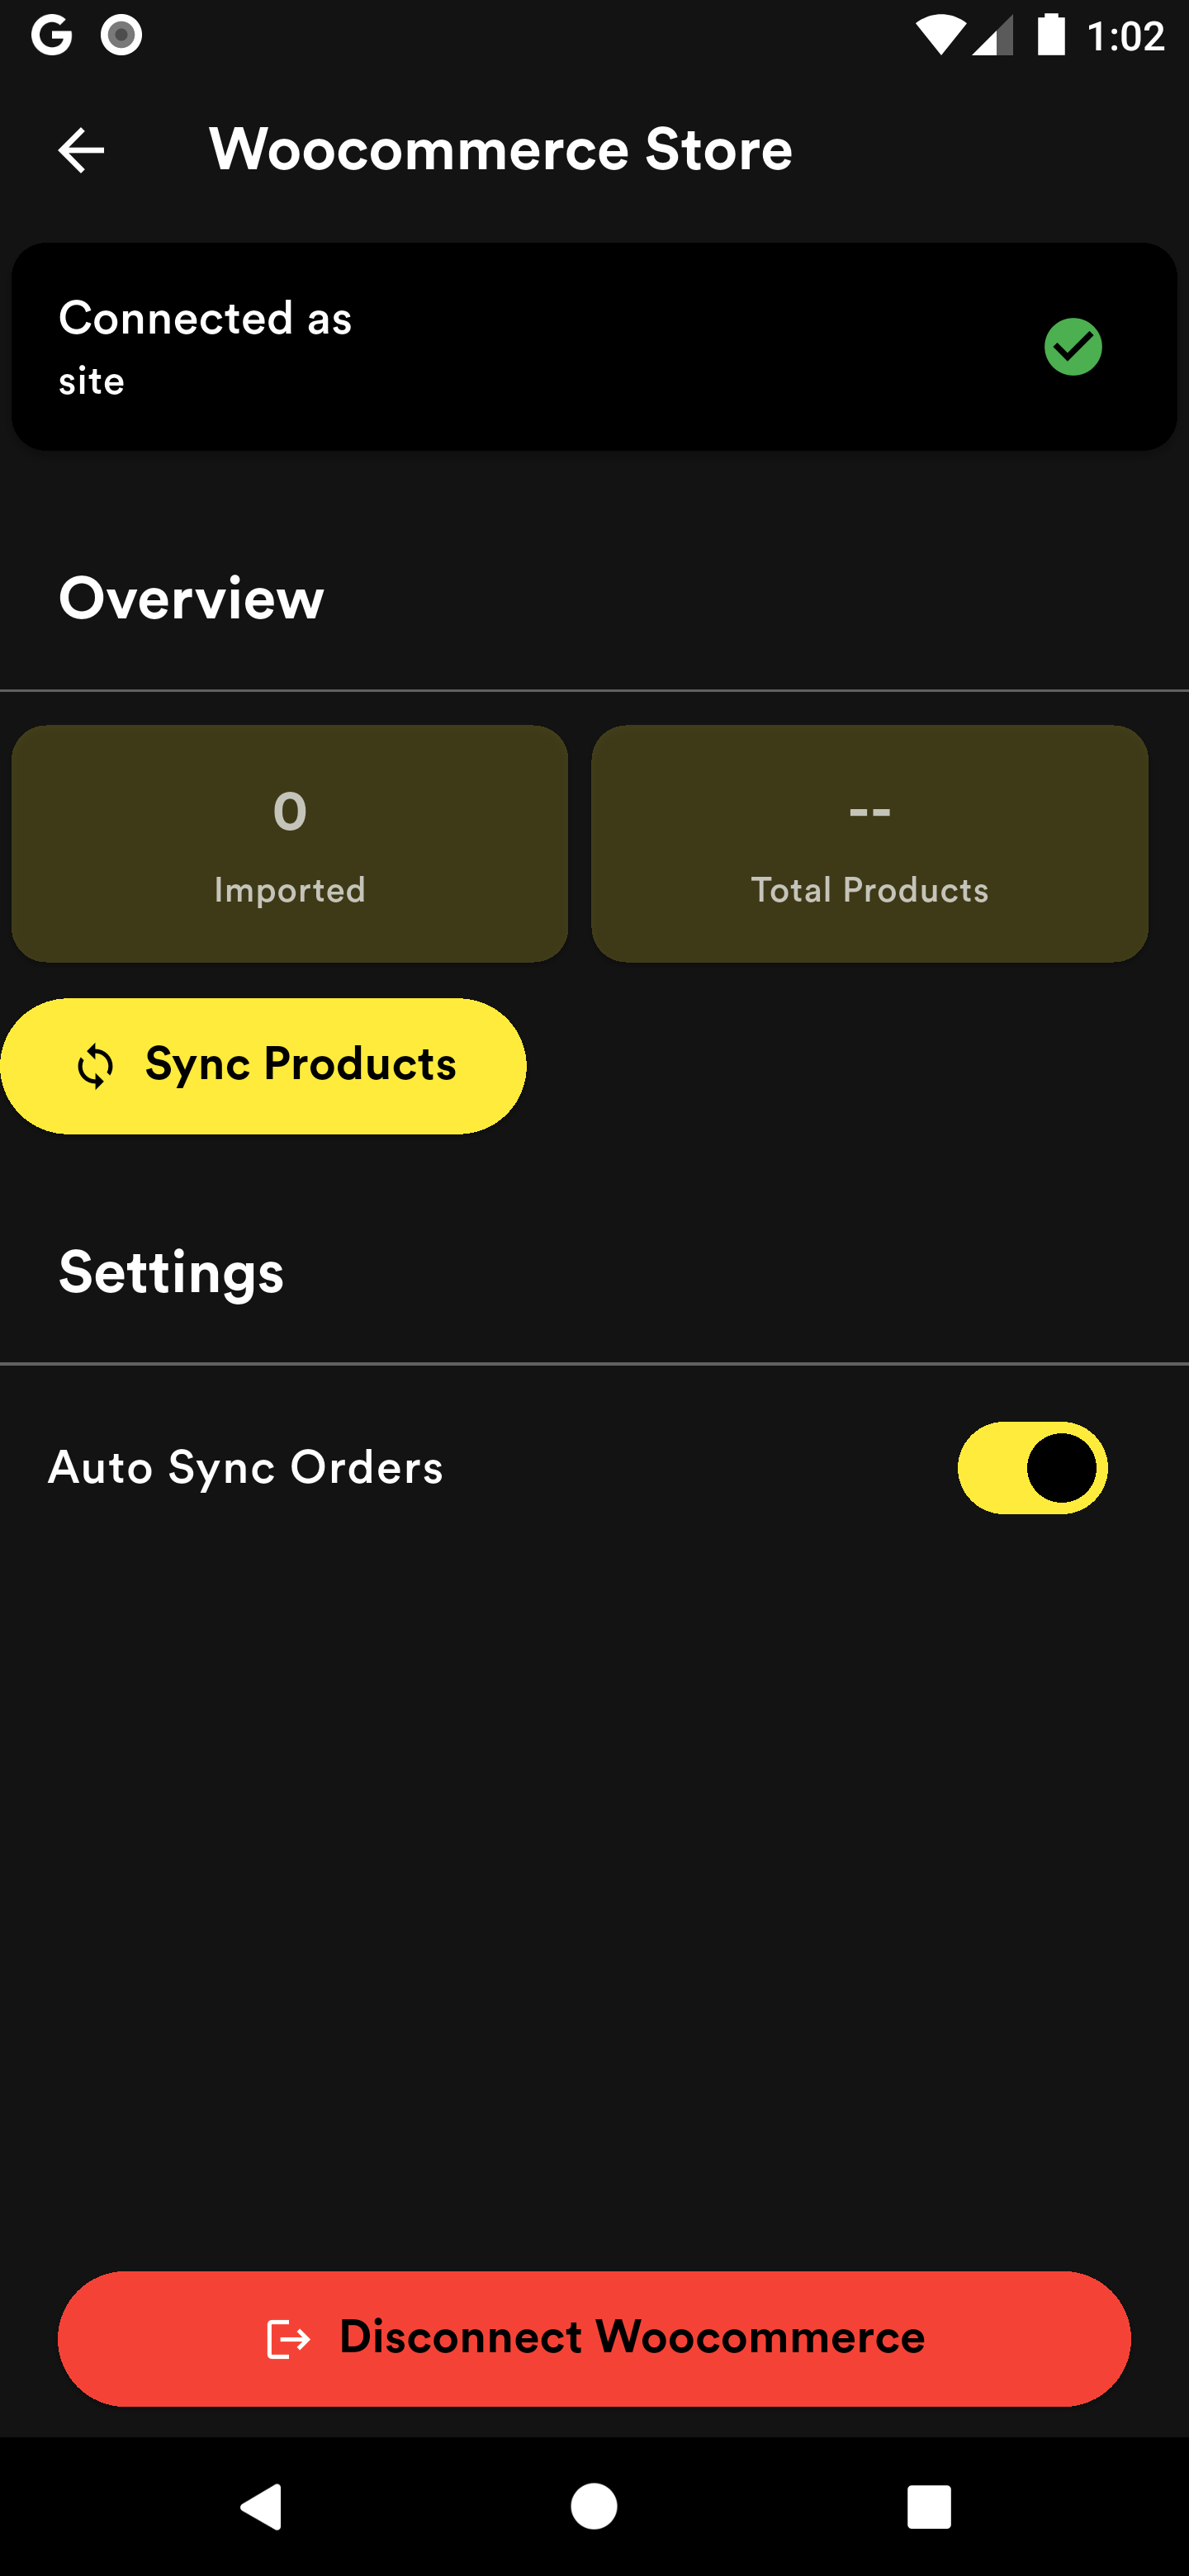
- Click Woocommerce Store and you will now see an overview of your woocommerce store, you can import products and allow/disallow orders sync
 >
> >
>
 >
>
Change Package Name
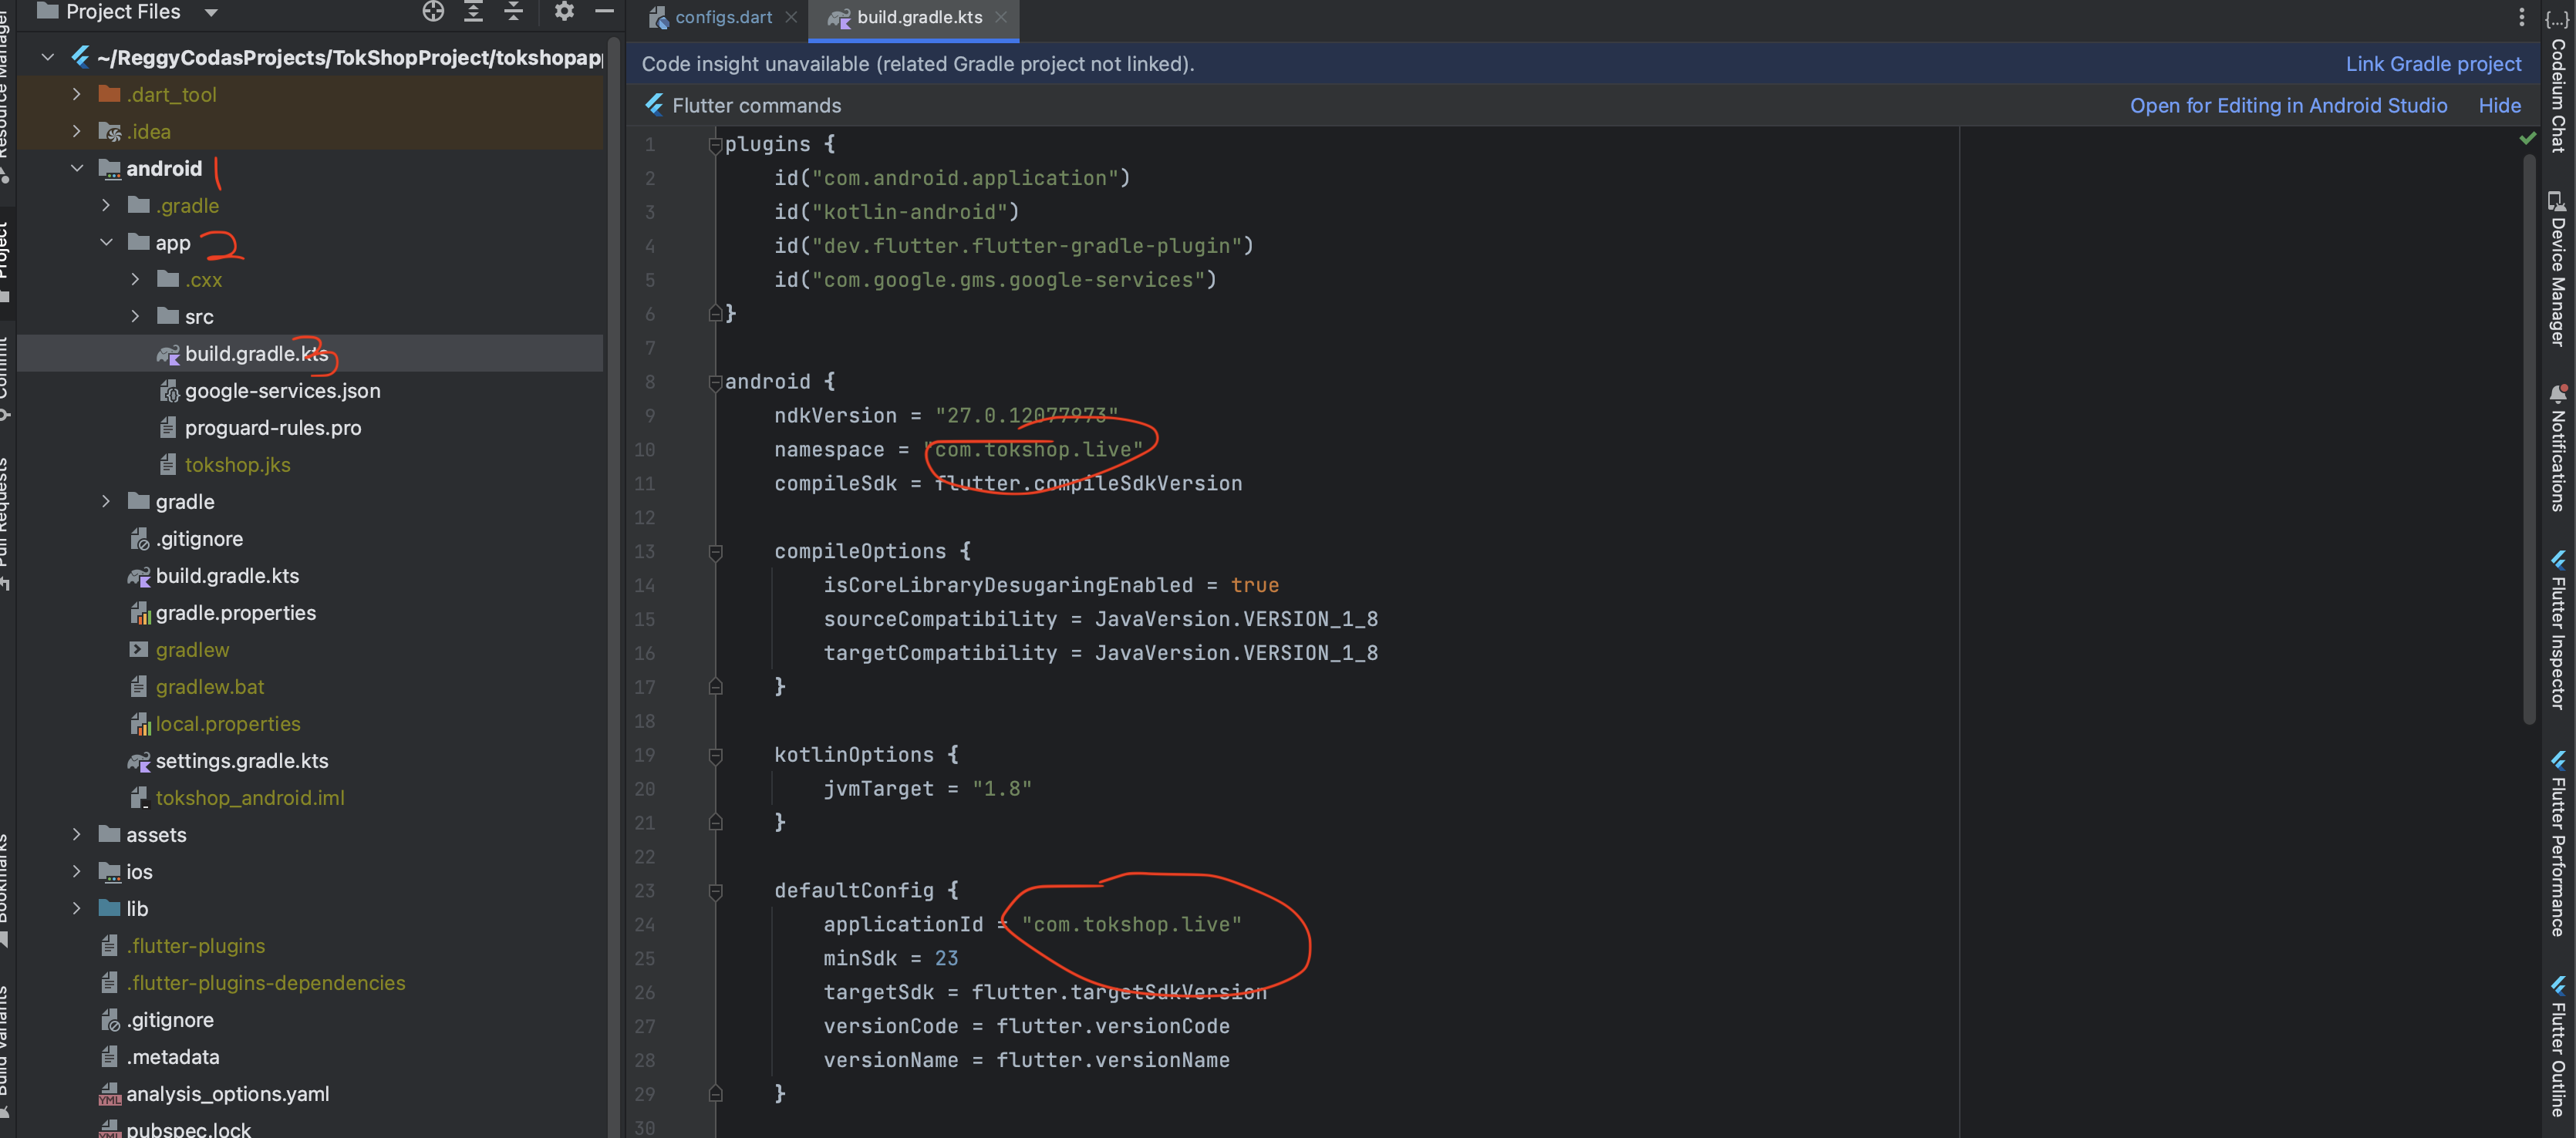
- Android
- Navigate to the "android/app" directory and locate the "build.gradle" file.
- Within this file, update the "applicationId" and its corresponding dependencies as necessary
- IOS
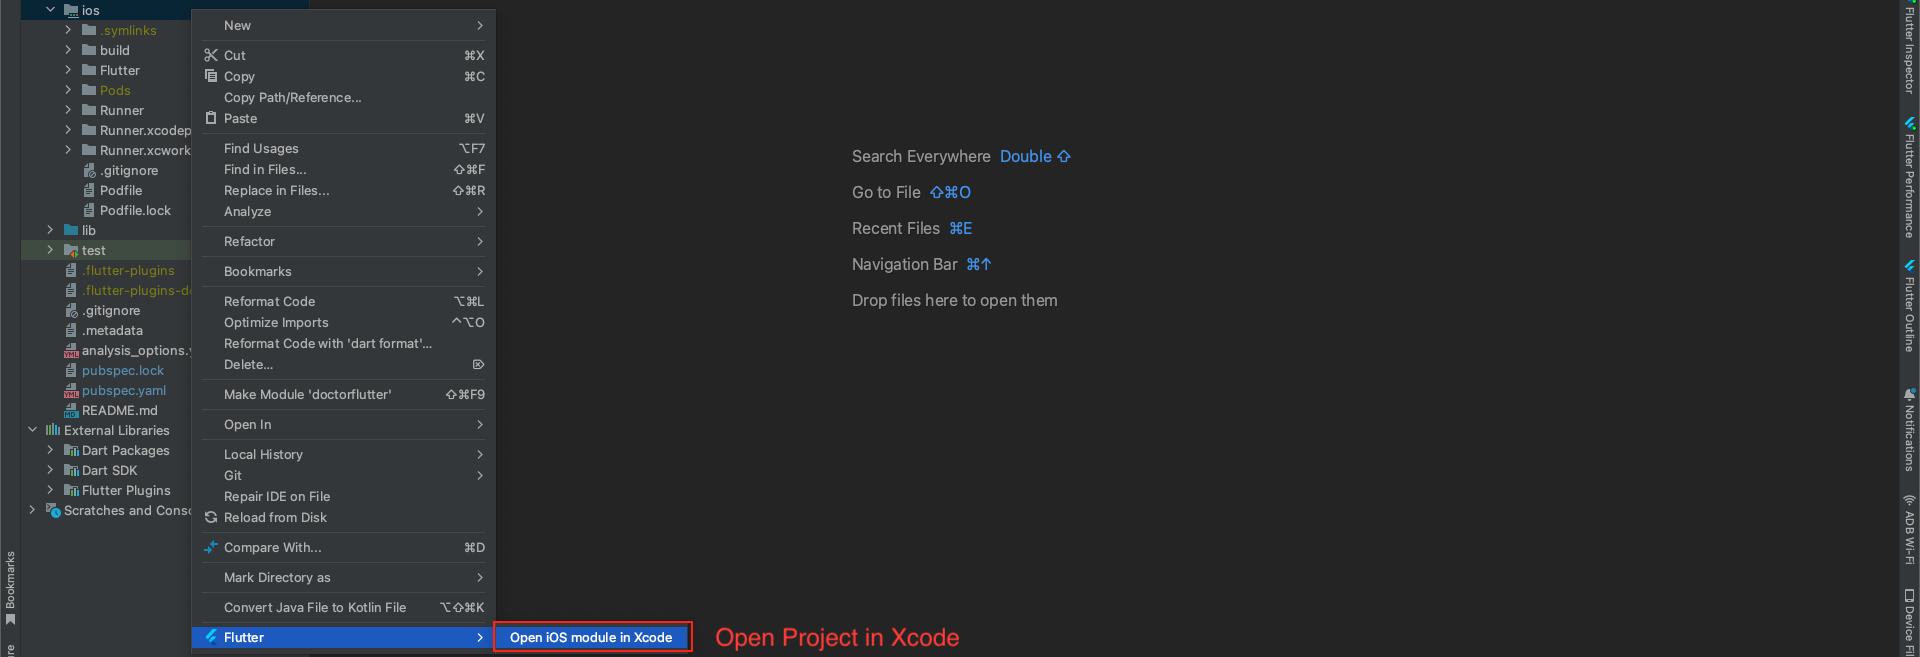
- Right-click on the iOS directory, select "Flutter" and then "Open iOS module in Xcode" to proceed further.
- After successfully opening the project in Xcode, proceed to the following steps:
- Navigate to "Runner" > "Signing & Capabilities".
- Modify the bundle identifier according to your requirements.
- Save the changes, and the process is complete.

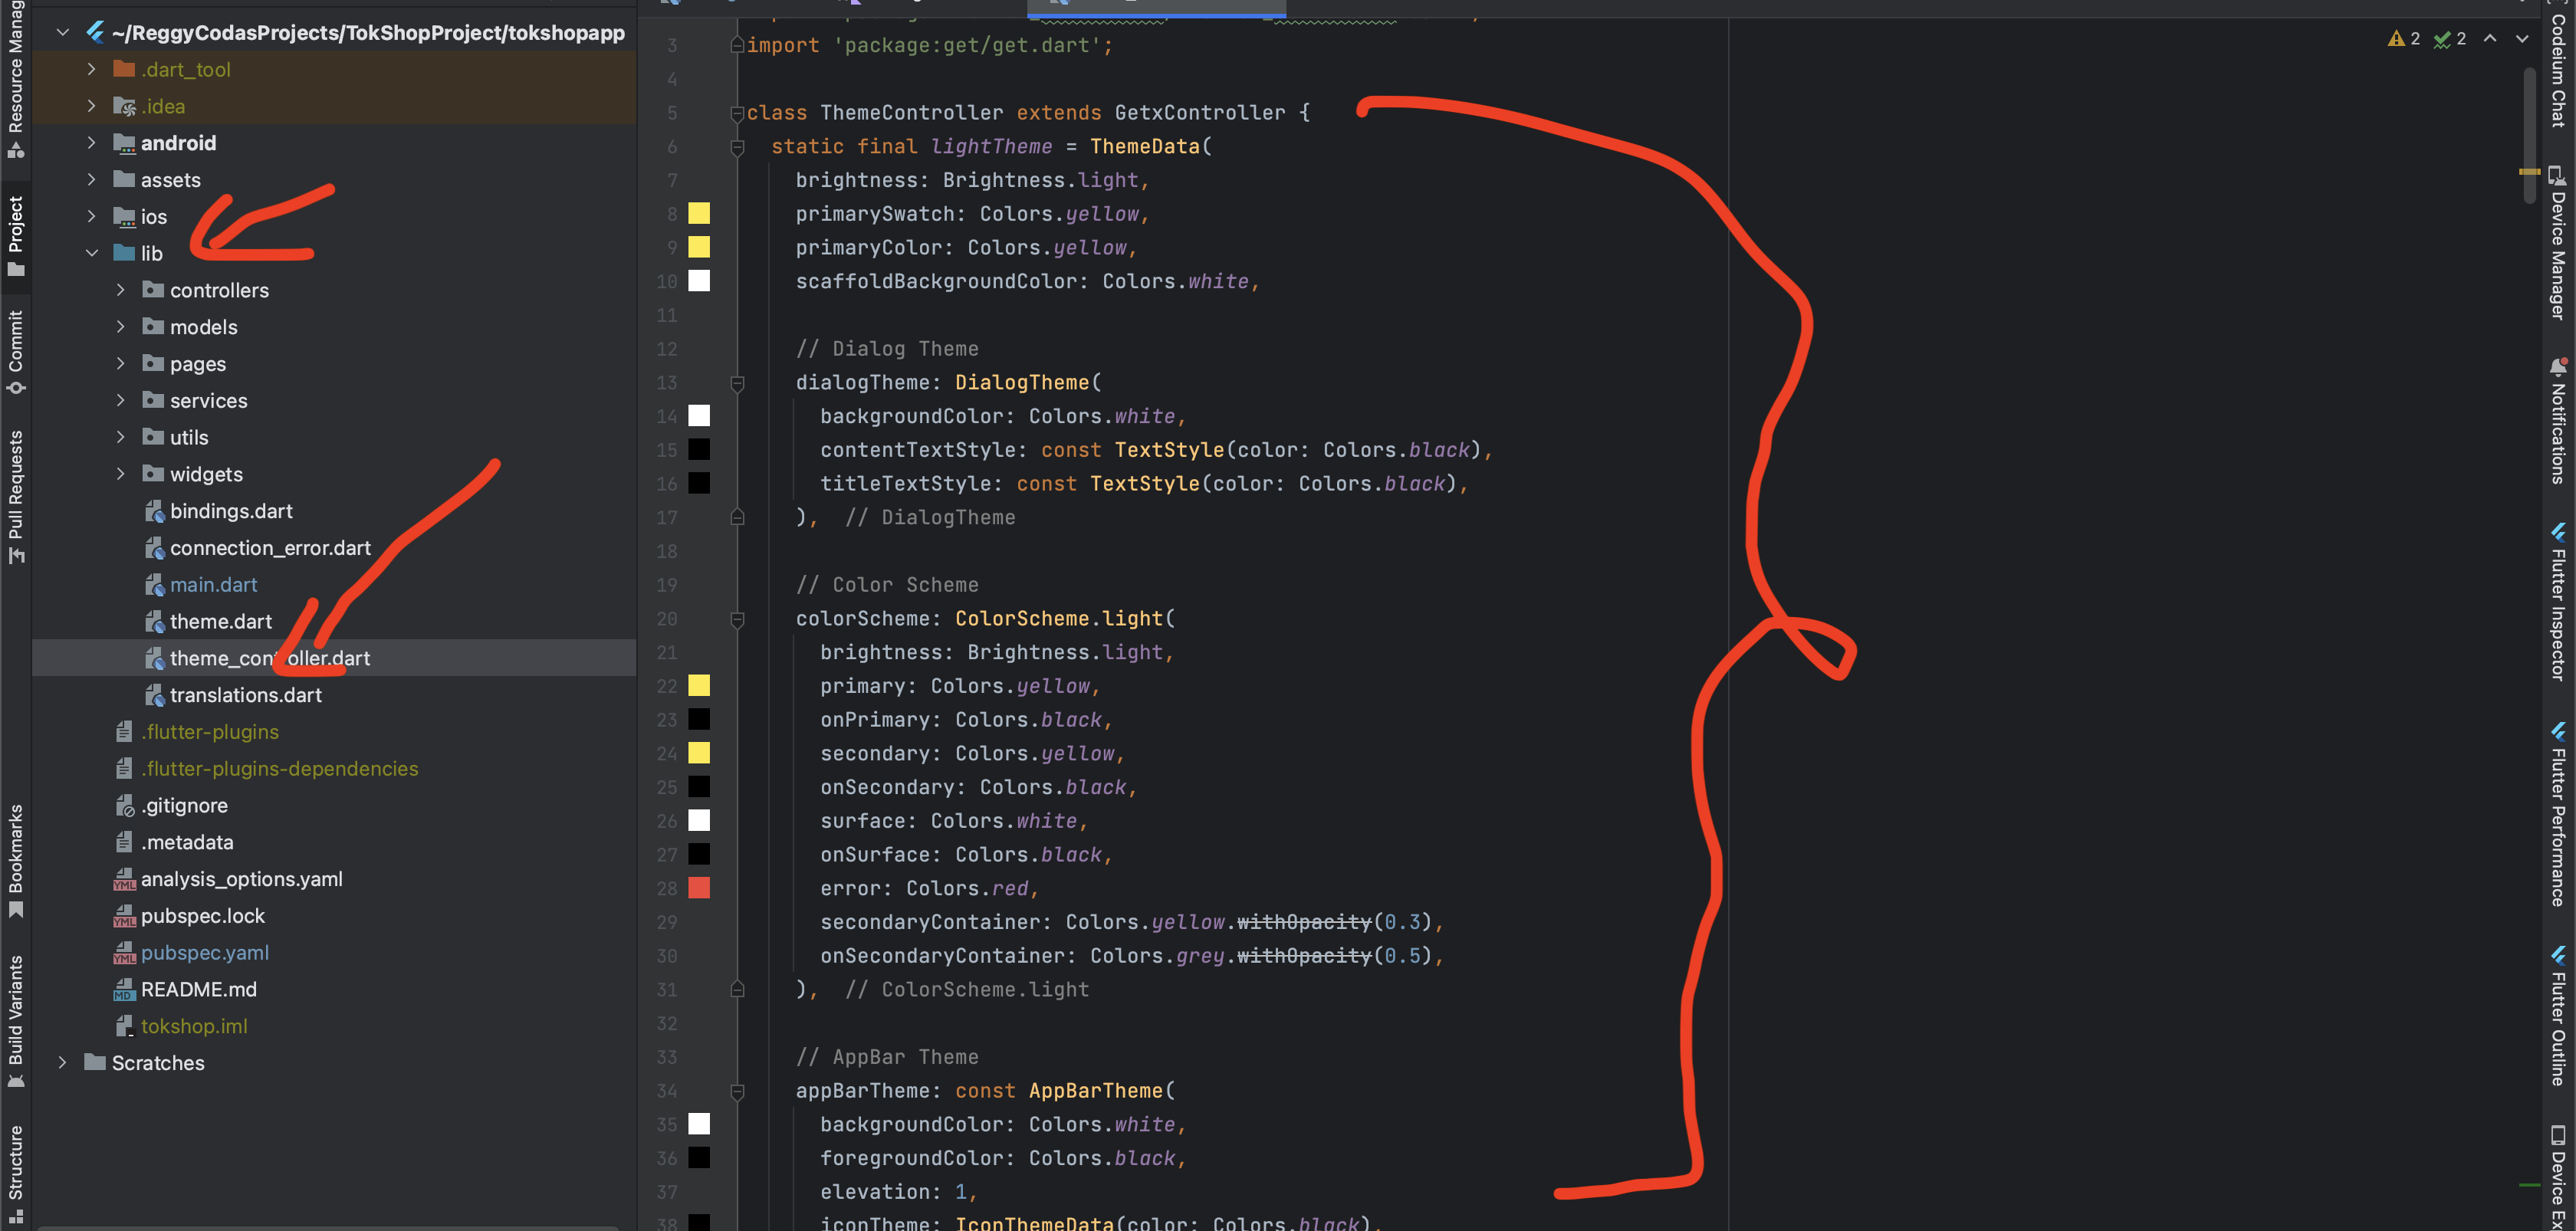
Change App Theme Color
- Go to your project lib > theme_controller.dart as shown in the below image.
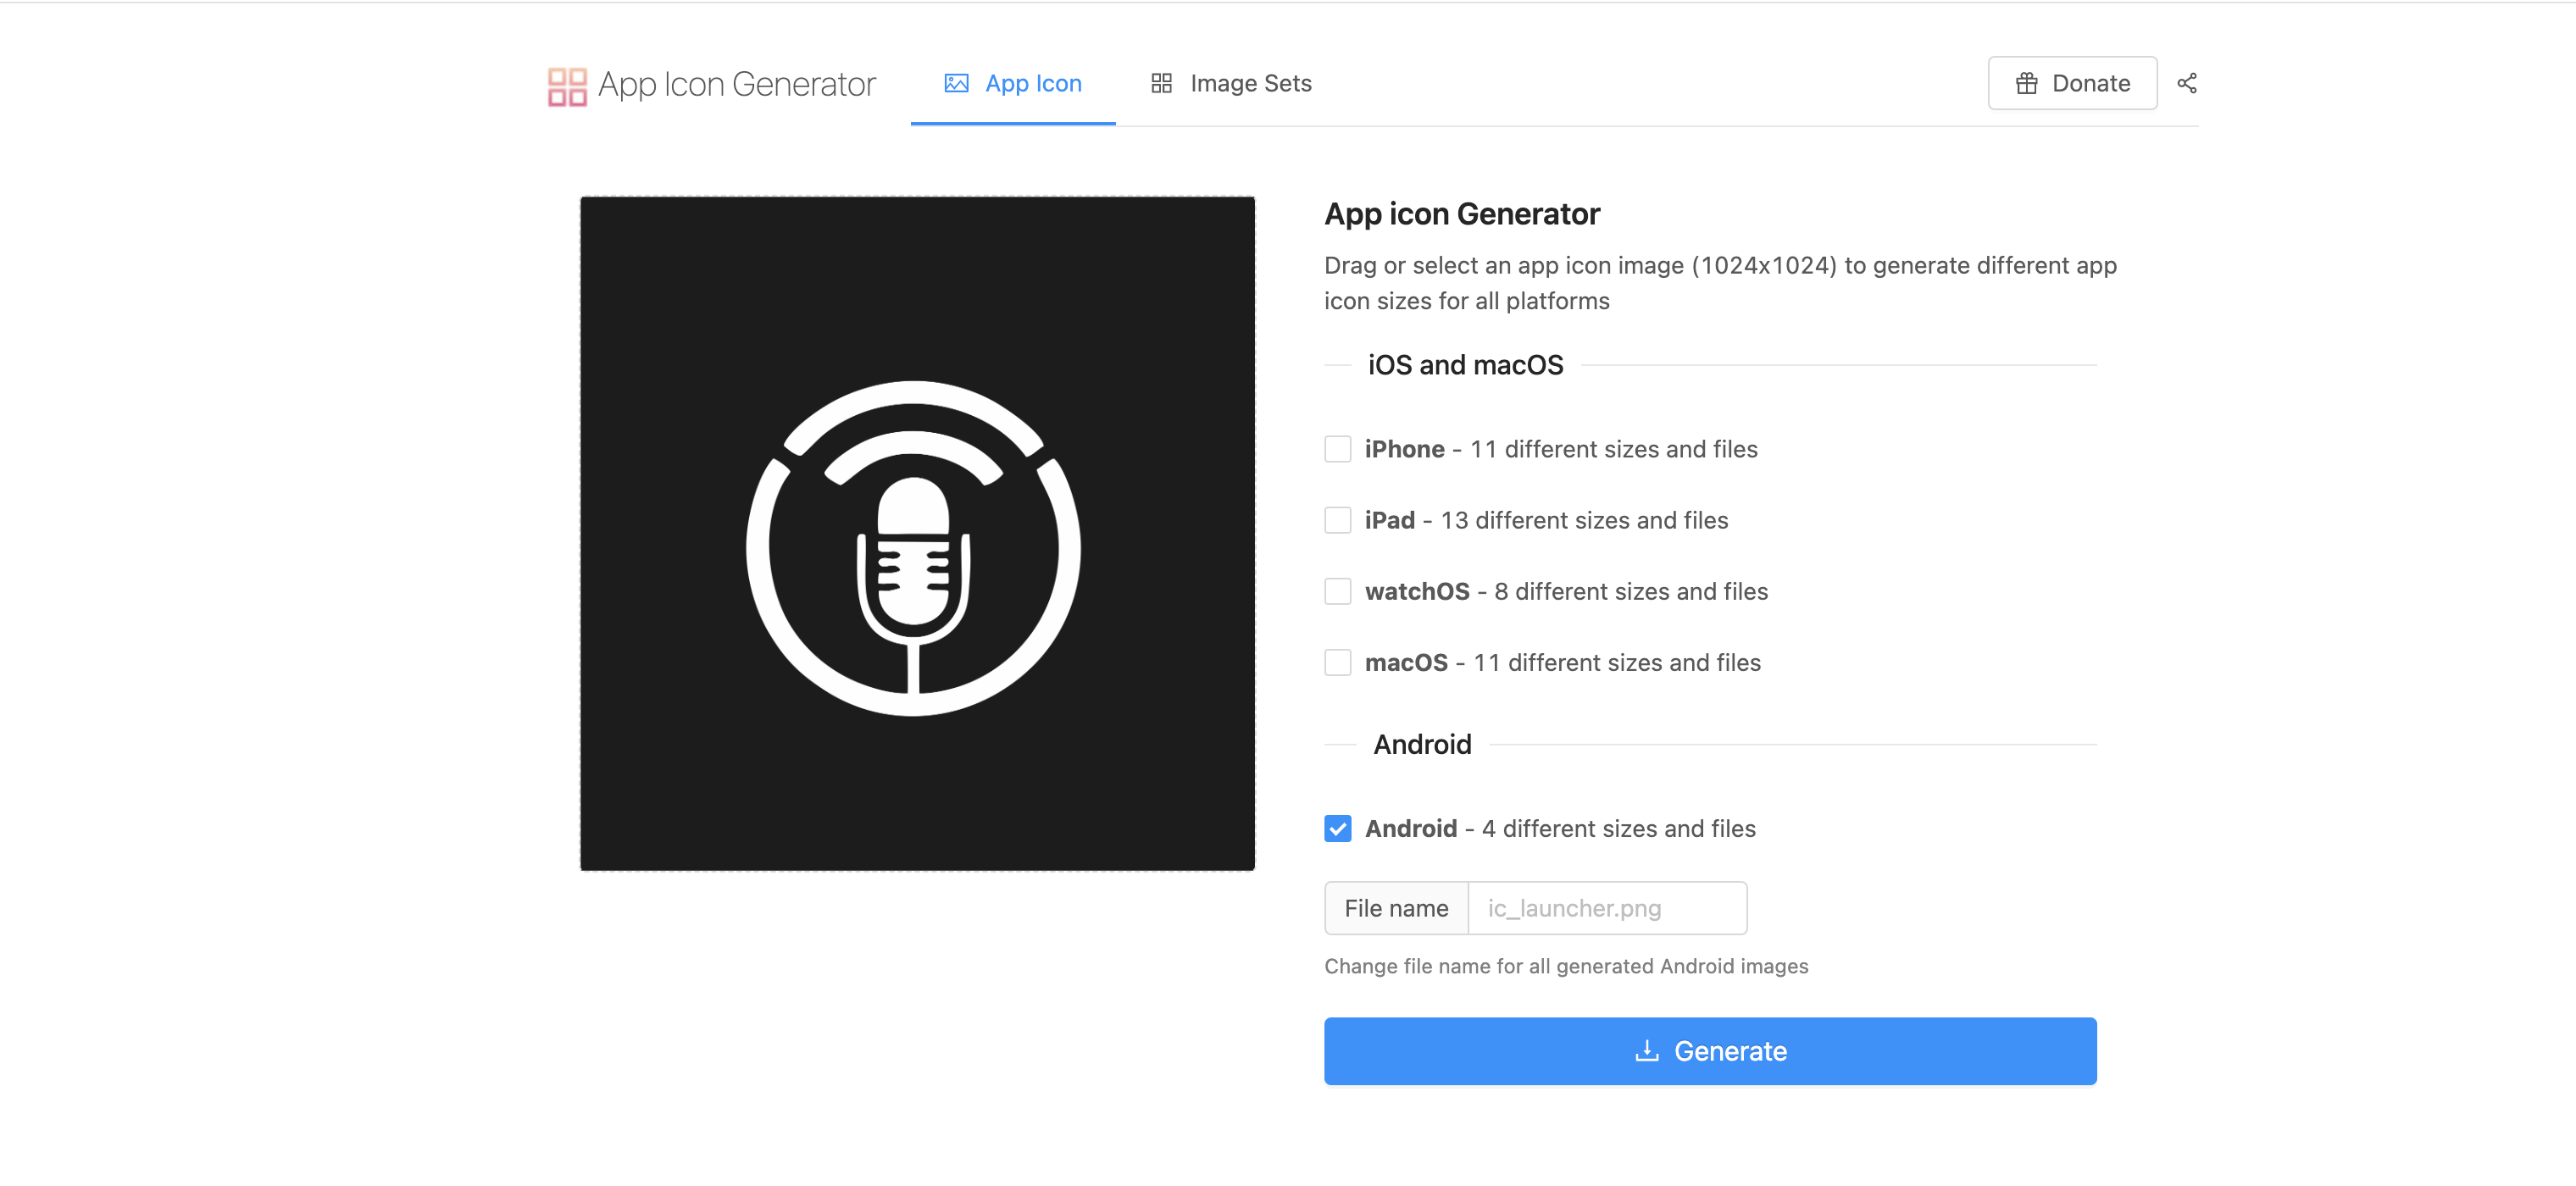
Change App Icon
- To generate icons of various sizes for both iOS and Android platforms,visit
- Upload the icon image, select the desired options for iPhone and Android compatibility, and click on "Generate". This website will efficiently produce icons in multiple sizes for both platforms simultaneously.
- After generating the icons, download a ZIP file named "AppIcons", containing folders named "android" and "Assets.xcassets", along with images suitable for the App Store and Google Play Store. These assets can be directly uploaded as icons in both app stores.
- Please open your project in Android Studio.
- Android
- Navigate to the "android/app/src/main/res" directory in your project. Right-click on the "res" folder and select "open in Finder". Once in Finder, delete all the existing mipmap folders. Then, paste the mipmap folders from the AppIcon/android directory that you have downloaded.
- IOS
- Navigate to the "ios/Runner directory and locate the ".xcassets" file. Right-click on the "Runner" folder and select "open in Finder". Once in Finder, delete the "Assets.xcassets" folder. Then, paste the "Assets.xcassets" folder from the "AppIcon" directory that you have downloaded.
- After replacing the images in the Android and iOS folders manually, proceed to "lib/main.dart" and run the Flutter project using the following command in the Flutter console.
Change App Name
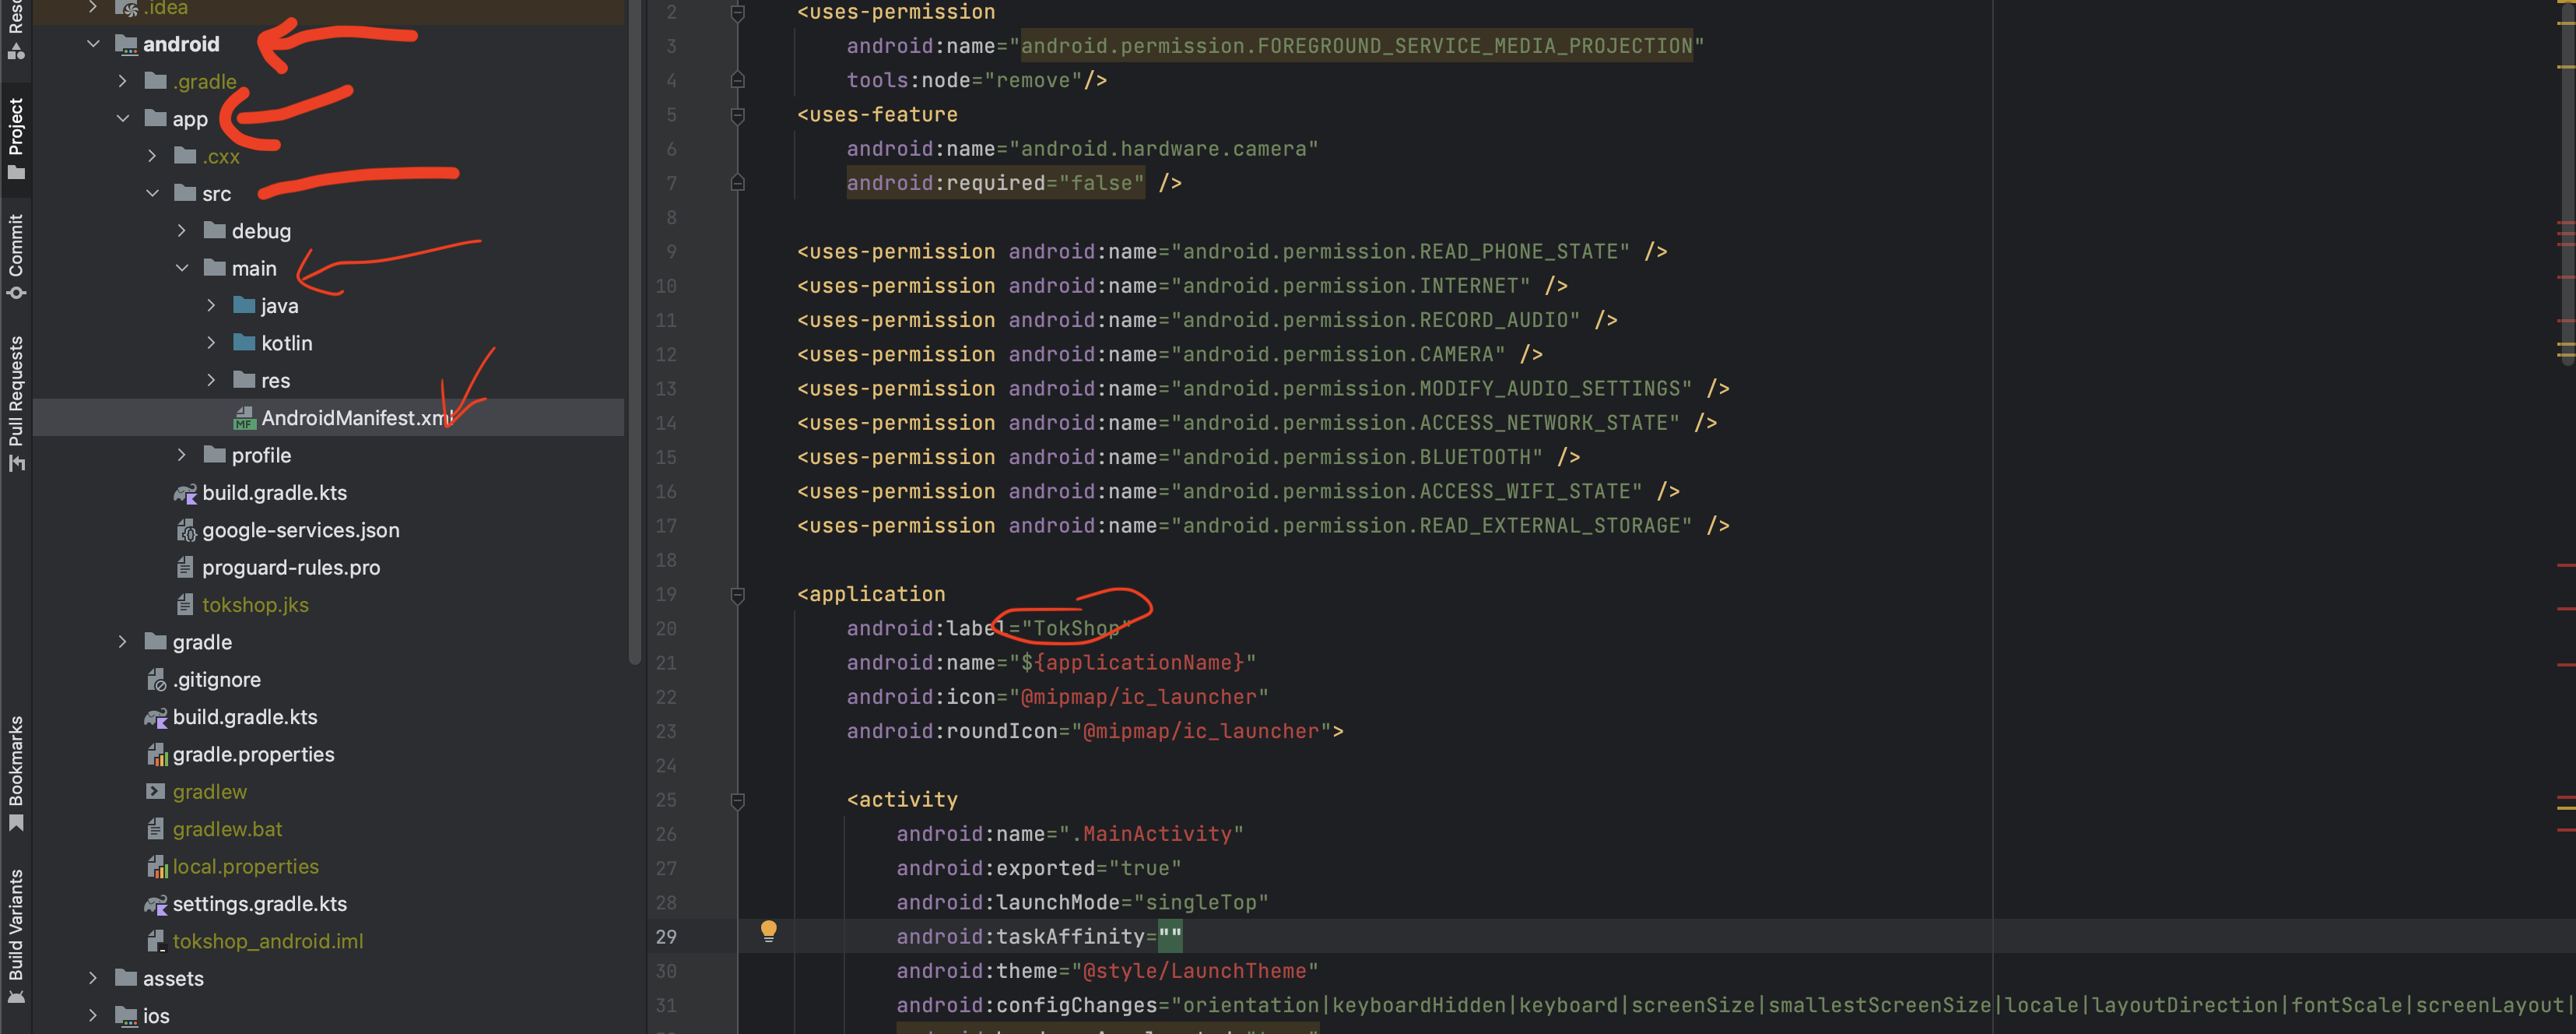
- Andriod
- Navigate to "android/app/src/main/AndroidManifest.xml" and make the changes as depicted in the provided image.
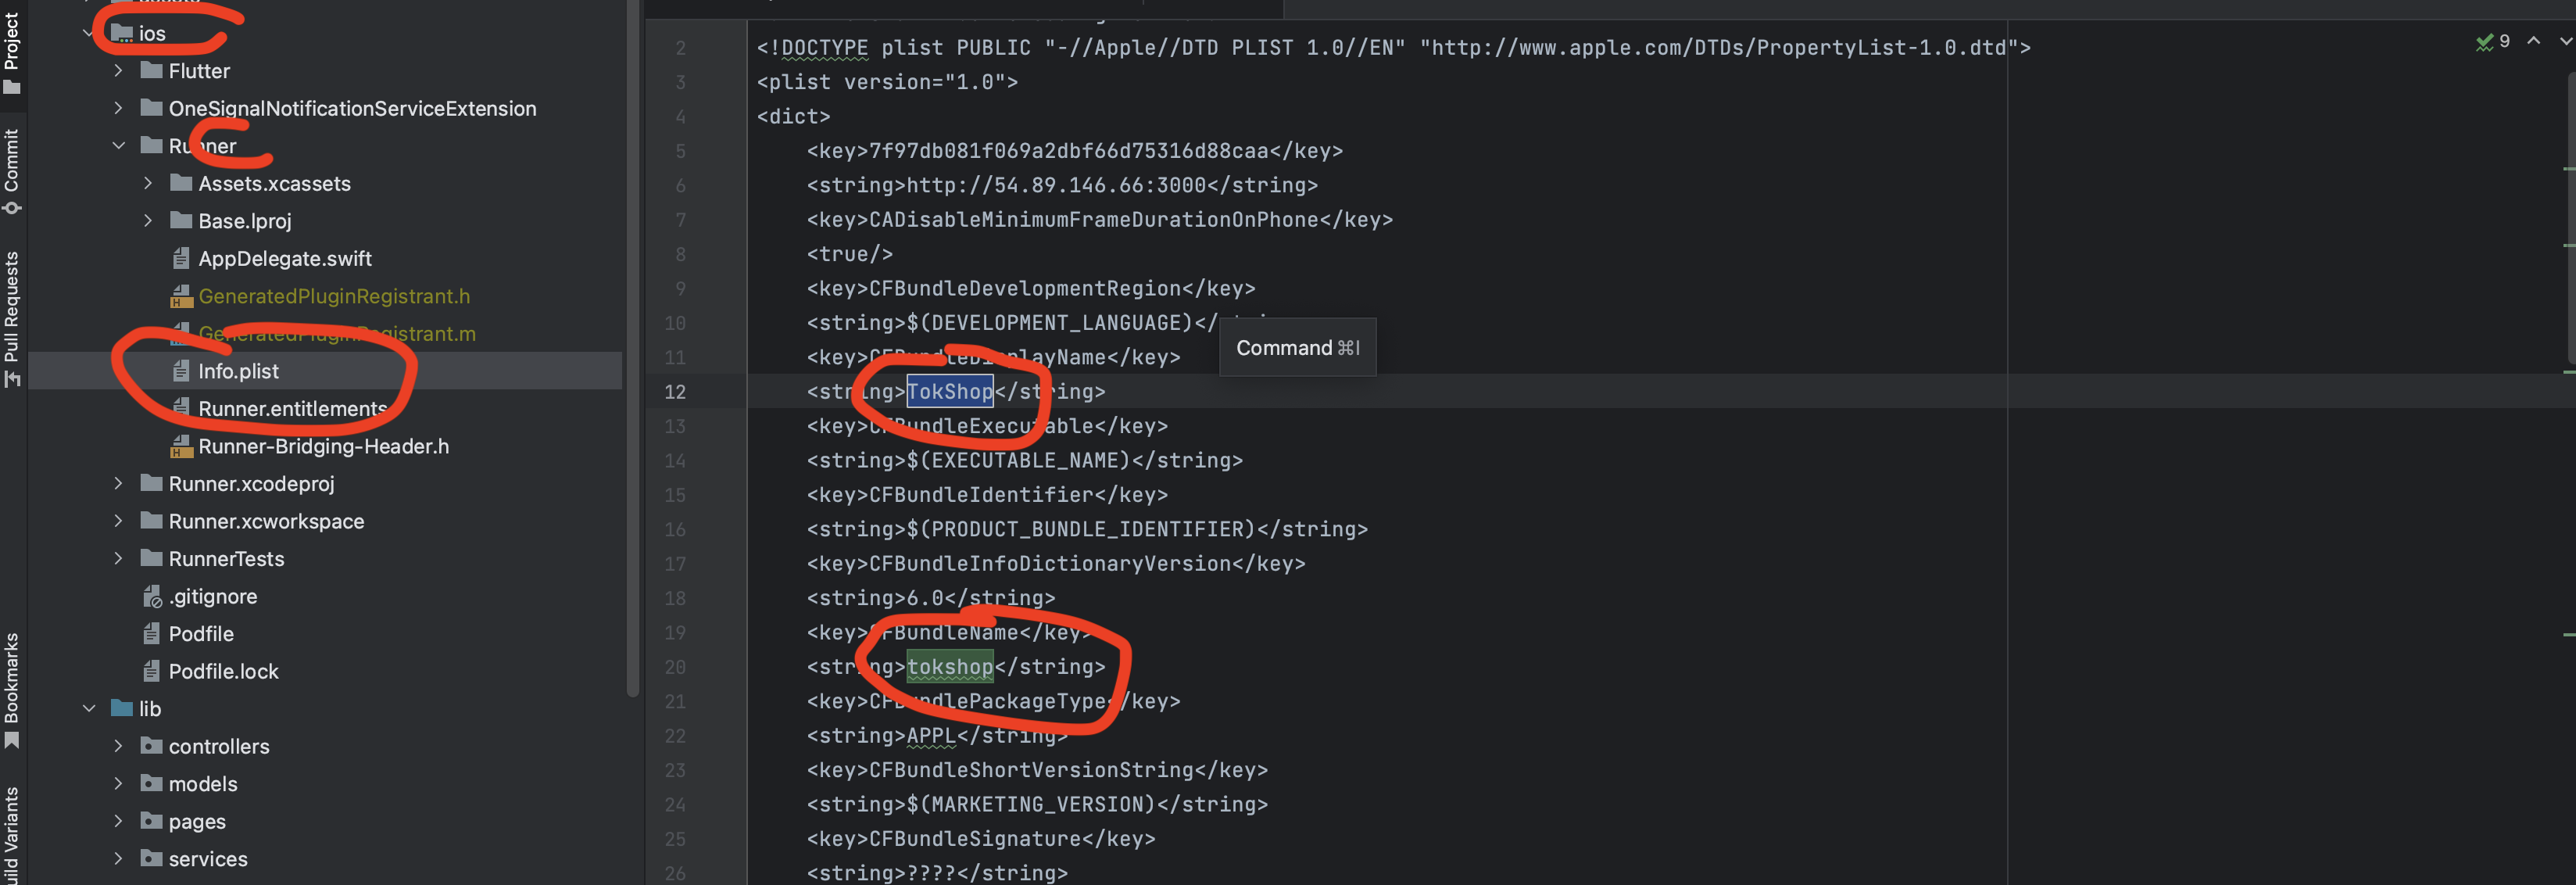
- IOS
- Please right-click on the "iOS" directory, then navigate to "Runner", and select "info.plist". Finally, open the iOS module in Xcode.


Build Debug APK
- To generate APK (Application Package File) for distribution and installation on Android devices, Flutter provides a straightforward method using the "flutter build apk" command. Below, we outline the steps involved in building APK files for Android using Flutter.
- Navigate to your project location.
- Access the build options by following this path: "Build" > "Flutter" > "Build APK".
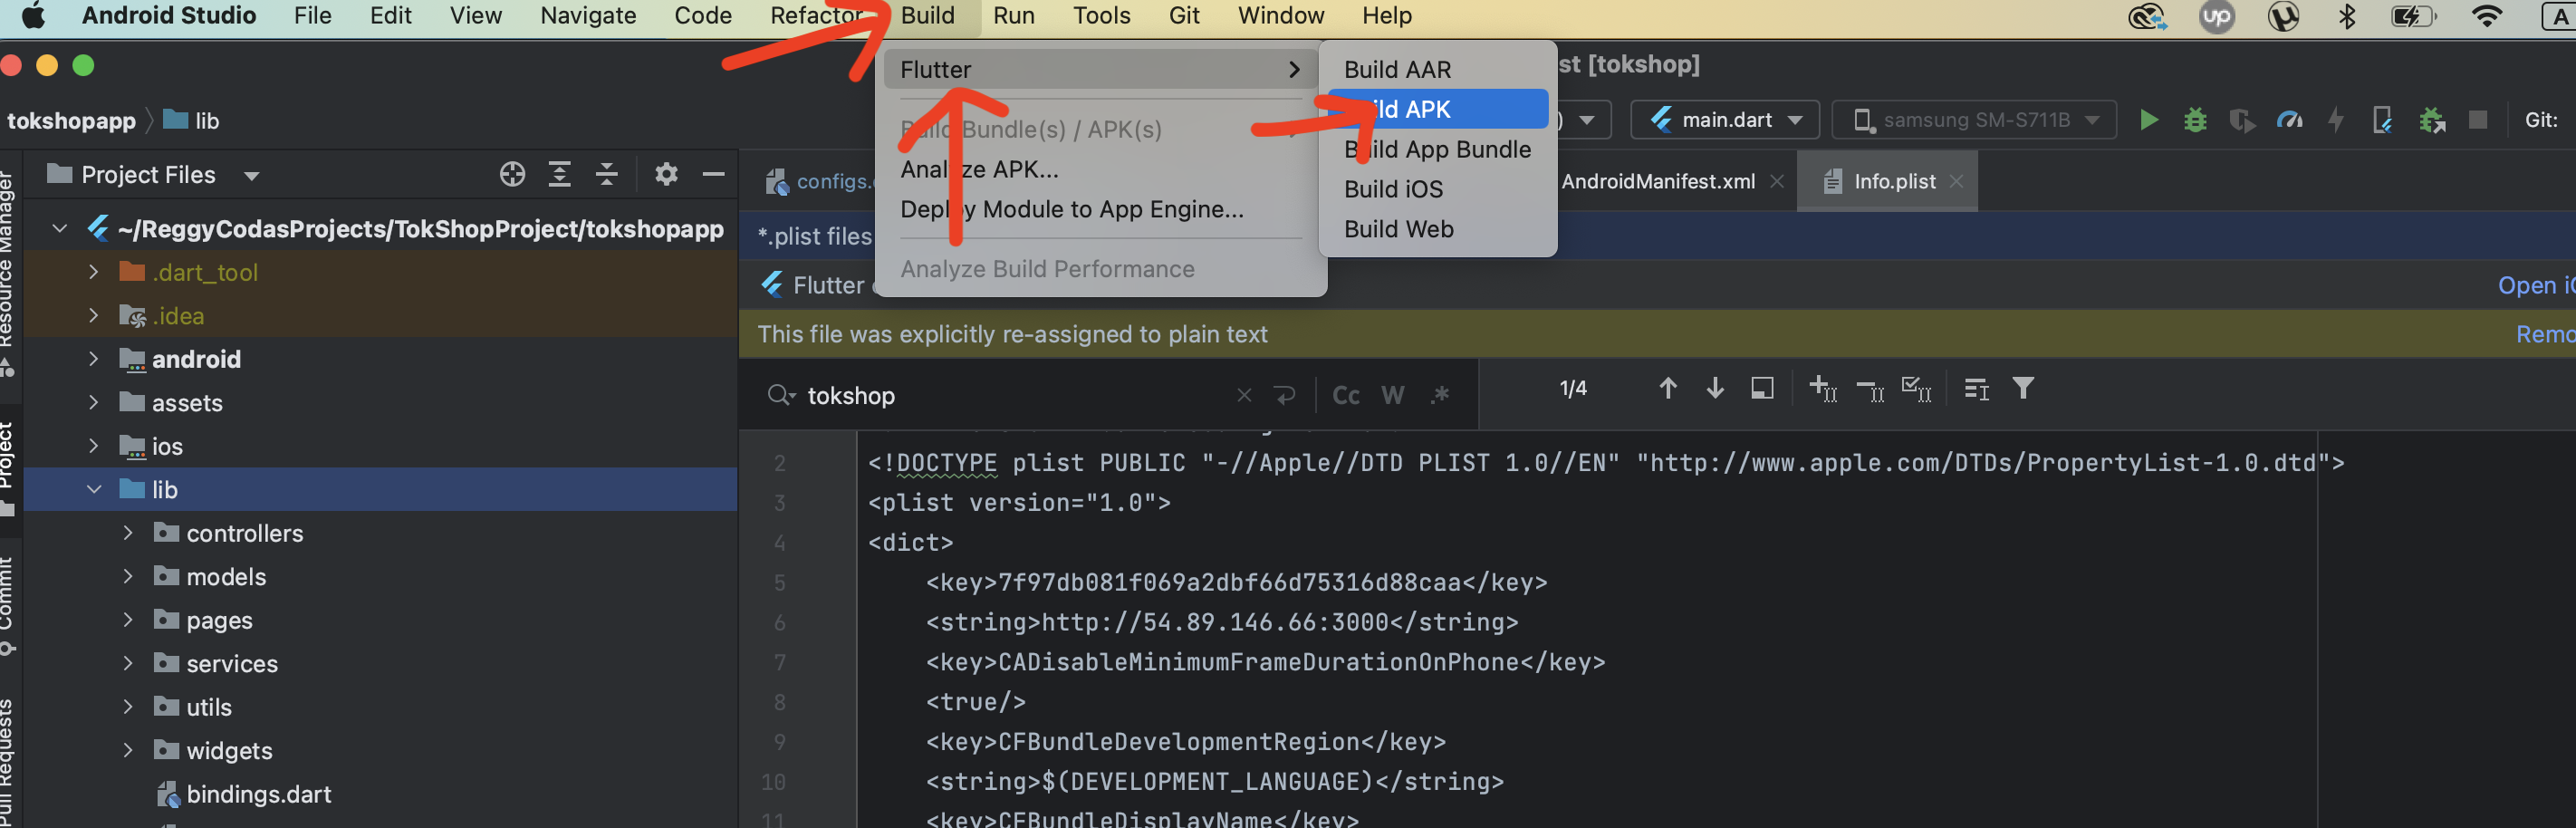
- Execute the following command: "flutter build apk --release", as demonstrated in the image below.
- Once the APK has been successfully generated, it will be automatically saved to the specified destination, as illustrated in the image below.
Release APK
